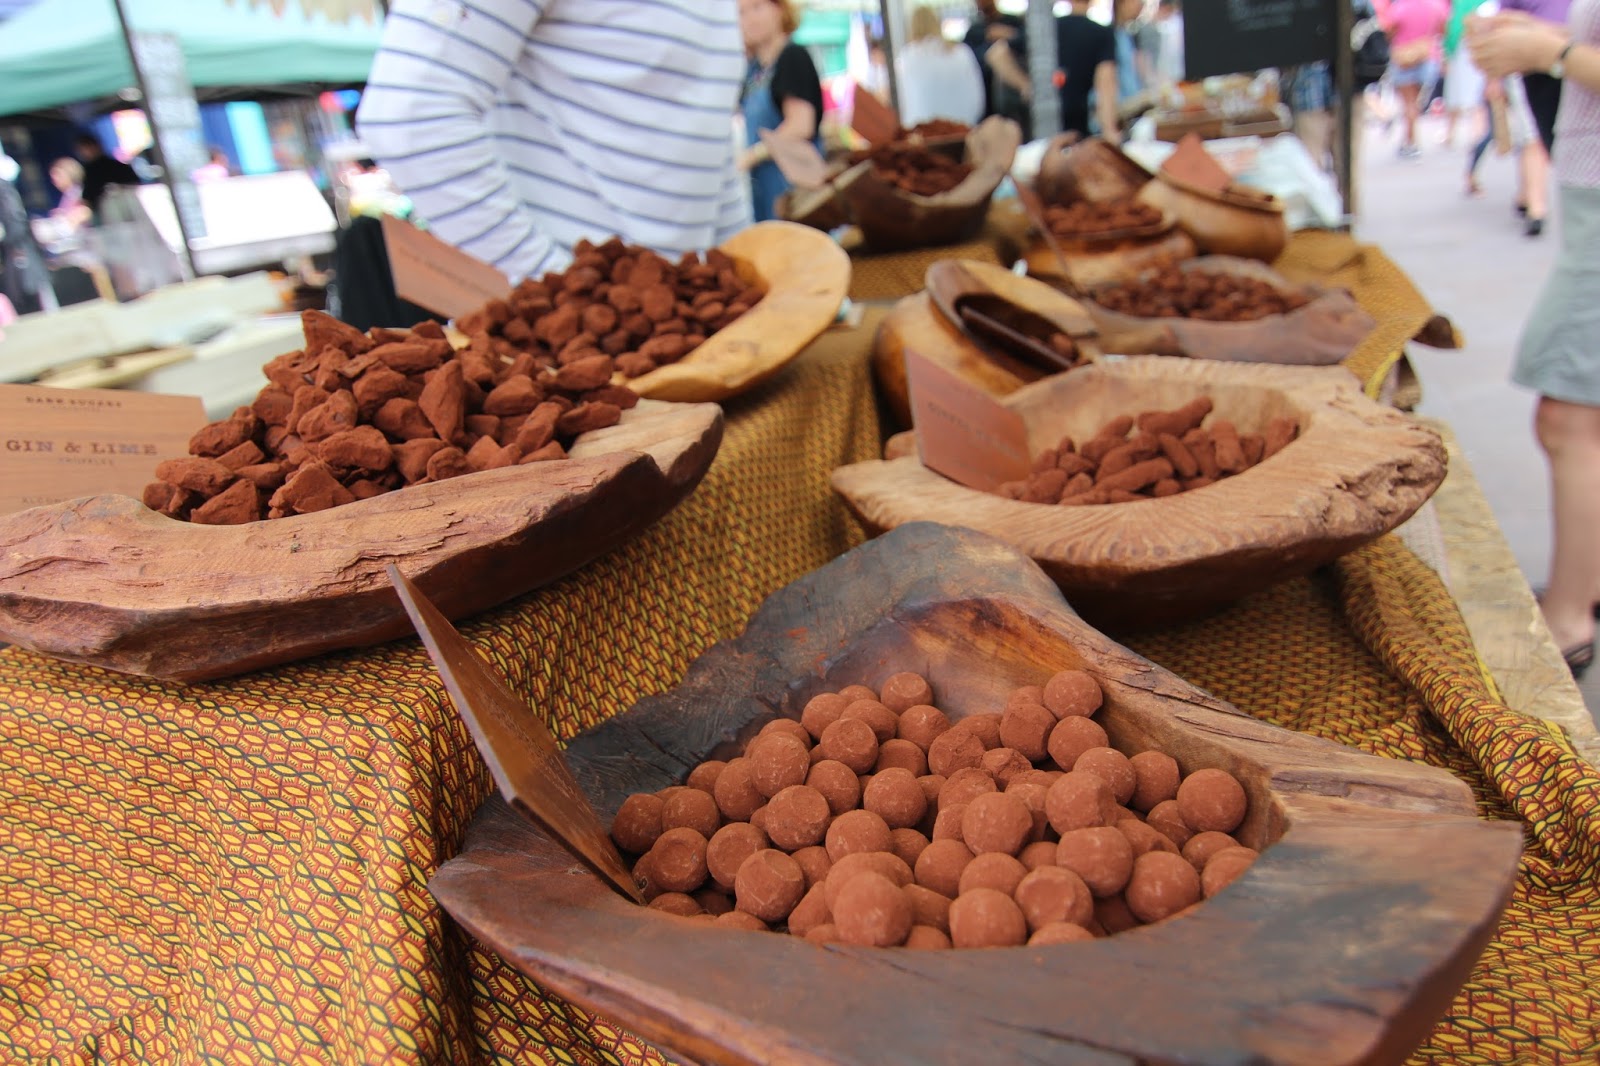
Showing posts with label review. Show all posts

Thursday, July 27, 2017

Your London Guide to Street Markets

I was lucky enough this summer to stay in London for just over 2 months doing some research work and some traveling. Of course I was determined to try all delicious food and get a "taste" of London culture and what better way than to check out all the street markets? I'm not talking just the Borough Market or Camden Market.. I'm talking ALL of them. So here's my little guide for which ones YOU should check out if you're more cut on time.

Before I get started, know that some of these markets can get crowded and with any crowded area in London (or anywhere really), be cautious of pick pockets. Be smart - don't just have your wallet hanging out from your back pocket. Also, always carry around some cash because not all the stalls will accept card (though a fair amount of them do!). And given that it's London weather, a bottle of water and an umbrella never hurt anyone.

1. Borough Market
I'm just going to get the big name ones out of the way. Yes this is the market where there was the shooting (article here if you somehow didn't hear/read about it), but I wouldn't let that deter you from checking this place out - just don't hang around too late at night if you want to stay on the safe side. It's a classic must visit market in London and can get a bit crowded (though not as bad as others) so best to go mid morning. It opens at 10 AM everyday except Saturday (8 AM) and Sunday (closed) and goes until 5 PM (6 PM on Friday). There's tons of little stalls in this underpass market selling mostly food items like cheeses, oils, teas, breads, fruits, and other delicious goods. There's not really any clothing stalls like other markets but there are a few stalls selling little trinkets/goodies/supplies that you can pick up as souvenirs or just for yourself. I'd definitely recommend getting the scotch egg here because it's freshly fried so toasty hot (I'm not a fan of cold scotch eggs) or a doughnut/donut (4-5 different flavors of plump custard/filling filled donuts..delicious!) or SOME sort of baked good from Bread Ahead. Notably, the Roast is also located in the market - this is a slightly upscale restaurant that does (duh) Sunday roast style dishes including roast beef with yorkshire pudding, pork belly (one of their highly rated dishes), and my favorite - sticky toffee pudding (a definite must get if you go here). It's a little pricey so save it for a special occasion if you do plan to go here.


2. Camden Market
Probably the largest market of them all, this spans several streets, and it's open every day from 10 AM - 7 PM. It gets jam packed with people at all times of the day so I'm really not sure when the best time to go is to avoid the crowds. There's basically everything there - clothing, food, jewelry, trinkets, the goods. Like I said, it's huge with lots of small "alleys" of stalls so it's a bit easy to get lost and be on alert for pick pockets. Lots of the stalls seem to repeat what they sell (ie same clothing items) but it doesn't hurt to take a look around. Personally I didn't find anything appealing to buy. There's a lot of different food varieties to choose from also but I think the halloumi fries are quite popular (again, personally they were just so-so for me but they're worth a try I suppose). They have a nice seating area (spots are hard to come by) that overlooks a river (though the river isn't that nice and very algae infested) where there are some boats that you can pay to go on I believe. Camden Market is definitely one you could spend over an hour at and Camden Town (the area the market is located in) has lots of shops on the highstreet where you can buy brand name clothes and other things so you can really spend half your day in this area.
Two things you should notice: the amount of people and the amount of algae in the lake.

Halloumi fries

 3. Portobello Market
Another very popular and large outdoor street market that gets packed early in the morning so again, not sure when the best time to go is besides early. Lots of antique shops line the streets and even more stalls on the streets themselves. You'll see lots of old gems/stones/jewelry, dining ware/teaware/silverware, and just random old things (age does not make them cheap). There are usually some performers on the street which add to the market feel. You'll walk for a couple of streets until you get to the end where there are most of the food stalls and let me tell you, this is probably one of the largest market food courts. They've got tons of stalls with a huge variety of foods and some will even offer your samples which is nice. They've got a pretty hipster seating area in a sand pit and outdoor loos (aka porta-pottys) that you (horray!) don't need to pay for.
People..and more people. Definitely one of the more crowded markets in London!


Seating area where you can enjoy your food
 
"Gozleme" for only 5 pounds. Super filling as it came with a heaping serving of hummus and salad. Absolutely delicious!

4. Old Spitafields Market
Nice indoor/covered market with wide variety of clothing shops, random trinkets/goodies, jewelry and hair things, leather belts and bags, etc - as well as a good section of food stalls and actual sit down restaurants on the side. It's open 10 AM - 5 PM everyday except Saturday (opens 11 AM). There's a good variety of things you can buy here and I picked up some cute dresses for a reasonable price (2 for 20 pounds). This market wasn't too crowded when I came by early afternoon which was a definite plus and the food had me drooling. Plus it's near the Peticoat Lane Market - a small outdoor street clothing market selling mostly cheap clothes (cash only) but also some other random household tools for low prices - so you can pop over there when you're done at Old Spitafields.

5. Columbia Flower Market
This Sunday only market specializes in flowers (hurdur) and antiques. It gets PACKED (possibly because it's only open on Sunday; and I mean packed like on par with, if not worse than, Portobello market) so try to go earlier rather than later. It has a huge variety of flowers for a super reasonable price. You're definitely going to see girls taking photos for Instagram here (see the classic feet and flower pose). Flower stalls line the streets but behind them are a few cafes and dozens of antique shops/boutiques selling various trinkets and random homeware goodies - definitely cute things to check out (but not exactly cheap). There's also a few food stalls at the edge/end of the market area and I picked up two vegan goodies (date brownie and banana bread) which were both absolutely deliccious!

6. Greenwich Market
Probably one of my favorite markets out of them all. It's located right off the road near the Cutty Stark (historic boat), the Prime Meridian (7 pound student ticket, 10 for adults - basically to stand over a line..but hey it's worth it if you want to be east and west at the same time right?), and the Queen's House (free! and really quite nice). The market is partly covered under a building (but not exactly indoors because no doors) with some food stalls outdoors as well, and has a really nice variety of stalls selling clothing, hand made things (cards, hair bands, bow ties, etc), homeware (ie metal wire photo holders which you can customize), and of course food! I saw a lot more vegan food options here than most other markets which was cool (not a vegan myself but I can appreciate it) and I tried the vegan donut from Ruby's which was absolute amazingg!


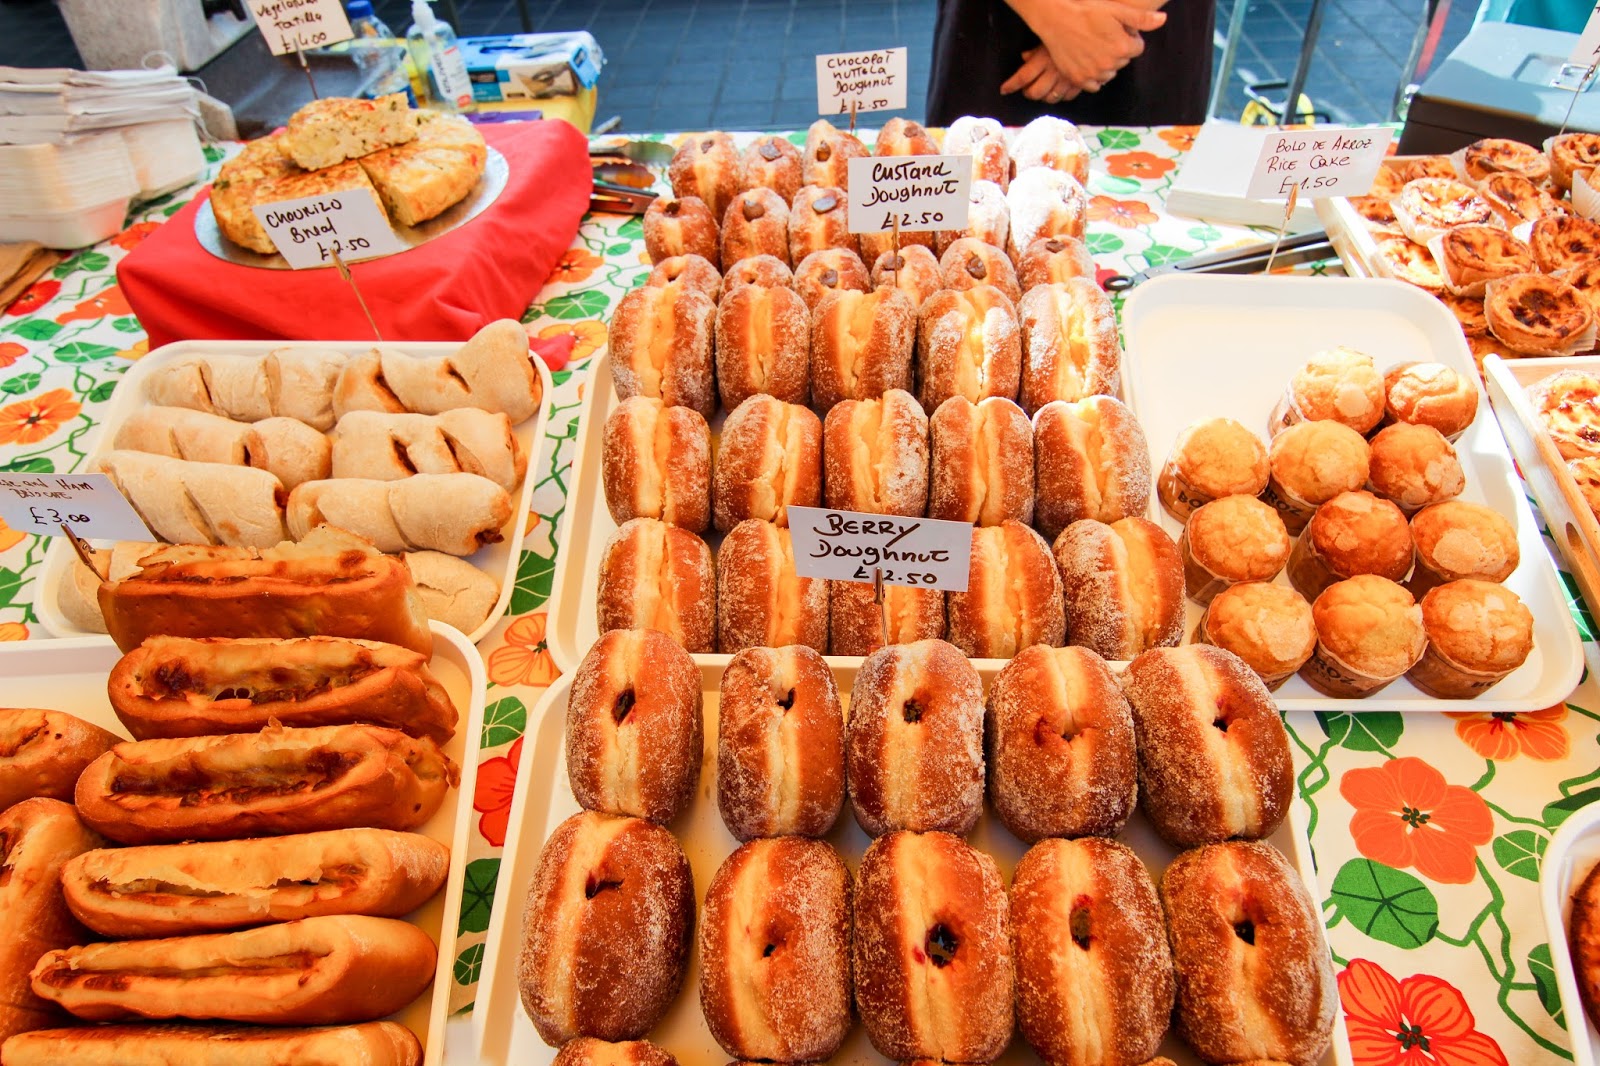

7. Brick Lane Market
Only open Saturday (11 AM - 6 PM) and Sunday (10 AM - 5 PM), this outdoor street market is filled with stalls selling second-hand/second-ware items as well as some clothing stalls. There's an area of the street that has an opening into an old parking lot looking area with more stalls set up in a flea market fashion (random old trinkets lined on tables). You'll also see some stalls selling fresh produce in buckets for 1 pound per bucket like Whitechapel Market (see below). There's lots of surrounding building walls "decorated" in street art which is quite cool (also near Shoreditch which is known for its street art). The streets surrounding the market are filled with hipster cafes (including the notable Cereal Killer cafe and Sloane Bros froyo), the classic famous "beigel" (aka bagel) shop known as Brick Lane Beigel Bake (there's one right next to it also called Beigel Shop which is also rated well but not as many reviews for it on Google so I think it's not the MOST famous lol), and Indian restaurants known to make amazing curry (I have yet to try but the area itself has lots of local Southeast Asians so I wouldn't be surprised if their restaurants were amazing). The two beigel/bagel shops are known for their salt beef bagel but personally I thought the salt beef wasn't anything out of this world (never had it before so not saying it was bad or anything) and for 4 pounds compared to the other fillings (ie cream cheese, smoked salmon and cream cheese, cheese, nutella) which are only 1-2 pounds, it didn't feel quite worth it. But if you're into salt beef or love meat, it doesn't hurt to try it because let's be honest, 4 pounds isn't unreasonably expensive when you consider London prices - and the bagel dough itself is really nice, soft, and fluffy.


8. Whitechapel Market
This is a street market right next to the Whitechapel tube station. It's not crazy huge or long and doesn't get crowded like the other markets. It's great for cheap ripe produce (and when I say ripe, I mean like eat that day ripe or else it'll go bad). Stalls sell fruit piled in a plastic bucket for 1 pound each and while other markets may have stalls like this as well, Whitechapel's portions (aka fruit per bucket) are the most and best deal. For example, I got 5 large ripe avocados for 1 pound and 9 bananas for 1 pound! There's also lots of clothing stalls selling cheap scarves (1-2 pounds each), dresses, pants, shoes, etc. It's a bit like a market you'd see in Asia but run mostly by Middle Eastern shop owners instead. Definitely a nice place to stop by to get your daily fruit fix. Be mindful that all the stalls are cash only.

9. Brixton Market/Brixton Station Road Market
Nice market with largely Jamaican, African, and Latin American influences so you can try some more authentic foods here. It's not as clean/tidy as some other markets (lots of meat butcher shops) but don't let that stop you from walk on a bit further where you'll find an indoor market area that's cleaner with mostly sit down cafes and restaurants (so many to choose from!). There's not as many clothing stalls here as it's mostly food but you'll find some cool cultural items at some stalls on the street/road market. There's also the Pop Brixton area which is an outdoor two-story food eating area (more hipster and pricey foods ranging from steak and fries, crepes, tacos/burritos, pizza, beer, etc) with maybe 1-2 vintage selling clothing stalls. There's a nice seating area on the second floor that's covered so you can take shelter there if it's raining.
Inside Pop Brixton
Pop Brixton second floor seating area
Vintage Kilo Sale! This event goes on every so often so check Facebook to see when the next one is. They have multiple locations
10. Bloomsbury Farmer's Market
Thursday only food market (9 AM - 2 PM) located near the University College London (UCL) so you'll see lots of students here. It's well-rated online with lots of reviewers raving about the lunch options but I haven't actually found the time to make my way there so I'll leave this short for now. Prices are said to range from 5-6 pounds which isn't unreasonable and they're said to have a good range of options to choose from. The only downside is that during peak lunch hours, there can be quite long lines and since the market isn't even open for that long, you might find yourself waiting a bit.

11. Broadway Street Market
Really nice outdoor street market for lunch time foods.. which is a shame because I went there around 10-10:30 (and it says it opens at 9) and most of the shops were still getting set up (especially the ones making fresh hot foods). It apparently gets really busy during lunch time so maybe go right before the lunch rush hour or after. There are a really wide variety of foods including savory and sweet (some really nice looking meringues and eclairs and cakes!) as well as shops selling handmade clothing, jewelery, and general things you can give as gifts. Also a few shops lining the buildings surrounding the market that are good for early birds looking for a bite to eat. It's close to Netil Market which is a small market (only about 5-8 small shops in a fenced area) that sells old furniture, bike parts, art pieces, flowers, and some other random things. It opens at 9 AM on the weekdays and 11 AM on weekends but I'd suggest going around 12 or after on the weekend since when I went, they weren't really set-up or open at 11.

12. Roman Way Market
Small outdoor street market selling cheap clothing and random things to use around the house (ie cleaning supplies, plastic tupperwares, etc). There's not a huge selection of things here and only 1-2 stalls selling fresh produce and it's not some market I'd say you HAVE to go to but they do have some stalls selling designer brand name clothes so you might want to pop on by if you're into that. There's a fair amount of restaurant/food shops lining the buildings surrounding the market if you're looking to get a bite to eat (Percy Ingle smells of warm melted butter and fatty goodness - definitely recommend checking out their hot pastries) but none of the usual fresh food stalls you might see at other markets.

That's all the ones I've been to so far. I'll continue to update this with more markets that I go to in the London area but hopefully you've found this helpful and enjoy exploring the London culture as I have. Let me know what markets are your favorites or if I've missed any, which ones I need to add to my list to check out!

Sunday, April 30, 2017

Does Castor Oil Work to Grow Your Eyelashes?? [REAL TEST!]

Being your typical Asian girl, long thick full luscious eyelashes are something I don't have. It's never been extremely bothersome though and I've never felt self-conscious or ashamed of my lashes. Heck, I'm pretty lucky because my lashes are actually a decent length for most Asians and I'm fortunate enough to not have short lashes that grow downward and into my eyeballs (yes that's a thing; it happened to my cousin and also a friend who actually had to get surgery to correct it because they were scratching/damaging her eyes!).

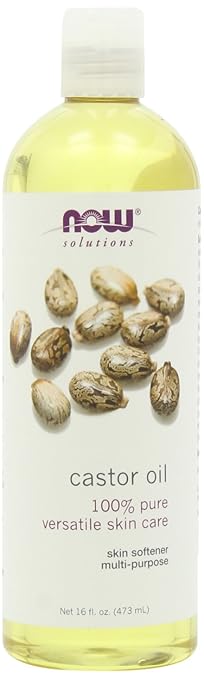
But that's besides the point. After watching numerous beauty gurus talking about RevitaLash or some other lash elongating or thickening product (many of which cost $60 and upward for a small mascara size bottle), I decided to give some DIY products a go. I started with just using my organic lipbalm to "coat" my lashes every night but then I did some research and found that Vaseline can be helpful (some controversy on it though) as well as castor oil. Castor oil seemed to be really highly recommended so I decided to get a bottle of castor oil from Now (pretty reputable brand, highly rated) on Amazon ($9.15 only for 16 oz!). The bottle is HUGE. I'm not sure how I'm going to finish it although I have been able to use up more by mixing a squirt of castor oil with some cheap body lotion and using it on my body.

NOW Castor Oil, 16-Ounce

I've used the castor oil every night (for about 2 months now) and apply just a little (pea size amount) on the tip/edge of my index finger. I put any excess oil onto the back of my other hand and apply the oil to upper lashline (the root of the lashes!) of one eye. I usually swipe the side of my index finger back into the excess I've wiped onto my hand to get some more product and then move onto the other eye. Then I'll use what's left on my finger to coat the bottom lashes. People say you really just need to get the base/root of your eyelashes rather than the whole entire eyelash but I find the oil on my finger tends to hit/coat the whole lash while I'm focusing on putting product on the lash line so basically, I end up coating my lashes as well as the root. Don't think it hurts to nourish the lash tips although if it gets in your eye, it kind of itches but it's not a huge deal (I actually wear night time contacts and haven't had too much problem with the product getting in my eye or irritating my eyes but just a word of note I suppose). Probably the better method to apply the castor oil would be to use a Q-tip/cotton swab but I'm too lazy to buy them/my finger works just fine for me but to each their own.

Now I'm not an ophthalmologist or optometrist so I can't say if this is safe or bad for your eyes/lashes but I haven't noticed any negative side effects in the last 2 months that I've been doing this (ie redness, allergic reaction, etc). The only possibly one downside is that maybe the castor oil clogs my pores because about twice, I've gotten a pimple on my upper cheekbone/under my eye which is pretty rare for me but I'm not sure if that's due to the castor oil. I've also gotten about 2 pimples within my eyebrows which seem to be associated with when I put any leftover castor oil through my brows (thought I'd try to thicken up those too) so I've stopped doing that. I read on a website (here is one site and another site that talks about the comedogenic properties of castor and other oils) that castor oil can clog pores on some people so I'd definitely suggest trying it out for a day or two first before really going for it. Despite possibly getting pimples around my eyes because of the oil, I haven't gotten any pimples on my eyelids or lashline (no styes) and I actually had what I think might have been a milia (keratin filled bump) which you can see in the initial pictures below and it's now gone away possibly because of the castor oil (it gets on my eyelids when I'm applying it, sometimes I rub the leftover/excess around my eyes like eye cream). So as a final warning, just be aware of any skin changes and stop if you think the castor oil is causing negative effects.

Okay so here's some picture results from my last 2 months of using castor oil (what you've all been waiting for).
I apologize for the lighting difference and meh quality but these were taken off my phone with no product on. The top 2 photos were at the start (February 2017) and the bottom 2 photos are now (April 2017). I'm going to continue using the castor oil since 2 months isn't a whole lot of time, and update this as it goes but so far I haven't seen that much of a difference..can you guys? It's definitely a bit disappointing that there's not much change and I actually did some MORE research on castor oil and found that only some people have actually seen eyelash growth with it so maybe it's not as effective as I initially though.

There is an actual medical product that boosts eyelash growth but requires a prescription and is incredibly expensive. It's called bimatoprost (generic) or Latisse (brand name) and has been shown to be extremely effective in lengthening your lashes. I don't plan on getting that though because (1) price and (2) a friend tried it and said after stopping, her lashes seemed stunted in growth (this has been mentioned by others who've used it as well).

So hopefully this was somewhat helpful or interesting to read. I'm sorry castor oil isn't the miracle product (for me at least) but give it a shot if you want - maybe you'll be different? Anyways, what other DIY or actual real products have you guys tried to make your eyelashes grow?

Tuesday, March 14, 2017

New Lip Products (Kylie Jenner and Alexis Ren x ColourPop Collection) + Swatches!

Recently I've been getting more and more into lip products especially liquid lipsticks. They're so fun (the bold colors!) and last quite well throughout the day, even through meals (well if you get the right brand...  more to come on this!). I still need to work on staying inside of my lip lines especially since liquid lipsticks aren't as forgiving as a traditional lipstick. Anyways, Alexis Ren recently had a collaboration with Colourpop and released about 6 items in her collection. I picked up 4 of the 6 and thought I'd share a swatch of these along with 2 Kylie Jenner liquid lipsticks my sister got recently as well.
Find this and more fun shots on my Instagram!
 The 4 items I got from the Alexis Ren x Colourpop collection were:
-Pressed Powder Face Duo in Topaz ($15)
-Blotted Lip in Lexi and Deja Vu ($5 each)
-Ultra Satin Lip in Bare Necessities ($6)

The two Kylie Jenner matte liquid lipsticks my sister picked up were in the shade:
-Candy K (lip kit, $29): described as a warm pinky nude
-Kristen ($17): described as a warm brown berry

I swatched all the lip products on my hand down below. I also have included a swatch of Beeper, an ultra satin lip liquid lipstick from ColourPop which is said to be comparable to Kylie Jenner's matte liquid lipstick in Dolce (which unfortunately I don't have but there are lots of comparison photos online!)
Personally, I think the quality of the Kylie Jenner and Colourpop liquid lipsticks are pretty much the same. They both have the same lasting power (Colourpop may actually last a little bit longer through food) and have high pigmentation. The Kylie Jenner matte liquid lipsticks are significantly more expensive and have a buttercream/frosting scent to them so if you're not into that, I would avoid these. The Colourpop lippies are all (I have multiple other ones as well) unscented. Like all the liquid lipsticks I've tried, both brands' liquid lipsticks tend to dry down a little darker then when you first apply them so just a word of caution. I would advise not applying more than 1 or 2 layers of either liquid lipstick as that tends to make them more easily rub off/smear (I learned the hard way..). Neither brand makes my lips feel too dry but I would advise lip balm after a day's wear of any liquid lipstick. They both fade off throughout the day nicely and don't flake off like other brands.

I like both the Kylie Jenner colors in terms of wearability (easy to wear on an everyday basis) where as some of the Colourpp liquid lipsticks can be a bit too bold for everyday. Beeper is definitely a dark brown mauve-y color (as you can see in the swatch) which makes it less work-friendly but I suppose that depends on your field of work. Bare Necessities is a nice peachy pink color though I noticed it did seem to smear a little bit more easily than Beeper or my other liquid lipsticks from the regular Colourpop collection. Not sure if that's because they used a different formula or if I was just eating/drinking more the day I wore Bare Necessities but thought I might just throw that in. Bare Necessities also might not look good on every skin tone (I think if you're a little darker than a MAC NC30-35 it might not look as good but that's just my opinion/from what my sister noticed when she wore it as she is a tad darker than NC30-35).

Lexi and Deja Vu are really nice. Both color are easy to wear and you can build up the color intensity. They're very creamy like a classic lipstick. They're not too drying and are a good consistency that doesn't accentuate your lip creases. The swatches on my hand were about 3-4 strokes/rubs on my hand (to give you an understanding of the pigmentation). I like the packaging of all the Alexis Ren collection products. It's like nice and classy with the black and gold!

I think I'll update this with more photos of me actually wearing the products on my lips/face but for now, hope you enjoy the mini review/hope it helps you decide if you want to buy them or not!

Tuesday, January 3, 2017

TheBalm/The Balm Cosmetics Review


The Balm Cosmetics has been a brand that I've heard loads about but just never got around to trying because it wasn't in available at Sephora, Ulta, or any drugstores. However, some time ago, there was a site wide 50% off sale on their online website so my sister and I jumped on it and picked up a few goodies we'd been eyeing for ages. So now that I've gotten to try out the products and put them to the test, I thought I'd do a little review and give you my thoughts on them!
I think it's only appropriate to start with Mary-Lou Manizer ($24 off the Balm site) because this was the first the Balm product I heard of. It's definitely a cult favorite and has been tested by many others and I have to say, I agree with the hype. It's a really beautiful light beige highlighter (not too warm and not too cool) with a beautiful fine shimmer that doesn't make you look like a disco ball but definitely makes you stand out. The packaging is quality and the mirror is huge so it's perfect for travel or on-the go makeup. You can double it for eyeshadow or highlighter too which is awesome. Definitely no complaints here. If you want to try out their other shades of highlighters though, they have a trio package with all 3 shades that they have in a mini/deluxe size which I semi wish I got because I bet they all would have looked really nice!
Next up is Bahama Mama ($20), a warm bronzer that hits the spot. I've been using it daily since I got it and absolutely love it. It has ZERO orange tones to it so it won't make you look like an oompa loompa (is that how you spell that..?) and blends in so easily. It's not SO pigmented that you get too much pigment when you swipe your brush into it (which is a good thing, I dislike products that are so soft that you get way too much product even with the lightest touch) but it definitely has color so don't be too hard with it. Like the highlighter, you can double this as an eyeshadow as well and it'll contour your eyes flawlessly. It is a bit small for $20 but since I got it half off, I'd say $10 is a good deal. I have Hoola by Benefit and the NYC Sunny Bronzer (really amazing for the price) so I'd say the NYC Sunny has a bit more orange than Hoola or Bahama Mama and Hoola is just a touch lighter than Bahama Mama. I love both my Hoola and Bahama Mama though so can't really say which I'd choose if I had to choose one. Maybe Hoola since it does come with a brush that is excellent for contouring but I think Bahama Mama's color is just SLIGHTLY better for my skin tone. Also keep in mind Hoola by Benefit is $29 so if price is a deciding factor, think on that (NYC's bronzer is like.. less than $5 by the way).
When picking out which products I was going to get, I had the hardest time choosing between Nude Tude (the original neutral palette) and Nude Dude (released after Nude Tude with more pinky tones). I ended up choosing Nude Dude ($36) because I wanted the rosy-dusty shades it had while Nude Tude had other warmer golden shades that I already had with my Naked by Urban Decay palette. I'm completely satisfied with my Nude Tude palette and have been using it basically daily since I got it. I love the wide range of colors it has and they're all really well pigmented and blend so easily. I don't get any patchiness with them and there's a really good amount of shimmery shades and matte shades. Beware that the dark colors are very pigmented so you don't want to be heavy handed (whereas the lighter shades you can get away with being heavy handed because they'll blend in more easily). The highlight shade is so good for the inner corners and underneath the brow bone and even all over the lid if you're doing a look that calls for that. I love the two dusty rose shades though because those are totally my style right now (one is shimmery and one isn't, 3rd column from the right) and they pair so well  with the darker browns next to them (2nd column from the right). While $36 isn't exactly cheap, it IS cheaper than the many other neutral palettes out there (ie. the Naked palettes are $54, Smashbox Full Exposure is $52, Too Faced The Chocolate Bar is $49) and I would say the shadow shades and quality are on par with all of those other brands so don't be afraid to try it even if Sephora doesn't stock it!

My sister wanted to try Meet Matt(e) Hughes ($17) in the shade Honest so we picked that up and lemme say it is super pigmented, matte, and creamy. The color is a bit more peachy that it appears in my photos and is described as a warm coral. It seems like it would be good on all skin tones and is very wearable. I think it lasts for a reasonable amount of time and fades well when you eat/drink/do stuff that would make it come off. The applicator is standard like most others though to be honest I prefer the heart shaped applicator tips with a pointed tip which really helps you get the edges of your lip without mistake. Definitely make sure you use a lip liner with this because mistakes are not easily forgiven. I think $17 is a bit up there in price especially since I've recently discovered the wonders of ColourPop (I know I'm late to the bandwagon) which has amazing liquid lipsticks for only $4-5 (they have sales a lot so you can usually get it discounted) and they're just as good, if not better, than this TheBalm liquid lipsticks.

How 'Bout Them Apples ($32) is a cream blush (well technically cheeks and lips) palette that is so pigmented and the color range is super wearable and versatile for all occasions. The packaging is cute (as are all of The Balm products, and as you can see in the photo below, the palette opens up vertically and on the top half, there's a HUGE mirror. Super great when you're traveling, on the go, or just not in a location where a full mirror is at easy access. Application works well with a beauty blender or dense brush but a normal powder brush would do as well. Gotta say this is a big hit and would definitely recommend it if you can pick it up on sale since full price is edging it a bit if you're like me and don't use blush that often.
I don't have a close up shot of the Time Balm ($28) foundation (my apologies) but it was definitely super orange-y/oxidized when my sister tried it out. I got the shade Medium (for my sister's Asian skin tone which I would say is about a Mac NC30 but maybe a little darker) and it just had a strong orange undertone that wasn't super flattering for the neutral undertone Asian skins generally carry; I'd say this foundation is better suited for Caucasian individuals. The puff that comes with the foundation isn't the greatest but that's expected so not a huge deal breaker really. This is one of the downsides of not having TheBalm stocked at Sephora or Ulta because you can't try out the foundations to make sure the shade fits you. So if you're not 100% sure if the shade will match you, I'd say save your money and spend a bit more for one you know matches you (aka one you can sample in store) since you can't return used/open items to TheBalm (understandably so).

All in all, I'd say I'm pretty pleased with this The Balm haul. I've wanted to try out their products for so long so I was really excited when I saw they had a 50% off sale! At full price, they're definitely a bit on the pricier range but they do go on sales periodically and some products can be found on sites like HauteLook for discount so look out for those if you're interested. The only product I'm iffy/so-so about is the Time Balm foundation but everything else I'd definitely recommend!

Saturday, May 28, 2016

My 2016 Spring Bloom VoxBox

As we near the end of May and into June, I can definitely say spring is going by fast and summer will be upon us all too soon. The weather is warming up, my nose gets itchy and my eyes water if I don't use Flonase in the morning, and I'm starting to feel comfortable wearing T-shirts and/or a skirt without thick woolly leggings! I got some products from Influenster that are all too perfect for the season and have put them too the test and want to share my thoughts with you all now.
Secret Outlast Deodorant
This is a bit of a weird one but honestly don't we all use deodorant and who wants those nasty pit stains or that weird sour stinky who knows what smell coming off of them? Certainly not me. In general, deodorant lasts me forever so it's hard to get to try a new one but I got a travel size of the Secret Outlast Deodorant in the completely clean scent and it's been working really well. Spring is like the time when it can get warm and dresses and T-shirts are out..basically all the more reasons to wear deodorant. I like how this doesn't mix with my sweat scent like my previous Secret deodorant sometimes did and it really does a good job at keeping me from getting those sweaty pits.

Nuxe Huile Prodigieuse Multi-Purpose Dry Oil
I'll start off by saying I've never used a "dry oil" and have only ever really used jojoba oil (once for my hair) and coconut oil (multiple times, also only for my hair). I've never used an oil to moisturize my body or face but have heard of such uses so was interested in trying this product for such purposes in addition to using it on my hair. I wish there were better instructions or directions for this product though because for someone who is new to dry oil or any oil for this matter, they might just apply the oil throughout their hair thinking it would have some shiny/silky effect on their hair and then be left with a greasy head all day.
The full size version of this comes with a spray pump but the sample I received was so small that it was just an open bottle with a screw on cap. This forces you to tilt the bottle and pour the product out which, like any oil or liquid, can cause it to dribble down the bottle and create a bit of a mess - which with oil, is more difficult to clean up then say, water. So already, my first time using this, I had some issues with pouring out the oil and having some of it go on my desk and not my hand. This wouldn't be a problem for the full size of the product which comes with a spray but it is something to keep in mind if you're looking to get a smaller size of this product.
-For the hair: The first time I used this, I poured it into my palms, rubbed it in to distribute it evenly, and combed it through the ends of my hair only. I did not go anywhere near my scalp for fear of a greasy head which was a good thing because my ends definitely looked a bit wet and piece-y for the whole day (signs of oily hair). I didn't use very much product, which means a little bit goes a long way, and the instructions on the website say you can spritz this in your hair
-For the skin: This doesn't leave your hands feeling super oily IF you rub it in completely. So start with only a little amount and rub it in thoroughly; that means MAKE THAT SMALL AMOUNT GO THE DISTANCE. The price is $36 for a full size which okay, isn't off the charts but it is more than the $3 Cerave lotion I usually use right? I think it does a good job at moisturizing my skin and doesn't make me feel all sticky or wet like other lotions do. Your hands will definitely feel different but with lotion your hands feel different too. I think it just takes some time getting used to.
-For the face, I have yet to try mixing this in with my foundation (not sure how oil and makeup go together...) but apparently it's supposed to give you a healthy natural glow. Someone else can try this out I suppose ;)

Sunbelt Bakery Chocolate Chip Bar
I brought this with me on my hike in South Lake Tahoe and ended up eating it back at my hotel when I was doing nothing exciting. Nevertheless, this was delicious. A bit on the sweet side and very similar to a Quaker Chocolate Chip granola bar but thicker. I wouldn't mind buying this again in a 6 pack (vs individually) to have as a healthier snack or dessert option for those days when I'm craving the sweeties.

Not Your Mother's Plump for Joy™
This is a hair thickener which is so great for people like me who have thin limp boring hair. I know how bad teasing your hair is for you so I rarely do it (that and I'm pretty bad at it) so having this was the perfect way to get the volume from teasing, without having to actually go through the teasing process. It's better than hairspray because it doesn't make your hair super crunchy and nasty and well the sample size of this is so perfect for traveling when space is limited and you can only take so much with you!

Cutex Nail Polish Remover
This is kind of amazing for travel because who wants to be lugging around a giant bottle of nail polish remover when they go on vacation right? I'm not even sure TSA would let you bring on a full size nail polish remover bottle and I don't know if there are travel size bottles of nail polish remover. So here we have the solutions - Cutex nail polish remover pads. These are thick pads (they wont just rip on you as you scrub away hard at your nails - trust me I tried with glitter polish) that are completely soaked in nail polish remover so they'll get your nail polish off in no time. The pads are so big that I swear they could do your fingers and toes all with one pad. Definitely one of my favorites. I wonder how long they last unopened though since I'm planning on going to Croatia in about 1.5 months and I don't want these drying out on me! (Which reminds me, even those these have acetone, they're not THAT drying because they have flax seed and other oils combined so it doesn't leave your nails gasping for moisture.

Sinful Colors Nail Polish in Bling it On! Teal Midnight

Because I had my Cutex pads, I was also able to easily try out my new Sinful Colors polish Bling it On! in Teal Midnight. Apparently it's limited edition so if this appeals to you, you better find it quick!
In the above picture, I tried on various combinations and coats of the Teal Midnight nail polish as well as my other Sinful Colors polish, Ingr, which is part of their extra shine collection.
-Index finger: 2 coats Ingr
-Middle finger: 1 coat Ingr + 1 coat Bling It On Teal Midnight
-Ring finger: 2 coats Teal Midnight
-Thumb and pinky: 1 coat Ingr
Both polishes are pretty sheer which isn't a bad thing. You don't need to make super thick coats since they'll go on sheer even if you glob it on so it's better to work with less product, let it sit and then do at least one more coat (probably 3 total would be best). Ingr with 2.5 coats was really great - opaque sea sky blue with fine shimmer (it really makes it look like the ocean). It has a nice glossy and shiny finish too. Teal Midnight is definitely a glitter top coat but it's not PACKED with glitter so if you're really looking for the glitter aspect, I'd suggest putting it on a sponge and then dabbing it onto your nail. I just brushed on the nail polish and would have liked more glitter but it was hard to get the glitter without getting the polish and making a huge glob/mess on my nail. You'll for sure need a clear top coat over Teal Midnight though because you can feel the glitters (that roughness doe). I wouldn't suggest using Teal Midnight on its own because it's way too sheer even with 2-3 coats which is pushing it because you get so much empty sheer nail polish and not enough glitter. This would definitely be perfect though if you just need a hint of glitter to boost your nail game.

Anyways, this is one of my more thorough reviews and I feel like I covered the key aspects and points of each product. I hope it helps you make your decision if you're looking to get any of these products. Please know that even though I got these products for free, all opinions are my 100% true to me. What works for me might not work for you so take everything with a grain of salt! Skin tone, skin type, hair type, etc all factor in to how a product works with you! Well, that's my spiel for the day. Have a wonderful day all you wonderful people reading this :)

Thursday, March 19, 2015

LUSH Dark Angels Facial Cleanser Review

Hey everyone! Today I'm going to talk about the LUSH facial cleanser called Dark Angels. Can we first start off by appreciating how cool and mysterious the name Dark Angels sounds? Okay maybe it's not that cool but I still like the name! Anyways, I'm going to start off by saying this is the first LUSH facial product I've ever gotten for myself besides their Coalface which I only used a little bit because I had actually gotten it for my boyfriend. I've seen people on Youtube talk about this before so I was intrigued and wanted to try it out as part of my daily routine. If you don't know, my skin type is more on the dry-combination side. It's not so dry that it gets flaky or anything, but it's definitely not oily. However, I do get a little oily in my T-zone occasionally which is why I would classify myself on the combination side. My face tends to feel more tight and smooth rather than the sort of sticky, soft supple feeling that some other people have and I think that's just because my skin isn't as moisturized as that, but I prefer it like this so yea! Sorry if that's wasn't the greatest explanation but I just wanted to give a description of my skin type first because everyone has different skin types so one type of facial product may work differently with your skin - this is just my opinion and how it worked for me. Take it with a grain of salt and enjoy~!
On the website, the description claims:
"Black sugar and charcoal gently exfoliate and absorb excess oils to leave dull, oily or acne-prone skin feeling fresh and matte. Even oily skin can be sensitive, so we've made this one soft and soothing to calm redness and irritation, too. Its rhassoul mud base deep-cleanses to help prevent breakouts while vitamin rich cold-pressed organic avocado oil nourishes skin to leave it soft and lightly hydrated. Use all over for perfectly smooth, bright skin. An angel indeed!"

So what does that all mean? Basically it's good for oily skin and exfoliates, smooths, and brightens skin.

On their site, it's rated a 4.4 (but all of their products are like a 4+) and there's a lot of great reviews about it. Some of the pros mentioned in the reviews include it smelling good, controlling oil, exfoliating, and being good for acne-prone and oily skin. Some cons are that it can be messy and leave a dark-ish residue on those with fairer skin. As you can see below, it's a bit pricey, but all LUSH stuff is pricey so you gotta keep that in mind if you're considering shopping at LUSH in general.
Price: $31.95 for 8.4 oz.
Where to buy: LUSH website

Okay so enough of the boring information, let's get on with my personal experience. I don't mind that it comes in a tub and that you have to scoop out the product. I can see this being a little unsanitary and especially since there's no preservatives, I feel like dipping your hands in it multiple times might speed up the "going bad" process. I really don't know how you even know if you're cleanser goes bad but mine actually passed the "best used by" date last week or so, so I'm furiously trying to use it up. I did read that you can use it on your body as a body scrub and lots of the reviews mentioned people using it on their body as well as their face. If you're doing it like that, I can totally understand how you would use up the whole product, but for me, well I'm barely halfway done and I've had it for over 3 months. That being said, I don't use this product every day. I did initially use it both day and night to cleanse my skin but one day I noticed my skin had a ton of little scratches and I realized it was from the cleanser so I decided to cut down and only use it maybe once every one or two days. 

In my opinion, Dark Angels is more of an exfoliant to be used a few times a week, not daily as a cleanser. My skin is definitely not sensitive and it's pretty good at taking harsh products. For example, the St. Ives apricot scrub, my skin can take that daily nbd. I actually think that's less rough than Dark Angels. I know there's a lot of controversy about the St. Ives apricot scrub with people saying it's really bad for your skin and causes micro-scratches and tears your skin, but honestly, I don't get that. I like the way St. Ives makes my skin feel really clean and I don't feel like it's harsh at all. Dark Angels is made with black sugar to give it that exfoliating property and Rhassoul mud (charcoal I think) to absorb excess oil. Since my skin was never super oily to start with, I can't really say if Dark Angels controls my oil production or not. I guess it does but who knows. *shrugs* Many reviews talk about how it controls their oil so if you have oily skin, this could work for you. But back on the topic of sensitive skin - if you have sensitive skin, I don't think I would recommend this for you. Especially if you can't stand St. Ives apricot scrub. The black sugar component of Dark Angels makes it pretty rough in texture and after seeing those tiny scratches/red lines on my face, I don't think it's a good idea to press too hard when using that. But my problem is that if you don't press the cleanser into your face, it won't stick on your skin and will just drop off into the sink/shower/wherever you wash your face and dude, that's like 10 cents right there! (Lol oh the stingy side in me comes out). 

With regards to people commenting on the scrub being messy, I don't think it's that messy. Sure some bits drop off, but if you're careful, like me, you shouldn't have too much fall out and all you have to do is use water to wash it off the sides of the sink/wherever it dropped and it's gone. Not that big of a deal right? The instructions say to only grab a pea size amount and then rub it in your palms with some water. What I do is grab about a pea size amount using my knuckles. This is a trick I learned when I had gotten gel nails and lotion kept getting stuck underneath my nails (#thestrugglewasreal ;D). Using your knuckles to get out lotion or the cleanser is a great trick if you have longer nails or just want to be a little bit more sanitary (somehow I think it's better than using your fingers). Then I rub it in my damp/wettened palms and rub together onto my face. I don't always do this though. Sometimes, I take it off my knuckles and just directly place it on my "freshly-water-splashed" face and rub it in. I wash my face by holding my face above the sink (looking downward) and catching water with my two palms and splashing it up against my face. No not like those commercials where the water splashes against the models face and goes everywhere but yes I do cup the water in my palms and bring it up to my face. I then use my hands to rub off and of the excess product still clinging to my face (kind of necessary for any cleanser really). I repeat this until all the product is washed off. I'm telling you this because not everyone does this (which surprised me when I first found out) but I think it's one of the best ways to efficiently wash your face. 

Okay so all in all, I don't think I would repurchase this cleanser. I like it and I don't mind the smell but it's definitely on the pricier side and since it has an expiration/best-use-by date and I can't use it that often (or choose not to), I don't think it's the best product for me personally. I do think it'd make a great body scrub but it's also one that I feel like I could make on my own (oh the multitude of DIY sugar scrubs you can find online) for much cheaper. My body skin isn't oily either (who's is anyways?) so I don't know how good of a use it would be to use Dark Angels as a body scrub (seems like a waste of money but at the same time, if my cleanser is past the use-by date.. I might have to resort to using it up on my body). I think this is a great exfoliating product that should be used occasionally, especially if you have sensitive skin. Maybe you can try pressing with less force, but even then, I feel wary about recommending this to anyone who's skin is generally pretty sensitive. I would follow up with a good moisturizer (I use my aloe gel because that's just what I use everyday and I would HIGHLY recommend everyone and anyone to use aloe gel if you aren't already. Seriously the bomb for any type of skin). The cleanser can be a bit crumbly and strange if you're not used to using products out of a tub (plus unsanitary) which are a few cons I might bring up if you're considering purchasing Dark Angels. So I suppose that's it for my review on Dark Angels. It's not bad and if you want to try out a new cleanser or exfoliating product and have the money to spend, you can definitely try it out. Just make sure you have a friend who you can share it with or give it to if you don't like it or don't want to use it that often but need to finish it before the best-by date! 

What other LUSH products have you guys tried and what would you recommend? I love their Bath Bombs but can never get myself to buy one but let me know what you think is worth the splurge!

Saturday, January 17, 2015

Good Eats - Hong Kong Edition - BBQ Military (Ep. 7)

It's been a while since my last Good Eats post, but I thought I should share a few more of the places I went to when I was in Hong Kong over the summer. BBQ Military is a Korean barbeque restaurant that, well as the name implies, has a theme centering on the military. Their waiting area chairs are cameo print (see above picture), their servers dress in military uniform, and they even have a mini shooting range with BB guns! You have to be over the age of 18 to use the BB gun but it's totally free and pretty fun. BBQ Military is also owned by the same owners of BBQ 7080, another Korean barbeque restaurant that is also just as popular as BBQ Military. I think there are also a few more branches of 7080 around Hong Kong so it's a bit easier to find.
BBQ Military is pretty popular so if you want to get a table, I would definitely suggest going before peak hours (ie. before 7 PM and even then might be cutting it close) or calling in to make a reservation. If you go in during their busy hours, they might not have any room and all their tables could be reserved meaning your chances of getting a table are slim and only possible if someone doesn't show up for their reservation or cancels. I like the style and concept of the restaurant and it's pretty cool, their seats are like stools but you can pop off the top and stuff your belongings in it making for easy storage and safe keeping. The restaurant does get pretty crowded but that's with most Hong Kong restaurants as space is limited. Your table will definitely get a bit crowded, but it's all good :)
All the tables come with a circular cooking tray in the middle and you usually have one waiter dedicated to you who will help serve and cook your food. I really liked the service because most Hong Kong restaurants don't focus on service and can treat you pretty badly (ie. they just want to get you in and out as quickly as possible). Here, the server really is attentive and they're super helpful. I did go to the 7080 in Tsim Sha Tsui and our server was amazing. I accidentally spilled my tea (they give really good Korean tea!) and she immediately was there with tissues and napkins to help wipe it all up. The server also frequently changes your cooking stove so it doesn't get too oily or covered in burnt food and they also give you a ton of lettuce and mint leaves to wrap your meat in. They also start off by giving you a tray of banchan (Korean starter dishes) which is super good. It comes with kimchi, japchae, cold tofu in some sort of really good sauce, and cabbage in a sort of wasabi paste which I personally don't like wasabi so I didn't care for it much.
I'll admit that the place isn't insanely cheap but it's also not crazy expensive. You get a good portion for what you pay and the meat is reallyy good. Their menu comes in Chinese and English which is great for tourists like me and pictures too ;D I know most people like pork belly but I personally find it too fatty, but if you're into that, then I would definitely recommend it. My favorite dish was the Gwangyang Bulgogi (marinated grilled beef), beef brisket, and some other beef thing that I can't remember what it was called but it was SO good. In the picture below, it's the meat that's rolled up with little hashmarks on the top right corner with the two white circular blobs (those are two slices of mushroom haha).
Overall I would highly recommend BBQ Military if you're looking for good Korean BBQ in Hong Kong. They have really great food and the service is great which is a nice change from the normal usual service you see around Asia. Plus I'm a sucker for Korean BBQ so I really enjoyed going here :) Let me know if you check this place out and what you liked the best!