Showing posts with label best. Show all posts

Thursday, July 27, 2017

Your London Guide to Street Markets

I was lucky enough this summer to stay in London for just over 2 months doing some research work and some traveling. Of course I was determined to try all delicious food and get a "taste" of London culture and what better way than to check out all the street markets? I'm not talking just the Borough Market or Camden Market.. I'm talking ALL of them. So here's my little guide for which ones YOU should check out if you're more cut on time.

Before I get started, know that some of these markets can get crowded and with any crowded area in London (or anywhere really), be cautious of pick pockets. Be smart - don't just have your wallet hanging out from your back pocket. Also, always carry around some cash because not all the stalls will accept card (though a fair amount of them do!). And given that it's London weather, a bottle of water and an umbrella never hurt anyone.

1. Borough Market
I'm just going to get the big name ones out of the way. Yes this is the market where there was the shooting (article here if you somehow didn't hear/read about it), but I wouldn't let that deter you from checking this place out - just don't hang around too late at night if you want to stay on the safe side. It's a classic must visit market in London and can get a bit crowded (though not as bad as others) so best to go mid morning. It opens at 10 AM everyday except Saturday (8 AM) and Sunday (closed) and goes until 5 PM (6 PM on Friday). There's tons of little stalls in this underpass market selling mostly food items like cheeses, oils, teas, breads, fruits, and other delicious goods. There's not really any clothing stalls like other markets but there are a few stalls selling little trinkets/goodies/supplies that you can pick up as souvenirs or just for yourself. I'd definitely recommend getting the scotch egg here because it's freshly fried so toasty hot (I'm not a fan of cold scotch eggs) or a doughnut/donut (4-5 different flavors of plump custard/filling filled donuts..delicious!) or SOME sort of baked good from Bread Ahead. Notably, the Roast is also located in the market - this is a slightly upscale restaurant that does (duh) Sunday roast style dishes including roast beef with yorkshire pudding, pork belly (one of their highly rated dishes), and my favorite - sticky toffee pudding (a definite must get if you go here). It's a little pricey so save it for a special occasion if you do plan to go here.


2. Camden Market
Probably the largest market of them all, this spans several streets, and it's open every day from 10 AM - 7 PM. It gets jam packed with people at all times of the day so I'm really not sure when the best time to go is to avoid the crowds. There's basically everything there - clothing, food, jewelry, trinkets, the goods. Like I said, it's huge with lots of small "alleys" of stalls so it's a bit easy to get lost and be on alert for pick pockets. Lots of the stalls seem to repeat what they sell (ie same clothing items) but it doesn't hurt to take a look around. Personally I didn't find anything appealing to buy. There's a lot of different food varieties to choose from also but I think the halloumi fries are quite popular (again, personally they were just so-so for me but they're worth a try I suppose). They have a nice seating area (spots are hard to come by) that overlooks a river (though the river isn't that nice and very algae infested) where there are some boats that you can pay to go on I believe. Camden Market is definitely one you could spend over an hour at and Camden Town (the area the market is located in) has lots of shops on the highstreet where you can buy brand name clothes and other things so you can really spend half your day in this area.
Two things you should notice: the amount of people and the amount of algae in the lake.

Halloumi fries

 3. Portobello Market
Another very popular and large outdoor street market that gets packed early in the morning so again, not sure when the best time to go is besides early. Lots of antique shops line the streets and even more stalls on the streets themselves. You'll see lots of old gems/stones/jewelry, dining ware/teaware/silverware, and just random old things (age does not make them cheap). There are usually some performers on the street which add to the market feel. You'll walk for a couple of streets until you get to the end where there are most of the food stalls and let me tell you, this is probably one of the largest market food courts. They've got tons of stalls with a huge variety of foods and some will even offer your samples which is nice. They've got a pretty hipster seating area in a sand pit and outdoor loos (aka porta-pottys) that you (horray!) don't need to pay for.
People..and more people. Definitely one of the more crowded markets in London!


Seating area where you can enjoy your food
 
"Gozleme" for only 5 pounds. Super filling as it came with a heaping serving of hummus and salad. Absolutely delicious!

4. Old Spitafields Market
Nice indoor/covered market with wide variety of clothing shops, random trinkets/goodies, jewelry and hair things, leather belts and bags, etc - as well as a good section of food stalls and actual sit down restaurants on the side. It's open 10 AM - 5 PM everyday except Saturday (opens 11 AM). There's a good variety of things you can buy here and I picked up some cute dresses for a reasonable price (2 for 20 pounds). This market wasn't too crowded when I came by early afternoon which was a definite plus and the food had me drooling. Plus it's near the Peticoat Lane Market - a small outdoor street clothing market selling mostly cheap clothes (cash only) but also some other random household tools for low prices - so you can pop over there when you're done at Old Spitafields.

5. Columbia Flower Market
This Sunday only market specializes in flowers (hurdur) and antiques. It gets PACKED (possibly because it's only open on Sunday; and I mean packed like on par with, if not worse than, Portobello market) so try to go earlier rather than later. It has a huge variety of flowers for a super reasonable price. You're definitely going to see girls taking photos for Instagram here (see the classic feet and flower pose). Flower stalls line the streets but behind them are a few cafes and dozens of antique shops/boutiques selling various trinkets and random homeware goodies - definitely cute things to check out (but not exactly cheap). There's also a few food stalls at the edge/end of the market area and I picked up two vegan goodies (date brownie and banana bread) which were both absolutely deliccious!

6. Greenwich Market
Probably one of my favorite markets out of them all. It's located right off the road near the Cutty Stark (historic boat), the Prime Meridian (7 pound student ticket, 10 for adults - basically to stand over a line..but hey it's worth it if you want to be east and west at the same time right?), and the Queen's House (free! and really quite nice). The market is partly covered under a building (but not exactly indoors because no doors) with some food stalls outdoors as well, and has a really nice variety of stalls selling clothing, hand made things (cards, hair bands, bow ties, etc), homeware (ie metal wire photo holders which you can customize), and of course food! I saw a lot more vegan food options here than most other markets which was cool (not a vegan myself but I can appreciate it) and I tried the vegan donut from Ruby's which was absolute amazingg!


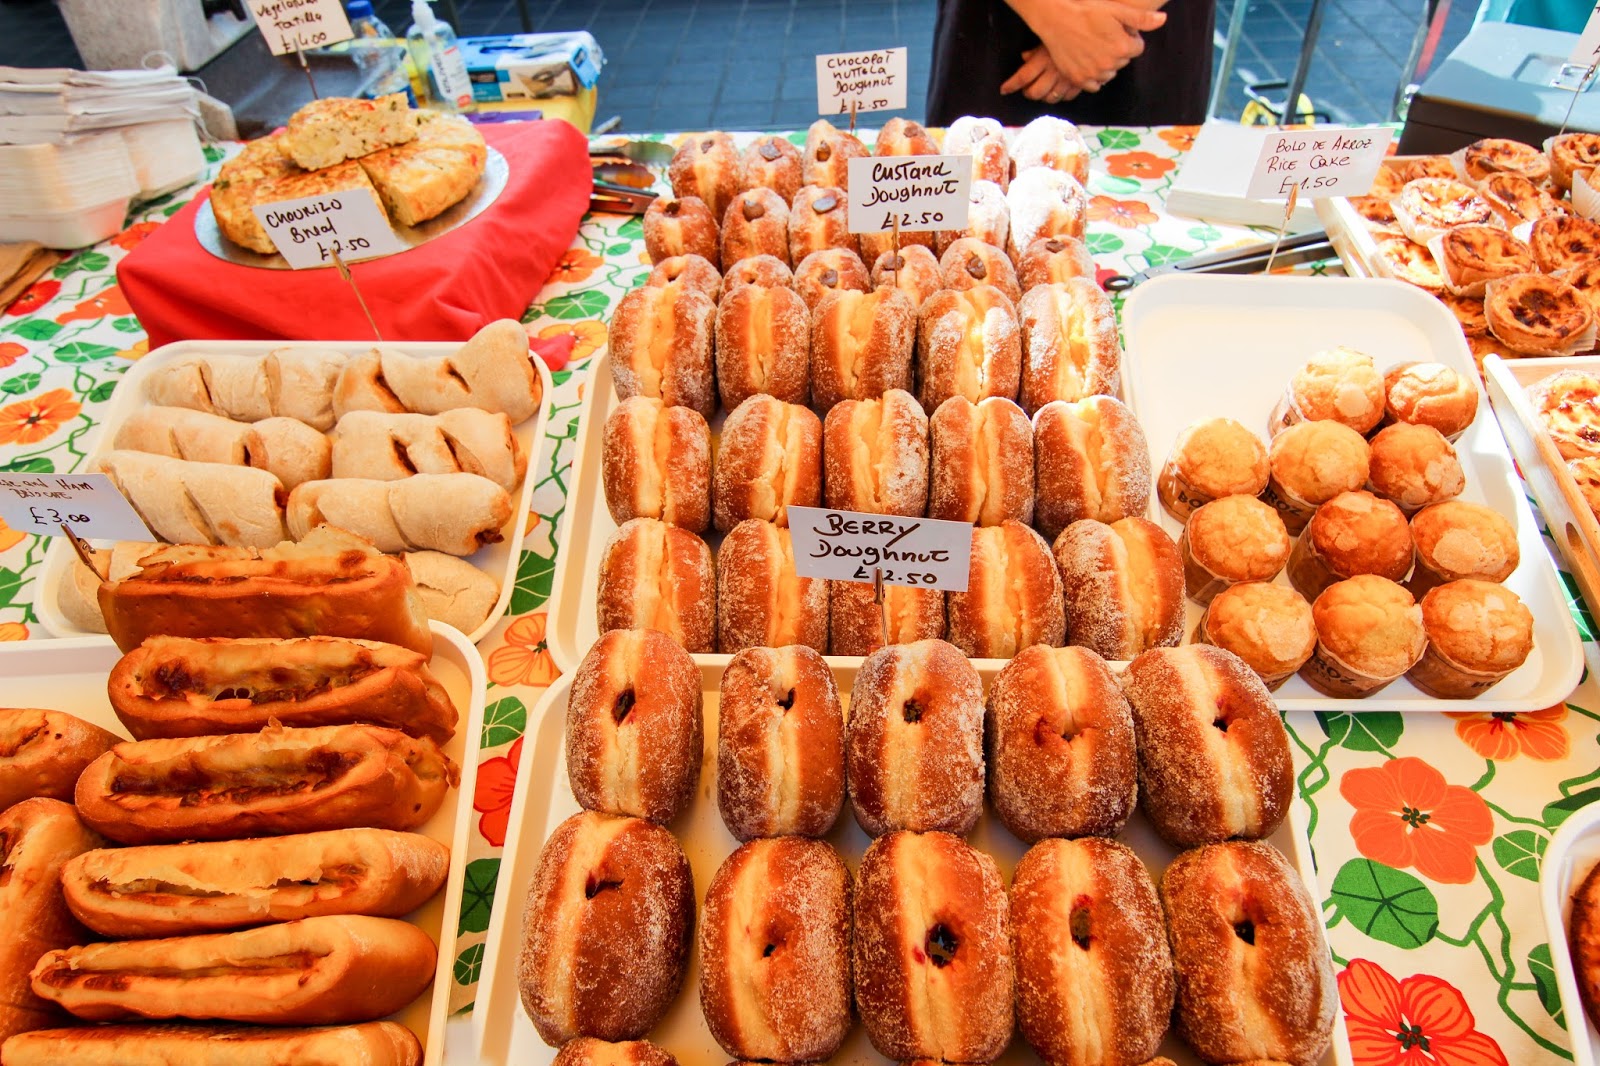

7. Brick Lane Market
Only open Saturday (11 AM - 6 PM) and Sunday (10 AM - 5 PM), this outdoor street market is filled with stalls selling second-hand/second-ware items as well as some clothing stalls. There's an area of the street that has an opening into an old parking lot looking area with more stalls set up in a flea market fashion (random old trinkets lined on tables). You'll also see some stalls selling fresh produce in buckets for 1 pound per bucket like Whitechapel Market (see below). There's lots of surrounding building walls "decorated" in street art which is quite cool (also near Shoreditch which is known for its street art). The streets surrounding the market are filled with hipster cafes (including the notable Cereal Killer cafe and Sloane Bros froyo), the classic famous "beigel" (aka bagel) shop known as Brick Lane Beigel Bake (there's one right next to it also called Beigel Shop which is also rated well but not as many reviews for it on Google so I think it's not the MOST famous lol), and Indian restaurants known to make amazing curry (I have yet to try but the area itself has lots of local Southeast Asians so I wouldn't be surprised if their restaurants were amazing). The two beigel/bagel shops are known for their salt beef bagel but personally I thought the salt beef wasn't anything out of this world (never had it before so not saying it was bad or anything) and for 4 pounds compared to the other fillings (ie cream cheese, smoked salmon and cream cheese, cheese, nutella) which are only 1-2 pounds, it didn't feel quite worth it. But if you're into salt beef or love meat, it doesn't hurt to try it because let's be honest, 4 pounds isn't unreasonably expensive when you consider London prices - and the bagel dough itself is really nice, soft, and fluffy.


8. Whitechapel Market
This is a street market right next to the Whitechapel tube station. It's not crazy huge or long and doesn't get crowded like the other markets. It's great for cheap ripe produce (and when I say ripe, I mean like eat that day ripe or else it'll go bad). Stalls sell fruit piled in a plastic bucket for 1 pound each and while other markets may have stalls like this as well, Whitechapel's portions (aka fruit per bucket) are the most and best deal. For example, I got 5 large ripe avocados for 1 pound and 9 bananas for 1 pound! There's also lots of clothing stalls selling cheap scarves (1-2 pounds each), dresses, pants, shoes, etc. It's a bit like a market you'd see in Asia but run mostly by Middle Eastern shop owners instead. Definitely a nice place to stop by to get your daily fruit fix. Be mindful that all the stalls are cash only.

9. Brixton Market/Brixton Station Road Market
Nice market with largely Jamaican, African, and Latin American influences so you can try some more authentic foods here. It's not as clean/tidy as some other markets (lots of meat butcher shops) but don't let that stop you from walk on a bit further where you'll find an indoor market area that's cleaner with mostly sit down cafes and restaurants (so many to choose from!). There's not as many clothing stalls here as it's mostly food but you'll find some cool cultural items at some stalls on the street/road market. There's also the Pop Brixton area which is an outdoor two-story food eating area (more hipster and pricey foods ranging from steak and fries, crepes, tacos/burritos, pizza, beer, etc) with maybe 1-2 vintage selling clothing stalls. There's a nice seating area on the second floor that's covered so you can take shelter there if it's raining.
Inside Pop Brixton
Pop Brixton second floor seating area
Vintage Kilo Sale! This event goes on every so often so check Facebook to see when the next one is. They have multiple locations
10. Bloomsbury Farmer's Market
Thursday only food market (9 AM - 2 PM) located near the University College London (UCL) so you'll see lots of students here. It's well-rated online with lots of reviewers raving about the lunch options but I haven't actually found the time to make my way there so I'll leave this short for now. Prices are said to range from 5-6 pounds which isn't unreasonable and they're said to have a good range of options to choose from. The only downside is that during peak lunch hours, there can be quite long lines and since the market isn't even open for that long, you might find yourself waiting a bit.

11. Broadway Street Market
Really nice outdoor street market for lunch time foods.. which is a shame because I went there around 10-10:30 (and it says it opens at 9) and most of the shops were still getting set up (especially the ones making fresh hot foods). It apparently gets really busy during lunch time so maybe go right before the lunch rush hour or after. There are a really wide variety of foods including savory and sweet (some really nice looking meringues and eclairs and cakes!) as well as shops selling handmade clothing, jewelery, and general things you can give as gifts. Also a few shops lining the buildings surrounding the market that are good for early birds looking for a bite to eat. It's close to Netil Market which is a small market (only about 5-8 small shops in a fenced area) that sells old furniture, bike parts, art pieces, flowers, and some other random things. It opens at 9 AM on the weekdays and 11 AM on weekends but I'd suggest going around 12 or after on the weekend since when I went, they weren't really set-up or open at 11.

12. Roman Way Market
Small outdoor street market selling cheap clothing and random things to use around the house (ie cleaning supplies, plastic tupperwares, etc). There's not a huge selection of things here and only 1-2 stalls selling fresh produce and it's not some market I'd say you HAVE to go to but they do have some stalls selling designer brand name clothes so you might want to pop on by if you're into that. There's a fair amount of restaurant/food shops lining the buildings surrounding the market if you're looking to get a bite to eat (Percy Ingle smells of warm melted butter and fatty goodness - definitely recommend checking out their hot pastries) but none of the usual fresh food stalls you might see at other markets.

That's all the ones I've been to so far. I'll continue to update this with more markets that I go to in the London area but hopefully you've found this helpful and enjoy exploring the London culture as I have. Let me know what markets are your favorites or if I've missed any, which ones I need to add to my list to check out!

Tuesday, January 3, 2017

TheBalm/The Balm Cosmetics Review


The Balm Cosmetics has been a brand that I've heard loads about but just never got around to trying because it wasn't in available at Sephora, Ulta, or any drugstores. However, some time ago, there was a site wide 50% off sale on their online website so my sister and I jumped on it and picked up a few goodies we'd been eyeing for ages. So now that I've gotten to try out the products and put them to the test, I thought I'd do a little review and give you my thoughts on them!
I think it's only appropriate to start with Mary-Lou Manizer ($24 off the Balm site) because this was the first the Balm product I heard of. It's definitely a cult favorite and has been tested by many others and I have to say, I agree with the hype. It's a really beautiful light beige highlighter (not too warm and not too cool) with a beautiful fine shimmer that doesn't make you look like a disco ball but definitely makes you stand out. The packaging is quality and the mirror is huge so it's perfect for travel or on-the go makeup. You can double it for eyeshadow or highlighter too which is awesome. Definitely no complaints here. If you want to try out their other shades of highlighters though, they have a trio package with all 3 shades that they have in a mini/deluxe size which I semi wish I got because I bet they all would have looked really nice!
Next up is Bahama Mama ($20), a warm bronzer that hits the spot. I've been using it daily since I got it and absolutely love it. It has ZERO orange tones to it so it won't make you look like an oompa loompa (is that how you spell that..?) and blends in so easily. It's not SO pigmented that you get too much pigment when you swipe your brush into it (which is a good thing, I dislike products that are so soft that you get way too much product even with the lightest touch) but it definitely has color so don't be too hard with it. Like the highlighter, you can double this as an eyeshadow as well and it'll contour your eyes flawlessly. It is a bit small for $20 but since I got it half off, I'd say $10 is a good deal. I have Hoola by Benefit and the NYC Sunny Bronzer (really amazing for the price) so I'd say the NYC Sunny has a bit more orange than Hoola or Bahama Mama and Hoola is just a touch lighter than Bahama Mama. I love both my Hoola and Bahama Mama though so can't really say which I'd choose if I had to choose one. Maybe Hoola since it does come with a brush that is excellent for contouring but I think Bahama Mama's color is just SLIGHTLY better for my skin tone. Also keep in mind Hoola by Benefit is $29 so if price is a deciding factor, think on that (NYC's bronzer is like.. less than $5 by the way).
When picking out which products I was going to get, I had the hardest time choosing between Nude Tude (the original neutral palette) and Nude Dude (released after Nude Tude with more pinky tones). I ended up choosing Nude Dude ($36) because I wanted the rosy-dusty shades it had while Nude Tude had other warmer golden shades that I already had with my Naked by Urban Decay palette. I'm completely satisfied with my Nude Tude palette and have been using it basically daily since I got it. I love the wide range of colors it has and they're all really well pigmented and blend so easily. I don't get any patchiness with them and there's a really good amount of shimmery shades and matte shades. Beware that the dark colors are very pigmented so you don't want to be heavy handed (whereas the lighter shades you can get away with being heavy handed because they'll blend in more easily). The highlight shade is so good for the inner corners and underneath the brow bone and even all over the lid if you're doing a look that calls for that. I love the two dusty rose shades though because those are totally my style right now (one is shimmery and one isn't, 3rd column from the right) and they pair so well  with the darker browns next to them (2nd column from the right). While $36 isn't exactly cheap, it IS cheaper than the many other neutral palettes out there (ie. the Naked palettes are $54, Smashbox Full Exposure is $52, Too Faced The Chocolate Bar is $49) and I would say the shadow shades and quality are on par with all of those other brands so don't be afraid to try it even if Sephora doesn't stock it!

My sister wanted to try Meet Matt(e) Hughes ($17) in the shade Honest so we picked that up and lemme say it is super pigmented, matte, and creamy. The color is a bit more peachy that it appears in my photos and is described as a warm coral. It seems like it would be good on all skin tones and is very wearable. I think it lasts for a reasonable amount of time and fades well when you eat/drink/do stuff that would make it come off. The applicator is standard like most others though to be honest I prefer the heart shaped applicator tips with a pointed tip which really helps you get the edges of your lip without mistake. Definitely make sure you use a lip liner with this because mistakes are not easily forgiven. I think $17 is a bit up there in price especially since I've recently discovered the wonders of ColourPop (I know I'm late to the bandwagon) which has amazing liquid lipsticks for only $4-5 (they have sales a lot so you can usually get it discounted) and they're just as good, if not better, than this TheBalm liquid lipsticks.

How 'Bout Them Apples ($32) is a cream blush (well technically cheeks and lips) palette that is so pigmented and the color range is super wearable and versatile for all occasions. The packaging is cute (as are all of The Balm products, and as you can see in the photo below, the palette opens up vertically and on the top half, there's a HUGE mirror. Super great when you're traveling, on the go, or just not in a location where a full mirror is at easy access. Application works well with a beauty blender or dense brush but a normal powder brush would do as well. Gotta say this is a big hit and would definitely recommend it if you can pick it up on sale since full price is edging it a bit if you're like me and don't use blush that often.
I don't have a close up shot of the Time Balm ($28) foundation (my apologies) but it was definitely super orange-y/oxidized when my sister tried it out. I got the shade Medium (for my sister's Asian skin tone which I would say is about a Mac NC30 but maybe a little darker) and it just had a strong orange undertone that wasn't super flattering for the neutral undertone Asian skins generally carry; I'd say this foundation is better suited for Caucasian individuals. The puff that comes with the foundation isn't the greatest but that's expected so not a huge deal breaker really. This is one of the downsides of not having TheBalm stocked at Sephora or Ulta because you can't try out the foundations to make sure the shade fits you. So if you're not 100% sure if the shade will match you, I'd say save your money and spend a bit more for one you know matches you (aka one you can sample in store) since you can't return used/open items to TheBalm (understandably so).

All in all, I'd say I'm pretty pleased with this The Balm haul. I've wanted to try out their products for so long so I was really excited when I saw they had a 50% off sale! At full price, they're definitely a bit on the pricier range but they do go on sales periodically and some products can be found on sites like HauteLook for discount so look out for those if you're interested. The only product I'm iffy/so-so about is the Time Balm foundation but everything else I'd definitely recommend!

Tuesday, April 19, 2016

Breakfast, brunch, and lunch for two - cute sandwich and other food ideas!

I recently made a little mini tea time brunch for my mother and me (my sister was at work) and wanted to share what I made in case some of you are looking for food inspiration for your next tea party, fancy breakfast time (need to impress a man?), or lunch gathering!
Menu items including:
  • Lemon ricotta pancakes with slice bananas and drizzled honey (Original recipe here)
  • Mixed greens salad with strawberries, walnuts, blueberries, and raspberry vinaigrette
  • Romaine lettuce mixed with cucumbers, pecans, tomatoes, and homemade pesto lemon vinaigrette
  • Avocado toast with sliced cherry tomatoes 
  • Toasted smoked gouda cheese sandwich with sliced turkey, spinach, and candied walnuts (my mom actually tossed and toasted the walnuts herself!). Strawberry jam toe tie it all together
  • French brioche bread with cream cheese spread, cucumbers, and smoked salmon. Garnished with thyme (but really dill would have been better but I didn't have any at the time!)
  • Fruit bowl of bananas, cantaloupe, and blueberries
  • Lastly TEA! - "Yummy" by Lupicia. This is strawberry and vanilla flavored smooth rooibos tea; no milk added. It's not overly sweet smelling like some fruit teas and really has an amazing taste to it.
Cream cheese and dill is the perfect spread for a cucumber or smoked salmon sandwich so combining it with both of them was a no brainer. Unfortunately I didn't have dill at the time so sprinkled some dried thyme on top instead and it was pretty good! The freshing flavor of the cucumber really balances the salty smokey salmon and the smooth texture of the cream cheese all on a nice slice of fresh brioche (but any bread will do really). I find for this type of sandwich you don't need to toast the bread.
The lemon ricotta pancakes were SO, I repeat, sooo good. I linked the original recipe earlier but there are definitely lots of recipes online to use. My pancakes weren't bursting with flavor but if you have ricotta lying around, these are a good way to put your ricotta to use (if you're not a lasagna type person). I love how the pancakes are super fluffy and not overly sweet. I added in the lemon flavor by squeezing in some lemon juice and adding fresh lemon gratings over the pancakes. Added a side of sliced bananas but any fruit will do, some maple syrup or honey, and boom - sweet wholesome goodness.
Strawberry jam and honey to top off the pancakes and with sippings of the tea? Can't get much better than that! Having these cute little jars of jam and honey really add to the overall presentation which is why I'm so glad I nicked them from a hotel I stayed at a little while back haha! (Okay I didn't really, someone I was staying with had ordered sandwiches and they came with these jars of jam and honey but they didn't use them so gave them to me!)
Here's a close up of my (basically) cheese turkey sandwich. What makes this better than your typical sandwich is the fact that it's toasted so the cheese is all nice and soft, you have the extra sweetness from the strawberry jam and candied pecans (which also gives a nice crunch!), and you get your daily dose of veggie with that one leaf of spinach ;) Perfect right? This was actually my mom's favorite sandwich. Also can I add how CUTE the little wooden board is? I got it from Ikea for only $2.99!
Cheers to a successful tea time bonding with my momma <3 I hope this gave you some ideas for your next home-baking food excursion! The dining and silverware you use really make a difference in the overall presentation of your food so take your time and pick up random bits and bobs that will really tie together your whole table and the food you make. They don't even have to be expensive (cough my wooden cutting board!) and most of our tea cups and tea plates are thrifted or bought from garage sales. A few are from Daiso, our local Japanese $1.50 shop (most things there are only 1.50 including their glassware!) and some others from Hong Kong or TaoBao (the China ebay). Good luck and leave a comment below if you know any tea party bloggers that could give ME inspiration!

Saturday, November 21, 2015

The Quest for Guilt-Free Sweets: [Vegan] Persimmon Bread (no eggs, oil, or butter!)

What can I say, I'm a forever sweet girl... meaning I love sweets, not that I'm a crazy nice loving person (though well, if you were to say I was, I wouldn't stop you). But of course, my body, metabolism, genetics, and society all do not meaning I cannot, as much as I would like to, eat ice cream, cakes, and cookies all day every day. So I'm am on an endless quest to find healthier options for my usual sweet treats. Although today's creation is more inspired by my need to use up anything in the house before it goes bad - and in this case, it was the persimmons my mom's coworkers and friends had given her. Personally, I'm not a huge fan of persimmons. I'm not sure why but they're not my go-to fruit and I definitely wouldn't be eating them plain (I also hate papaya and I think persimmons and papaya are pretty similar but who knows).
I searched high and low on the Internet for persimmon recipes and finally decided to go with the one with the highest ratings - aka this one here from AllRecipes (my go to for almost everything I try out). One thing I especially like about AllRecipes (besides the fact that there are always such good reviews, feedback, and tips) is that you can adjust the serving size! The original recipe that I used was set to make 3 loves of bread! Since I've never made persimmon bread and I was planning on making a lot of modifications, I decided to play it safe and 1/4 the recipe to make one small loaf to test out first. (Trust me, I have a LOT more persimmon puree to use up.)
Here's what the ingredients of my modified persimmon recipe ended up as:
  • 1/2 cup persimmon pulp
  • 1/2 teaspoon baking soda
  • 5/8 cup white sugar
  • 1/4 cup unsweetened applesauce
  • 1 substitute egg (meaning 1 tablespoon flax seed + 3 tablespoons of water let to sit for 5 minutes or until it becomes a thick gooey paste)
  • 1/4 - 1/2 teaspoon ground cinnamon
  • 1/8 - 1/4 teaspoon ground nutmeg
  • 1/8 - 1/4 teaspoon ground cloves
  • 1/8 - 1/4 teaspoon ground ginger
  • 1/4 teaspoon salt
  • 3/4 cup all-purpose flour
  • 1/4 cup chopped/broken walnuts
*Note: I write ranges of measurements for the spices because I eyeballed them. All of my spices have a sprinkle top lid so I never really measure them, I just estimate. I actually put a lot more cinnamon than I was planning on adding but the end result turned out fine so I don't think it's a big deal (I know I'm a terrible baker who doesn't follow the golden rule of BE PRECISE). I think you can adjust the amount of spices you want depending on whether or not you like them. I LOVE pumpkin anything and the spices that go with it so I assumed I'd like them just the same with the persimmons. 

If you ask why I didn't use an egg, it's not because I'm allergic to them, it's more like eggs are quite expensive at the moment where I live and I'd rather save my eggs for recipes that do require it (ie. to make an egg omelette). Flax seed is really good for you and I've used it in multiple recipes and had success replacing eggs with this flax seed+water combo. I was lucky that this recipe didn't call for butter and only oil as I was able to replace the oil with applesauce. I think applesauce can be used to substitute for butter but I'm not sure and haven't tried it yet so who knows. I have, however, used applesauce in a chocolate bread recipe before and it worked perfectly also so I had faith in subbing out the oil. If you aren't feeling so daring, I saw in the reviews a lot of people used olive oil to up the health factor. For those of you wanting to go even more healthier (which yes this isn't 100% guilt free but it is closer than the original recipe), I'd try using whole wheat flour or using some flax seed (without water) in place of some of the all-purpose flour (I wouldn't recommend using flax seed for ALL the flour though). You can also use honey instead of sugar or some sort of no calorie sugar (Monkfruit anyone?).
I followed all the same steps as the original recipe with minor modifications which you'll see below.
  1. Preheat the oven to 350 degrees F (175 degrees C). Line 6x3 inch loaf pan/glass Tupperware with parchment paper (I actually used a special half parchment paper half foil but normal parchment paper is fine I think).
  2. In a small bowl, stir together persimmon pulp and baking soda. Let stand while completing step 3 to thicken the pulp. It will become a thick jello like blob.
  3. In a medium bowl, combine sugar, applesauce, flax seed egg, spices, and salt. Blend until smooth (I actually used a spoon to mix everything because I was too lazy to grab a whisk/use my electric beater/the spoon was working fine). 
  4. Mix in persimmon pulp and flour in alternating manner. I did 1/4 cup flour, half of persimmon pulp, 1/4 cup flour, other half of persimmon pulp, 1/4 cup flour. 
  5. Add walnuts. 
  6. Pour batter into pan (up to 2/3 full)
  7. Bake for 1 hour in the preheated oven, or until a toothpick inserted comes out clean. (I used a conventional oven so I actually made the temperature like 345 F and took my bread out at 50 minutes.) Cool in pan for 10 minutes (I waited like 5) before removing to a wire rack to cool completely.

 This bread is similar to a banana or pumpkin bread in that it's super moist. I'm not sure if I would call it dense..I guess it is but not in the heavy rich way. I think I could have baked my bread a little longer in the oven to dry it out a bit more and make it less moist (I'm not 100% sure if that would have helped but that's what the Internet suggests so I might give that a try next time I make this..which will be soon seeing how much persimmon puree I still have!) A lot of reviewers mentioned difficulty removing the bread from its pan due to the extreme moistness which is why I lined my glass loaf-shaped Tupperware with parchment paper. I didn't have to worry about cleaning the pan and literally just pulled the bread out of the pan! I let it cool on the wire rack for a good 10-15 minutes before prying the parchment paper away from the sides of the bread.
Other changes I might do for my next attempt include decreasing the sugar further (although I found the bread to be perfect in sweetness but hey, you can always have less sugar!) or using honey instead of sugar, increasing the amount of flour I used to make the cake slightly less moist, adding raisins or more walnuts, and upping the spices. I mean honestly I'm really satisfied and happy with how the bread turned out but I want to play around with the ingredients more and see what a difference it makes. Normally I don't make a recipe more than once or twice because I don't have enough ingredients or time, but really this was so easy and simple and I have so much persimmon puree, I might as well!

Anyways, that's my take on persimmon bread. I know lots of people have their own take on it so if you know a recipe you think is better and/or healthier, leave it in the comments below. Or if you even have another persimmon recipe cause.. we have SO many persimmons and puree that I don't know how many times I can make this bread before my parents get sick of it.

Wednesday, March 25, 2015

Baking with Tammy: How to Make Cookie Stamps and USE them! (Cookie Recipe included)

Today I want to share with you how to make cookie stamps and the best type of cookie recipe I've found to use them on. If you don't know, cookie stamps are literally stamps (like the ones you would dip in ink) except you use them on cookies. They're generally made out of plastic and can be found at most places - craft stores, grocery stores, etc. The hard part is finding one with a design you want! Ebay has a great selection and I actually purchased this letter cookie stamp for super cheap and it works perfectly well. But of course, sometimes you want to make your own special design right? For me, it's Game of Thrones cookie stamps. Hopefully you all know what that is, but if not, Game of Thrones is a TV show on HBO and it's kind of.. intense (ie. blood and lots of nude people) but it's a really great show (story line wise). I've been reading the books (half way through the latest one!) and I'm loving it. But anyways, I'm part of a school club and we're having a bake sale so we decided to make it Game of Thrones themed so I needed cookie stamps to make cookies with the House symbols engraved (or stamped) onto them. That being said, on Etsy, someone IS selling Game of Thrones (as well as some other themed) cookie stamps but they were more than $10 each and would be shipped from Australia, so with my small budget and lack of time, I decided to try and make them myself.
I looked up a ton of cookie stamp tutorials and found this page to be the most useful and was the one I followed. The author is pretty vague about their recipe that they used to make the salt-dough, which is what I used to make my cookie stamps. You can use clay, which was my original plan, but the author, and from what other people online were saying, said it might not be safe even if the clay is said to be non-toxic. Honestly, I don't know but I thought it wouldn't hurt to try using salt-dough and it worked out fine. The webpage recipe calls for "one part hot water, one part salt and two parts plain all-purpose flour". I also looked up other recipes for salt dough and they were all about the same so I ended up using this one. A tip that I think is an obvious one, but still a good one to mention, is to start off with less if you're not sure. I mean especially for me trying out the cookie recipes, I'm glad I wasn't making giant batches because if they didn't turn out well, well then I'd be the one eating all the cookies which, as much as I love my cookies, would not be a good thing. Or I'd have to throw them away which my sister does when she isn't happy with her baking results but I can never do that. Hm maybe that's why I'm so much fatter than my sister (LOL). Ok back on the topic, what I used to make my salt dough was:
  • 1/4 cup of hot water
  • 1/4 cup of salt
  • 1/2 cup of all-purpose
That gave me just enough to make 5 cookie stamps as shown below. The salt dough was great, way better than cookie recipes - probably because there's no butter. But anyways it was totally not sticky and easy to roll out. It takes a while to harden completely so you have a lot of time to mess up (like me) or to spend forever making a design (also like me). I had to free draw out all of the designs and I used a combination of tooth picks and pencils. If you're into nail art and have dotting tools, I think those would be really great too (I didn't have mine at the time). Free-hand drawing is super hard but my mom did come up with the idea to use saran wrap and trace out the designs onto the saran wrap using sharpie and then put the saran wrap over the salt-dough and sort of poke holes to get the basic outline of the design into the dough. Then we removed the saran wrap and finished tracing/filling in the gaps of the design on the salt dough. It wasn't a perfect method but it did work a bit so if you're struggling, you can give that method a shot. Once you're satisfied with your designs (and make sure you make them deep enough with sharp defined edges or else the designs will not stamp into the cookies very well), you cut them out. I used a circular glass cup from my local Japanese Daiso (cheap dollar store basically) and it worked perfect. That's also what I used to cut out my cookies, which you'll see later. I left my salt-dough cookie stamps to dry for about a day and a half (overnight) and then baked them at 275 for who knows how long. The webpage I was looking out wasn't specific about the temperature or time for baking them but other sites said about that temperature and I started off with 20 minutes. I flipped them over and then did another 10 but they still didn't feel ready so then I did another 20. I would keep a good eye on them if you're worried especially since what I'm giving you isn't an exact baking time.

Now once I had my cookie stamps all baked and hardened, I set off to find the perfect cookies for stamping. Since I've done cookie cutting before, I know that cookies spread when you bake them so I wanted to find a recipe that spread the least and would hold my design the best. Looking back at the page that I got my salt-dough recipe from, the author links you to this sugar cookie recipe and says they just didn't add baking powder. I didn't use that recipe though because I forgot about it and first tried this sugar cookie recipe from Allrecipes. I had a lot of trouble with it, but the one thing I like about Allrecipes is that you adjust the measurements to change the serving size to how you like. That original recipe makes 60 cookies and since I was just trying it out, I changed it to only 10. I'm glad I did because it definitely wasn't the recipe for me. Not that it was bad because hey, there are so many reviews on that recipe saying how good it is but for me, I'm not sure what I did wrong but I left it in the fridge for over 6 hours and when I came back and tried to roll it out, it was way too sticky. So I used powdered sugar and flour to try and make it firm enough to roll out and stamp. I didn't use precise measurements or anything like exact weight or exact leveling off the flour, but I never do and usually my stuff turns out fine LOL but perhaps that's why this recipe didn't work for me. Nevertheless, the cookies did taste good but they just didn't hold the design very well. As you can see from the picture, the design is there, but it's faint. That picture is also of one of the better cookies that turned out. Some of the other ones just completely did not show up. I should mention that I didn't leave out the baking powder and that most likely contributed to the rising/spreading of my cookies.
So the next recipe I used, and had successful results, is from Food Network. This recipe is a shortbread recipe because after my fail with the first sugar cookies, I decided to look up some tips on how to prevent the design from fading. From what I read, most people recommended using a recipe without baking soda or leaveners which cause the cookie to rise. Many other sites also recommended shortbread cookies rather than sugar cookies so that's how I stumbled upon the Foodnetwork shortbread recipe. The recipe said it makes 20 cookies but called for 3 STICKS (I know it says 3/4 lbs which is important because some people in the reviews said they had thought it was 3/4 cup which is WAY less butter haha) of butter and I didn't exactly want to use that much butter on a recipe I'd never tried. So I chose to 1/3 the entire recipe allowing me to only use  1 stick of butter, equivalent to 1/2 cup of butter. These are the measurements I used:
  • 1 stick of butter (ie. 1/2 cup)
  • 1/3 cup of white sugar
  • 1/3 tsp of vanilla extract
  • 1.17 cups of flour
  • 1/12 tsp salt
Now as you can see, some of the measurements (aka the flour and salt) are a bit wonky. But like I said earlier, I'm never too precise when baking (which I know isn't a good thing) and since I'm lazy about washing dishes, I just re-used my 1/3 cup that I had used for the white sugar and did 3 scoops of flour (=1 cup) leveled off by shaking the cup so that it was about 1/3.  Before I ramble on further, I did follow the instructions from the Food Network recipe meaning I did this:
  1. Cream butter and sugar 
    1. I say cream meaning I used my sister's kitchen aid and used the white paddle mixer instead of the standard stainless steal whisk. Most people say not to over do this step so I just had it on low and continued to mix it about 20 seconds after the butter and sugar had came together. My butter probably wasn't at room temperature since I had taken it out of the fridge while I got the rest of my ingredients so it was probably only out of the fridge for about a minute.
  2. Add in vanilla extract and mix.
    1. I mixed for about 20 seconds before moving on to the next step
  3. Add flour and salt
    1. Like I mentioned earlier, I used my 1/3 cup from the sugar measurement and added in the flour in thirds while mixing. Because a lot of people in the reviews had said the dough had been too crumbly, I wanted to make sure each flour addition mixed together before adding the next spoonful of flour so that I didn't add too much flour. I'm not sure if it made a difference to add it in in thirds rather than all at once, but after my 3 1/3 cup spoonfuls, I added a little (about half a tablespoon) more of flour and let it mix together. I then used a rubber scraper spoon to mix in any flour on the sides of the bowl and it easily formed a nice dough ball.
    2. I want to mention that the dough wasn't crumbly or sticky at all. It was seriously perfect. A little oily feeling from the butter but it didn't stick to my hands at all. It was kind of awesome *__* 
    3. Oh and another side note, the original recipe says to mix the flour and salt together in a bowl before adding but obvi, lazy me didn't do that and just sprinkled (hey that's like what 1/12 a teaspoon is right?) a dash of salt in with my second addition of flour. 
  4. Shape dough into ball, roll out, stamp, and cut!
    • At this step, I split my dough in half and rolled out one half and put the other half in the fridge. The original recipe says to roll out the dough and put it in the fridge for half an hour but many people said they hadn't needed to do that and my dough felt perfectly fine so I though it'd try half without putting it in the fridge and both of them worked out fine.
    • Note, I rolled my dough to about 1 cm thick. I did it a little thicker (about 1.5) in the beginning because using my stamps, I would press down so the dough would thin out.
    • A tip I found while researching is to roll your dough out on your parchment paper so that you don't have to ruin the cookies by transferring them from wherever you rolled them, to your cookie sheet. By rolling them on the parchment paper and stamping and cutting them there, I could just take the parchment paper and plop it on the cookie sheet and bake. I would HIGHLY suggest doing this because, especially for my thinner cookies, when I tried to pick them up because they were too close to another cookie I had stamped, they would slightly deform.
     5. Bake until edges start browning at 350 F.
    • I know, annoying, I'm not giving you an exact time right? But that's because the original recipe calls for 20-25 minutes but I was using a toaster oven and only baking 4-5 cookies at a time (I made 3 batches) so I only baked my cookies for 10 minutes, 11 minutes, and 12 minutes (respectively for each batch). I was keeping an eye on my cookies and they weren't even browning at the edges very much so I probably could have kept them in longer. 
Okay I think that's a detailed enough instruction guide on how I got my cookies to turn out nicely. Some other tips I want to mention that really helped me get nice cookies were:
Finished result~! Super happy with them :) As you can tell, the letter stamped cookies are definitely more prominent but I think my cookie stamps fared pretty well for what I was expecting.
  • Lightly flour your cookie stamps before stamping. I made the mistake of not doing that for the first cookie I stamped using the shortbread recipe and the dough totally stuck to it so I had to like scrape/peel it off. Flouring helps SO MUCH. I can not stress that. I filled up my 1/3 measuring cup with a little bit of flour and would use that to sprinkle and rub onto my stamps. I then tapped off the excess on my surface (aka cutting board lol). Some people also use powdered sugar instead of flour.
  • Make sure your oven is properly heated to the right temperature. I read this helps prevent spreading if it's at the right temperature the moment you put in the cookies. Also don't open the door to peak at them, apparently this ruins them. Now I'm not a super expert but I follow those two rules and my cookies didn't spread and turned out great so it doesn't hurt right?
  • I would suggest putting some the dough you're not using in the fridge if you can. Since I was using my letter stamper, it actually took me some time to form out my letters and put them into the bar to stamp so I would put the dough I wasn't working with in the fridge while I was stamping out a portion of the rolled out dough. While the dough isn't sticky, it does get a little mushy (not like banana mushy!) and soft so putting it in the fridge doesn't hurt in my opinion.
  • For sugar cookies, people say to stamp & cut your cookies and then leave them in the fridge before baking. I tried that with my original recipe and I don't think it did much. I didn't do it for my shortbread cookie recipe and they were fine. Obviously that could be due to differences in the ingredients I used and it makes sense to put them in the fridge before you bake them so they don't spread as much BUT for the shortbread recipe I used, I think you'll be fine if you don't do this :)
So that's it for this incredibly long post. Let me know if you try out this recipe or if you have any other cookie recipes that worked for your cookie stamps. I hope this advice/my notes help you along. Definitely go read up some other sites and other people's reviews because everyone has a different kitchen (ie. oven, temperature, climate, butter softness levels) and I'm sure all of this factors in to whether or not you have a successful result. So just try little batches so that you can adjust ingredients or methods if the first attempt doesn't work out and don't give up! Good luck and have fun baking~!