Being your typical Asian girl, long thick full luscious eyelashes are something I don't have. It's never been extremely bothersome though and I've never felt self-conscious or ashamed of my lashes. Heck, I'm pretty lucky because my lashes are actually a decent length for most Asians and I'm fortunate enough to not have short lashes that grow downward and into my eyeballs (yes that's a thing; it happened to my cousin and also a friend who actually had to get surgery to correct it because they were scratching/damaging her eyes!).
But that's besides the point. After watching numerous beauty gurus talking about RevitaLash or some other lash elongating or thickening product (many of which cost $60 and upward for a small mascara size bottle), I decided to give some DIY products a go. I started with just using my organic lipbalm to "coat" my lashes every night but then I did some research and found that Vaseline can be helpful (some controversy on it though) as well as castor oil. Castor oil seemed to be really highly recommended so I decided to get a bottle of castor oil from Now (pretty reputable brand, highly rated) on Amazon ($9.15 only for 16 oz!). The bottle is HUGE. I'm not sure how I'm going to finish it although I have been able to use up more by mixing a squirt of castor oil with some cheap body lotion and using it on my body.
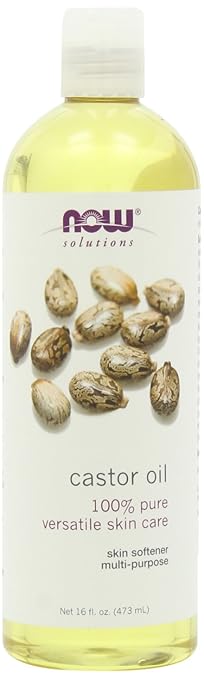
I've used the castor oil every night (for about 2 months now) and apply just a little (pea size amount) on the tip/edge of my index finger. I put any excess oil onto the back of my other hand and apply the oil to upper lashline (the root of the lashes!) of one eye. I usually swipe the side of my index finger back into the excess I've wiped onto my hand to get some more product and then move onto the other eye. Then I'll use what's left on my finger to coat the bottom lashes. People say you really just need to get the base/root of your eyelashes rather than the whole entire eyelash but I find the oil on my finger tends to hit/coat the whole lash while I'm focusing on putting product on the lash line so basically, I end up coating my lashes as well as the root. Don't think it hurts to nourish the lash tips although if it gets in your eye, it kind of itches but it's not a huge deal (I actually wear night time contacts and haven't had too much problem with the product getting in my eye or irritating my eyes but just a word of note I suppose). Probably the better method to apply the castor oil would be to use a Q-tip/cotton swab but I'm too lazy to buy them/my finger works just fine for me but to each their own.
Now I'm not an ophthalmologist or optometrist so I can't say if this is safe or bad for your eyes/lashes but I haven't noticed any negative side effects in the last 2 months that I've been doing this (ie redness, allergic reaction, etc). The only possibly one downside is that maybe the castor oil clogs my pores because about twice, I've gotten a pimple on my upper cheekbone/under my eye which is pretty rare for me but I'm not sure if that's due to the castor oil. I've also gotten about 2 pimples within my eyebrows which seem to be associated with when I put any leftover castor oil through my brows (thought I'd try to thicken up those too) so I've stopped doing that. I read on a website (here is one site and another site that talks about the comedogenic properties of castor and other oils) that castor oil can clog pores on some people so I'd definitely suggest trying it out for a day or two first before really going for it. Despite possibly getting pimples around my eyes because of the oil, I haven't gotten any pimples on my eyelids or lashline (no styes) and I actually had what I think might have been a milia (keratin filled bump) which you can see in the initial pictures below and it's now gone away possibly because of the castor oil (it gets on my eyelids when I'm applying it, sometimes I rub the leftover/excess around my eyes like eye cream). So as a final warning, just be aware of any skin changes and stop if you think the castor oil is causing negative effects.
Okay so here's some picture results from my last 2 months of using castor oil (what you've all been waiting for).
I apologize for the lighting difference and meh quality but these were taken off my phone with no product on. The top 2 photos were at the start (February 2017) and the bottom 2 photos are now (April 2017). I'm going to continue using the castor oil since 2 months isn't a whole lot of time, and update this as it goes but so far I haven't seen that much of a difference..can you guys? It's definitely a bit disappointing that there's not much change and I actually did some MORE research on castor oil and found that only some people have actually seen eyelash growth with it so maybe it's not as effective as I initially though.
There is an actual medical product that boosts eyelash growth but requires a prescription and is incredibly expensive. It's called bimatoprost (generic) or Latisse (brand name) and has been shown to be extremely effective in lengthening your lashes. I don't plan on getting that though because (1) price and (2) a friend tried it and said after stopping, her lashes seemed stunted in growth (this has been mentioned by others who've used it as well).
So hopefully this was somewhat helpful or interesting to read. I'm sorry castor oil isn't the miracle product (for me at least) but give it a shot if you want - maybe you'll be different? Anyways, what other DIY or actual real products have you guys tried to make your eyelashes grow?
A blog about the random discoveries of beauty through the life of a normal girl.
Showing posts with label beauty. Show all posts
Sunday, April 30, 2017
Tuesday, March 14, 2017
New Lip Products (Kylie Jenner and Alexis Ren x ColourPop Collection) + Swatches!
Recently I've been getting more and more into lip products especially liquid lipsticks. They're so fun (the bold colors!) and last quite well throughout the day, even through meals (well if you get the right brand... more to come on this!). I still need to work on staying inside of my lip lines especially since liquid lipsticks aren't as forgiving as a traditional lipstick. Anyways, Alexis Ren recently had a collaboration with Colourpop and released about 6 items in her collection. I picked up 4 of the 6 and thought I'd share a swatch of these along with 2 Kylie Jenner liquid lipsticks my sister got recently as well.
![]() |
| Find this and more fun shots on my Instagram! |
-Pressed Powder Face Duo in Topaz ($15)
-Blotted Lip in Lexi and Deja Vu ($5 each)
-Ultra Satin Lip in Bare Necessities ($6)
The two Kylie Jenner matte liquid lipsticks my sister picked up were in the shade:
-Candy K (lip kit, $29): described as a warm pinky nude
-Kristen ($17): described as a warm brown berry
I swatched all the lip products on my hand down below. I also have included a swatch of Beeper, an ultra satin lip liquid lipstick from ColourPop which is said to be comparable to Kylie Jenner's matte liquid lipstick in Dolce (which unfortunately I don't have but there are lots of comparison photos online!)
Personally, I think the quality of the Kylie Jenner and Colourpop liquid lipsticks are pretty much the same. They both have the same lasting power (Colourpop may actually last a little bit longer through food) and have high pigmentation. The Kylie Jenner matte liquid lipsticks are significantly more expensive and have a buttercream/frosting scent to them so if you're not into that, I would avoid these. The Colourpop lippies are all (I have multiple other ones as well) unscented. Like all the liquid lipsticks I've tried, both brands' liquid lipsticks tend to dry down a little darker then when you first apply them so just a word of caution. I would advise not applying more than 1 or 2 layers of either liquid lipstick as that tends to make them more easily rub off/smear (I learned the hard way..). Neither brand makes my lips feel too dry but I would advise lip balm after a day's wear of any liquid lipstick. They both fade off throughout the day nicely and don't flake off like other brands.
I like both the Kylie Jenner colors in terms of wearability (easy to wear on an everyday basis) where as some of the Colourpp liquid lipsticks can be a bit too bold for everyday. Beeper is definitely a dark brown mauve-y color (as you can see in the swatch) which makes it less work-friendly but I suppose that depends on your field of work. Bare Necessities is a nice peachy pink color though I noticed it did seem to smear a little bit more easily than Beeper or my other liquid lipsticks from the regular Colourpop collection. Not sure if that's because they used a different formula or if I was just eating/drinking more the day I wore Bare Necessities but thought I might just throw that in. Bare Necessities also might not look good on every skin tone (I think if you're a little darker than a MAC NC30-35 it might not look as good but that's just my opinion/from what my sister noticed when she wore it as she is a tad darker than NC30-35).
Lexi and Deja Vu are really nice. Both color are easy to wear and you can build up the color intensity. They're very creamy like a classic lipstick. They're not too drying and are a good consistency that doesn't accentuate your lip creases. The swatches on my hand were about 3-4 strokes/rubs on my hand (to give you an understanding of the pigmentation). I like the packaging of all the Alexis Ren collection products. It's like nice and classy with the black and gold!
I think I'll update this with more photos of me actually wearing the products on my lips/face but for now, hope you enjoy the mini review/hope it helps you decide if you want to buy them or not!
Labels:
2017
,
alexis ren
,
beauty
,
collaboration
,
colourpop
,
honest
,
kylie jenner
,
lippies
,
lipstick
,
liquid
,
makeup
,
matte
,
review
,
swatch
,
swatches
Tuesday, January 3, 2017
TheBalm/The Balm Cosmetics Review
The Balm Cosmetics has been a brand that I've heard loads about but just never got around to trying because it wasn't in available at Sephora, Ulta, or any drugstores. However, some time ago, there was a site wide 50% off sale on their online website so my sister and I jumped on it and picked up a few goodies we'd been eyeing for ages. So now that I've gotten to try out the products and put them to the test, I thought I'd do a little review and give you my thoughts on them!
I think it's only appropriate to start with Mary-Lou Manizer ($24 off the Balm site) because this was the first the Balm product I heard of. It's definitely a cult favorite and has been tested by many others and I have to say, I agree with the hype. It's a really beautiful light beige highlighter (not too warm and not too cool) with a beautiful fine shimmer that doesn't make you look like a disco ball but definitely makes you stand out. The packaging is quality and the mirror is huge so it's perfect for travel or on-the go makeup. You can double it for eyeshadow or highlighter too which is awesome. Definitely no complaints here. If you want to try out their other shades of highlighters though, they have a trio package with all 3 shades that they have in a mini/deluxe size which I semi wish I got because I bet they all would have looked really nice!
Next up is Bahama Mama ($20), a warm bronzer that hits the spot. I've been using it daily since I got it and absolutely love it. It has ZERO orange tones to it so it won't make you look like an oompa loompa (is that how you spell that..?) and blends in so easily. It's not SO pigmented that you get too much pigment when you swipe your brush into it (which is a good thing, I dislike products that are so soft that you get way too much product even with the lightest touch) but it definitely has color so don't be too hard with it. Like the highlighter, you can double this as an eyeshadow as well and it'll contour your eyes flawlessly. It is a bit small for $20 but since I got it half off, I'd say $10 is a good deal. I have Hoola by Benefit and the NYC Sunny Bronzer (really amazing for the price) so I'd say the NYC Sunny has a bit more orange than Hoola or Bahama Mama and Hoola is just a touch lighter than Bahama Mama. I love both my Hoola and Bahama Mama though so can't really say which I'd choose if I had to choose one. Maybe Hoola since it does come with a brush that is excellent for contouring but I think Bahama Mama's color is just SLIGHTLY better for my skin tone. Also keep in mind Hoola by Benefit is $29 so if price is a deciding factor, think on that (NYC's bronzer is like.. less than $5 by the way).
When picking out which products I was going to get, I had the hardest time choosing between Nude Tude (the original neutral palette) and Nude Dude (released after Nude Tude with more pinky tones). I ended up choosing Nude Dude ($36) because I wanted the rosy-dusty shades it had while Nude Tude had other warmer golden shades that I already had with my Naked by Urban Decay palette. I'm completely satisfied with my Nude Tude palette and have been using it basically daily since I got it. I love the wide range of colors it has and they're all really well pigmented and blend so easily. I don't get any patchiness with them and there's a really good amount of shimmery shades and matte shades. Beware that the dark colors are very pigmented so you don't want to be heavy handed (whereas the lighter shades you can get away with being heavy handed because they'll blend in more easily). The highlight shade is so good for the inner corners and underneath the brow bone and even all over the lid if you're doing a look that calls for that. I love the two dusty rose shades though because those are totally my style right now (one is shimmery and one isn't, 3rd column from the right) and they pair so well with the darker browns next to them (2nd column from the right). While $36 isn't exactly cheap, it IS cheaper than the many other neutral palettes out there (ie. the Naked palettes are $54, Smashbox Full Exposure is $52, Too Faced The Chocolate Bar is $49) and I would say the shadow shades and quality are on par with all of those other brands so don't be afraid to try it even if Sephora doesn't stock it!
My sister wanted to try Meet Matt(e) Hughes ($17) in the shade Honest so we picked that up and lemme say it is super pigmented, matte, and creamy. The color is a bit more peachy that it appears in my photos and is described as a warm coral. It seems like it would be good on all skin tones and is very wearable. I think it lasts for a reasonable amount of time and fades well when you eat/drink/do stuff that would make it come off. The applicator is standard like most others though to be honest I prefer the heart shaped applicator tips with a pointed tip which really helps you get the edges of your lip without mistake. Definitely make sure you use a lip liner with this because mistakes are not easily forgiven. I think $17 is a bit up there in price especially since I've recently discovered the wonders of ColourPop (I know I'm late to the bandwagon) which has amazing liquid lipsticks for only $4-5 (they have sales a lot so you can usually get it discounted) and they're just as good, if not better, than this TheBalm liquid lipsticks.
How 'Bout Them Apples ($32) is a cream blush (well technically cheeks and lips) palette that is so pigmented and the color range is super wearable and versatile for all occasions. The packaging is cute (as are all of The Balm products, and as you can see in the photo below, the palette opens up vertically and on the top half, there's a HUGE mirror. Super great when you're traveling, on the go, or just not in a location where a full mirror is at easy access. Application works well with a beauty blender or dense brush but a normal powder brush would do as well. Gotta say this is a big hit and would definitely recommend it if you can pick it up on sale since full price is edging it a bit if you're like me and don't use blush that often.
I don't have a close up shot of the Time Balm ($28) foundation (my apologies) but it was definitely super orange-y/oxidized when my sister tried it out. I got the shade Medium (for my sister's Asian skin tone which I would say is about a Mac NC30 but maybe a little darker) and it just had a strong orange undertone that wasn't super flattering for the neutral undertone Asian skins generally carry; I'd say this foundation is better suited for Caucasian individuals. The puff that comes with the foundation isn't the greatest but that's expected so not a huge deal breaker really. This is one of the downsides of not having TheBalm stocked at Sephora or Ulta because you can't try out the foundations to make sure the shade fits you. So if you're not 100% sure if the shade will match you, I'd say save your money and spend a bit more for one you know matches you (aka one you can sample in store) since you can't return used/open items to TheBalm (understandably so).
All in all, I'd say I'm pretty pleased with this The Balm haul. I've wanted to try out their products for so long so I was really excited when I saw they had a 50% off sale! At full price, they're definitely a bit on the pricier range but they do go on sales periodically and some products can be found on sites like HauteLook for discount so look out for those if you're interested. The only product I'm iffy/so-so about is the Time Balm foundation but everything else I'd definitely recommend!
Labels:
2016
,
bahama mama
,
beauty
,
best
,
blush
,
bronzer
,
cosmetics
,
cream
,
haul
,
highlighter
,
liquid lipstick
,
make up
,
makeup
,
makeupalley
,
mary lou manizer
,
matte
,
nude dude
,
review
,
sale
,
the balm
Friday, October 30, 2015
Get the [Nail] Look: A Pastel Galaxy
Everyone loves the good old classic galaxy nail, but adding pastel? Well that's a match made in heaven! (Okay maybe not really but you get my enthusiasm). I saw some pastel galaxy nails on Pinterest and just had to recreate them and share them with you! Honestly they're the same technique as a normal galaxy nail, you just need to pick out all your favorite pastel or light colored polishes - they can be shimmer, glitter, or cream. You can also choose only a few colors to create a different effect (maybe a more cool-toned sky or a warmer one or if you want to be fun, choose them all like me! Although I think I ended up with a more cool toned galaxy nail).
Please
excuse the messiness/dryness of my cuticles. My hands were super dry
the week I did this and a little on the shorter side but as you can
tell, the nails still turned out beautifully!
I used the following nail polishes (listed below) but honestly any
light or pastel colors you have will work. I also used one of those
cheap makeup sponges that you can get from Ulta or Sephora to stipple on
the colors. I first cut the sponge into roughly 0.5 cm by 0.5 cm
squares and used a cheap tweezer I got from Hong Kong to hold the sponge
pieces to hold the pieces while I stippled color onto my nails. You
want to make sure you have a good white base nail polish by the way to
avoid any sort of dimpling or weirdness which you can tell sort of
happened with mine.. -shrug- Oh well haha.From left to right:
-L.A. Colors Art Deco Nail Art Lacquer, White
-Pop-Arazzi Nail Polish, Icing On The Cake (cheap nail polish from CVS but any white will do; I'm not sure I would recommend this.. it's not terrible but you need at least two coats and it can be thick..)
-Covergirl Coral Silk
-Orly Spark
-Revlon Minted
-Sally Hansen Breeze Blue
-H&M Beauty Bandit (not sure if this is sold anymore since they appear to have changed their packaging)
I should also mention that when I was finished, I used one of those shimmery top coat add on nail polishes (not really sure how to describe it but its super iridescent) from Skin Food (a Korean brand). I can't seem to find a photo or name of it online so I'm not sure if it's still available but it's not necessary to get the galaxy effect. You can coat your nails with a fine white glitter nail polish if you have one to save yourself the trouble of having to spot on white 'stars'. I finished my nails with my usual Seche Vite top coat which gave them the perfect gel finish. I used dotting tools from Ebay to draw my stars but a toothpick of bobby pin will work fine.
Friday, June 26, 2015
Disney Princess Series Nail Art: Beauty and the Beast
I used the following nail polishes if you want to try and at least recreate the same color scheme. If you don't have stickers like I did, you can definitely still just use a gold glitter and apply it at the tips or in a half moon at the bottom or draw more red flowers (and better than mine). I really hate how blotchy my red rose was sigh but I think my right hand flower also had ugly leaves so that didn't help.
-Zoya in Piaf
-Sally Hansen Hard as Nails Extreme Wear in 180 Monarch-y
-Essie Mojito Madness
-Forever 21 Ruby Red
Saturday, January 24, 2015
Get the [Nail] Look: Flower Tips
I loved this look so much that I decided to try and recreate it. I couldn't find the right pink, and I still can't! So if you know what polish looks similar to the pink in that picture, PLEASE let me know down in the comments below because I literally spent an hour searching up very pastel pink nail polish and swatch trying to find the perfect color. I ended up giving up because I couldn't find any color close enough and just stuck to a very light pastel pink that I had. It's a bit too light for my liking but I'm pretty happy with the end result!
I used the following nail polishes (shown in order from left to right):
-Sinful Colors Nail Polish in Easy Going
-Essie Nail Color in Mojito Madness
-Revlon Colorstay Nail Enamel in Cafe Pink
-Orly White French Tips Nail Polish
-Essie Nail Color in Camera (discontinued)
Although the bright red nail polish by Essie is discontinued, you can use any sort of red-pink nail polish that would blend well with the pink. Or you can totally make this look your own and choose a different flower color like yellow roses or even blue roses if you're feeling creative ;D
Steps:
1. Paint base coat with Easy Going by Sinful Colors. This polish can be pretty streaky so you need at least two if not three coats. Wait for it to completely dry. Be patient!
2. On a scratch piece of paper, put a drop of the white (Orly French Tips), pink (Revlon Cafe Pink), and red-pink nail polish (Essie Camera) so that they're all touching. Using a rounded tip (ie. a dotting tool or the knob of a bobby pin), swirl right in the middle where all the colors meet so that your rounded tip has a bit of all colors.
3. In a C or circular shaped motion, start drawing the first petal of your rose. Continue on going towards the center. Paint about three roses per nail. (Try not to crowd them as much as I did so leave some extra space in between). Let dry.
4. Add the leaves! Using a green polish (Essie Mojito Madness) and a tooth pick, create leaf like structures.
5. Let it all sit a bit before adding a top coat. I used Seche Vite as usual which works for not completely dried polish but it depends on what top coat you are using. Be careful that your design isn't so wet that it smears when you add the top coat.
6. Finished~! Make sure to take a picture for instagram and tag me (@creamydinner) ^__^
Sunday, December 28, 2014
A peek at my Frosty VoxBox from Influenster
With that being said, let me share with you the products I received in my Frosty VoxBox!
One of the first things I noticed was the McCornick Gourmet bottle of thyme. I'm no professional chef but I do know that thyme is a super useful dried herb when it comes to cooking. I've used it to season lamb, mashed potatoes, and various other dishes so I was actually pretty excited to see this in my VoxBox. I recently used it for our family Christmas dinner to season our roasted vegetables and it was so good! McCormick is a brand I've grown up with and I think it's one of those "family brands" that have just been around for a while. The glass bottle packaging definitely makes this bottle look more classy and professional than their usual plastic ones. I definitely think I might pick up a few more herbs or dried seasonings from this "gourmet" line by McCormick.Anyways that's it for my Frosty VoxBox. I hope you guys enjoyed the mini review of everything and have a wonderful new year's eve/new year if I don't post anything before 2015~!
Disclaimer: I received these products complimentary from Influenster for testing purposes. However, all opinions are my honest and true thoughts!
Friday, May 23, 2014
Introducing the GoVoxBox from Influenster
Hi everyone~! Sorry it's been a while since my last post since I've been so caught up with my exams but summer is almost here so I know I just have to push through this last stretch and then it'll be all over! As my fellow Kpop lovers would say "Fighting~!" haha ^__^ Another thing keeping me going is also knowing that my family and I are going to Yellowstone National Park for a road trip right after my last exam! I'm so excited and actually, my GoVoxBox from Influenster couldn't have come at a more perfect time! I was so excited to receive it and it really has a bunch of products that are just perfect for my family road trip!
As you can see, it contains items perfect for any outdoor activities really! A bag of almonds to snack on, a protein shaker bottle (I'VE ALWAYS WANTED ONE OMGOSH NOW I'M PART OF THE COOL FITNESS CLUB LOL <3), protein shakes to keep me fueled throughout the day, tampons in case of ..well you know haha, and even shoe inserts to make sure I can walk the distance! I was also delighted to see the pumice stone because I walk outside barefoot all the time and my heels are just (okay sorry if this is TMI) caked with dead skin. It's so bad that when my foot itches, I really have to dig my nail into my skin because it's so thick that just scratching the surface doesn't get rid of that itch!
Here is the bag of Blue Diamond Almonds in the Blueberry flavor that I received and I am SO excited to try them out! I haven't actually tried them so I can't give my honest opinion yet and I do actually want to save them for my trip, but let me say, they look delicious! I love Blue Diamond almonds in general, ever since I tried their chocolate flavored almonds - SO good! My boyfriend and I were on the Keto diet which is basically a no/extremely low carb and high fat diet and we were allowed to eat nuts in small amounts. One day, my boyfriend was craving chocolate and of course we couldn't actually eat real chocolate so we came upon the Blue Diamond chocolate almonds and they were amazing!! If you haven't tried them out, I definitely suggest them. They're much healthier than the actual chocolate coated or covered almonds that you normally see since it's just like cocoa powder on the surface of the almonds (sort of like how these blueberry almonds are coated in a blueberry powder) but they taste amazing! So I definitely have high hopes for these blueberry flavored almonds and can't wait to try them out. Almonds are the perfect snack for on the go and they really do keep you full because they're high in healthy fats. These blueberry almonds are extra good because they contain Vitamin E, an antioxidant that you know we all need!
As I mentioned before, I was superr excited to try out the Pedi-Rock from Profoot since my feet are just caked with layers of skin. Unfortunately I was sorely disappointed. I used it in the shower to try and remove the layers of dead skin and while I was using, the Pedi-Rock was like falling apart! I mean black beads just kept fall off of it which was quite alarming. It did work in removing some of my dead skin though but no better than an ordinary pumice stone or file so I don't know if I would recommend this really. Super disappointed that I couldn't love this product but it's not that it doesn't work - it's just nothing special. The shoe inserts on the other hand were quite nice. They are surprisingly comfortable when I put them in my running shoes and walked around for the whole day. I don't know how necessary they really are, but if you're looking for a shoe insert, I'd definitely suggest these!
The Next Step Fit n Full Protein shakes that I received were an unexpected but wonderful surprise. I've been struggling with my weight for the past 2-3 years now and I'm always trying to find healthy snacks, meal plans, or meal supplements. I got three different protein mix flavors which included Swiss Chocolate, Rich Vanilla, and Fresh Berries. So far I've only tried Swiss Chocolate (hey this girl was craving her daily chocolate dose) and it was absolutely delicious! I've always been a bit wary of protein shakes because from what my workout guy friends always say, those usually don't taste the best. I know most fitness girls put protein powder in their smoothies and stuff which I usually do too but with these protein mixes, all I need to do is add water and..shake! Such a perfect invention for me since I always have early morning classes and no time to eat breakfast.
The last thing I received in my GoVoxBox was the Aqua Spa Body Creme. Apparently you could have gotten the Aqua Spa Bath Salts but I'm glad I got the Body Creme because my skin is always so dry so I'm always open to trying new more moisturizing lotions. As you can see in the photo, (ignoring my disgustingly old looking hands) the creme is pretty thick but it absorbs into the skin super quickly. It has a distinct scent to it since it's says it contains lavender and chamomile and I can't put my finger on the exact scent but I want to say it smells like shaving cream.. but I feel like it's a man's shaving cream not like the girl kinds that have the nice paradise scents (if you know what I'm talking about haha). If any of you guys have tried this body creme and know what it smells like, pleasee leave a comment down below because it's bugging me that I can't put my finger on the scent! >:(
Oh and last but not least (because I almost missed it haha so I felt it only appropriate to add it at the very end), there was a coupon for Mueller Greek Yogurt. I've heard of the brand and seen it every so often in Target but never tried it but now with the coupon, there's nothing stopping me haha. I love eating Greek yogurt - plain or with fruit - and it's so good for you and keeps your full for a long time~! My favorites include the Honey Greek yogurt by Sunnyside Farms (the name-brand sold by Save Mart and Lucky supermarkets), Trader Joe's Honey Greek yogurt, and the Dannon Oikos Greek yogurt (all their flavors are deliciouus). Maybe the Mueller Greek yogurts will get added to this list haha. I'll definitely let you guys knows if I end up liking it when I get off my lazy bum and go to the grocery market to buy it haha!
Anyways, hope this post wasn't too rambly or long and if you were thinking about purchasing any of these products, I hope this post was able to help you make your decision in some way ^__^ Have a wonderful Memorial Weekend everyone~!
The Next Step Fit n Full Protein shakes that I received were an unexpected but wonderful surprise. I've been struggling with my weight for the past 2-3 years now and I'm always trying to find healthy snacks, meal plans, or meal supplements. I got three different protein mix flavors which included Swiss Chocolate, Rich Vanilla, and Fresh Berries. So far I've only tried Swiss Chocolate (hey this girl was craving her daily chocolate dose) and it was absolutely delicious! I've always been a bit wary of protein shakes because from what my workout guy friends always say, those usually don't taste the best. I know most fitness girls put protein powder in their smoothies and stuff which I usually do too but with these protein mixes, all I need to do is add water and..shake! Such a perfect invention for me since I always have early morning classes and no time to eat breakfast.
The last thing I received in my GoVoxBox was the Aqua Spa Body Creme. Apparently you could have gotten the Aqua Spa Bath Salts but I'm glad I got the Body Creme because my skin is always so dry so I'm always open to trying new more moisturizing lotions. As you can see in the photo, (ignoring my disgustingly old looking hands) the creme is pretty thick but it absorbs into the skin super quickly. It has a distinct scent to it since it's says it contains lavender and chamomile and I can't put my finger on the exact scent but I want to say it smells like shaving cream.. but I feel like it's a man's shaving cream not like the girl kinds that have the nice paradise scents (if you know what I'm talking about haha). If any of you guys have tried this body creme and know what it smells like, pleasee leave a comment down below because it's bugging me that I can't put my finger on the scent! >:(
Oh and last but not least (because I almost missed it haha so I felt it only appropriate to add it at the very end), there was a coupon for Mueller Greek Yogurt. I've heard of the brand and seen it every so often in Target but never tried it but now with the coupon, there's nothing stopping me haha. I love eating Greek yogurt - plain or with fruit - and it's so good for you and keeps your full for a long time~! My favorites include the Honey Greek yogurt by Sunnyside Farms (the name-brand sold by Save Mart and Lucky supermarkets), Trader Joe's Honey Greek yogurt, and the Dannon Oikos Greek yogurt (all their flavors are deliciouus). Maybe the Mueller Greek yogurts will get added to this list haha. I'll definitely let you guys knows if I end up liking it when I get off my lazy bum and go to the grocery market to buy it haha!
Anyways, hope this post wasn't too rambly or long and if you were thinking about purchasing any of these products, I hope this post was able to help you make your decision in some way ^__^ Have a wonderful Memorial Weekend everyone~!
Sunday, April 6, 2014
Butter London 3 Free Nail Lacquer Haul + Review and Swatches!
If you didn't already know, Ulta had this special event called "21 Days of Beauty Madness" where each day (since March 16th all the way till April 5th), they had one or more "Beauty Steal(s) of the Day" with certain products discounted or on sale for a pretty good price. They also had a different in store events every day where they either teach you beauty tips and tricks or share new products! It's pretty cool and the nice thing is, they released all the specials of the day that they'd have on their website so you didn't have to keep checking back or checking your email to find out what items might be on sale that day. Click this link if you want to check out what goodies they had on sale so the next time it come around, you have sort of an idea what to expect! :)
Anyways, why am I mentioning Beauty Madness at Ulta - besides trying to save you some bucks? Because on March 20th, the Beauty Steal of the Day was buy one get one free for Butter London nail polishes. Say whaat?? Yea you heard me. Those polishes that sell for $15 a piece for only $7.50?! Woot woot, count me in! Unfortunately, that week was my finals week for school so I was locked up in my room studying that day and knew I wouldn't be able to go in stores to get the polishes so I decided to purchase them online.. which I wouldn't say was a bad thing because (1) all of the nail polishes were in stock and available and (2) I was "forced" to buy more than just two polishes since I wanted the free shipping which required a purchase over $50 haha. I ended up buying 6 polishes and a toner that cost about $6 which got me just barely over $50 and the free shipping! I'm planning on returning the toner to my local Ulta though since I don't exactly need a new one and I might actually be returning one of the Butter London nail polishes just because I realized I have a color similar to it already (but who knows!).
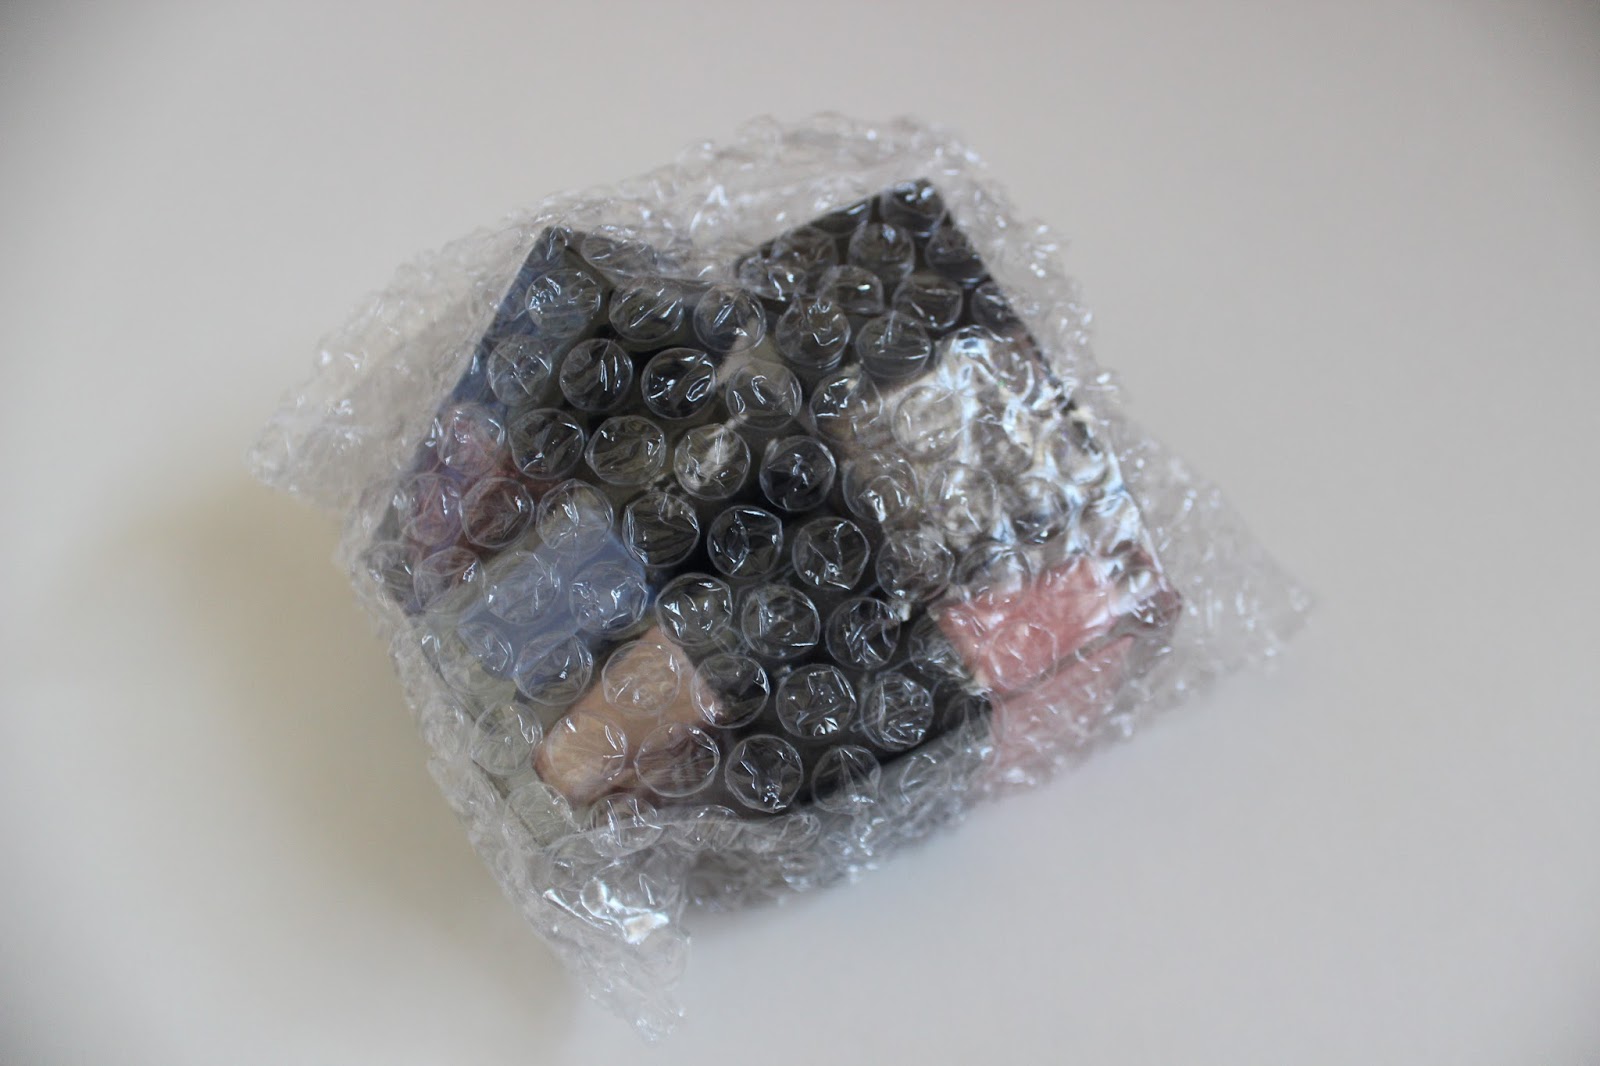
Below is a photo of how the polishes came in their bundled original bubble wrap packaging. Thought
I'd just share this to show how nicely packed the polishes were to avoid
breaking during the shipping process. I commend Ulta for their shipping
services as I received the tracking ID in a timely manner via email and
my package arrived in about 4 business days (it was supposed to take 2-5
business days). My order came in a nicely packed cardboard boxed that
was filled with air bags and bubble wrap to keep everything secure and
safe :D
The polishes I purchased are Goss, Lucy in the Sky, Sprog, Bit Faker, Rosie Lee, and Kerfuffle. Goss and Lucy in the Sky are from the Boho Collection, Bit Faker is from the Summer Collection, and Kerfuffle is from the Spring Collection. Rosie Lee and Sprog are part of the permanent collection. Sprog is a beautiful pond blue cream shade with no sparkles and is quite opaque (you can get away with one coat but two is always advised). Kerfuffle is also another cream polish that comes in a peachy-coral-pink shade. It's not exactly the type of pink I've been searching for (I'm on a hunt for the perfect pink base shade that I can do nail art and designs on) but it's definitely a really pretty pink with warm undertones.
If you want, I can do a shade comparison to other pinks I have to show the difference as many pinks can be too cool or too orange and this is definitely a nice different shade from anything I have. I also am quite pleased with Kerfuffle in it's opacity and non-streaky nature (I only needed one coat of it and it looked fantabulous!). Rosie Lee and Bit Faker are both dense glitter packed polishes and I know they're going to be a pain in the butt to get off, but they're soo gorgeous. Rosie Lee has pink glitter specks while Bit Faker has a mix of gold and bronze glitter specks giving it a really nice multidimensional look. Because they're both intense glitter polishes, they dry with a textured rough finish because of all the glitters but that's not a problem for me (especially since I always top with my Seche Vite top coat)
Goss is one of the most unique polishes I've ever tried since it's a foil or metal finish meaning it's SUPER glossy and shiny and makes it look like you have metal on your nails! It's absolutely stunning and actually might be my favorite polish from this haul because of it's unique look. It reminds me of my Sally Hansen Insta-Dri Nail Polish in Silver Sweep (click here for a swatch of it) which also has a metallic/foil finish but Goss is a rose gold color which makes it extra special. The only downside to Goss is that it is a bit less forgiving to any bumps or lines on your nails as they WILL show up through the polish and I would advise 2-3 coats to get an even finish (in addition to a base coat and buffed&smoothed nails). When I was deciding if I should purchase Goss or not, I was reading reviews and quite a few people had mentioned the streakiness and how you could see "brush strokes" when using Goss. I agree that it is a bit more difficult to use than other normal polishes, but nothing that can't be fixed with multiple coats of polish! And last but not least, Lucy in the Sky! It is a beautiful glitter top coat with gold and silver glitter particles. These glitters are different from the ones in Rosie Lee and Bit Faker because they're just a tad bit larger and there are less of them which makes it better as a top coat than to be worn by itself. Because it has less glitters and the glitter particles are slightly larger, Lucy in the Sky has less of a rough finish.
I paired Rosie Lee by itself (two coats) on my left thumb and found it to be quite a glitter packed polish. While it can look nice over another solid polish, it definitely can be worn by itself since the glitter flecks are so densely packed. On my right thumb, I did one coat of Kerfuffle and topped it with two coats of Lucy in the Sky. I'm not sure how much I like the pairing but I do like both nail polishes separately! Lucy in the Sky is really pretty and layering one coat vs. two coats can create very different effects.
Overall I'm extremely satisfied with all the nail polishes so far. They all apply super smoothly and evenly and look amazing! I'll post an update later on how long they last before chipping so I won't apply a top coat. I'll also post pictures of Sprog once I get to testing it out but I hope this post was helpful to any of you guys thinking about purchasing one of these Butter London shades! They're all quite unique in my opinion and I'm glad I purchased them when they were on sale :)
| From left to right: Sprog, Rosie Lee, Kerfuffle, Goss, Bit Faker, and Lucy in the Sky |
| Top to bottom and Left to right: Rosie Lee, Sprog, Kerfuffle, Bit Faker, Goss, and Lucy in the Sky |
| All nicely bundled up to protect from injury during the ship! |
The polishes I purchased are Goss, Lucy in the Sky, Sprog, Bit Faker, Rosie Lee, and Kerfuffle. Goss and Lucy in the Sky are from the Boho Collection, Bit Faker is from the Summer Collection, and Kerfuffle is from the Spring Collection. Rosie Lee and Sprog are part of the permanent collection. Sprog is a beautiful pond blue cream shade with no sparkles and is quite opaque (you can get away with one coat but two is always advised). Kerfuffle is also another cream polish that comes in a peachy-coral-pink shade. It's not exactly the type of pink I've been searching for (I'm on a hunt for the perfect pink base shade that I can do nail art and designs on) but it's definitely a really pretty pink with warm undertones.
If you want, I can do a shade comparison to other pinks I have to show the difference as many pinks can be too cool or too orange and this is definitely a nice different shade from anything I have. I also am quite pleased with Kerfuffle in it's opacity and non-streaky nature (I only needed one coat of it and it looked fantabulous!). Rosie Lee and Bit Faker are both dense glitter packed polishes and I know they're going to be a pain in the butt to get off, but they're soo gorgeous. Rosie Lee has pink glitter specks while Bit Faker has a mix of gold and bronze glitter specks giving it a really nice multidimensional look. Because they're both intense glitter polishes, they dry with a textured rough finish because of all the glitters but that's not a problem for me (especially since I always top with my Seche Vite top coat)
Goss is one of the most unique polishes I've ever tried since it's a foil or metal finish meaning it's SUPER glossy and shiny and makes it look like you have metal on your nails! It's absolutely stunning and actually might be my favorite polish from this haul because of it's unique look. It reminds me of my Sally Hansen Insta-Dri Nail Polish in Silver Sweep (click here for a swatch of it) which also has a metallic/foil finish but Goss is a rose gold color which makes it extra special. The only downside to Goss is that it is a bit less forgiving to any bumps or lines on your nails as they WILL show up through the polish and I would advise 2-3 coats to get an even finish (in addition to a base coat and buffed&smoothed nails). When I was deciding if I should purchase Goss or not, I was reading reviews and quite a few people had mentioned the streakiness and how you could see "brush strokes" when using Goss. I agree that it is a bit more difficult to use than other normal polishes, but nothing that can't be fixed with multiple coats of polish! And last but not least, Lucy in the Sky! It is a beautiful glitter top coat with gold and silver glitter particles. These glitters are different from the ones in Rosie Lee and Bit Faker because they're just a tad bit larger and there are less of them which makes it better as a top coat than to be worn by itself. Because it has less glitters and the glitter particles are slightly larger, Lucy in the Sky has less of a rough finish.
| Picture taken indoors with flash. |
Overall I'm extremely satisfied with all the nail polishes so far. They all apply super smoothly and evenly and look amazing! I'll post an update later on how long they last before chipping so I won't apply a top coat. I'll also post pictures of Sprog once I get to testing it out but I hope this post was helpful to any of you guys thinking about purchasing one of these Butter London shades! They're all quite unique in my opinion and I'm glad I purchased them when they were on sale :)
Subscribe to:
Posts
(
Atom
)