Showing posts with label diy. Show all posts

Sunday, April 30, 2017

My Harry Potter Themed Party

Being the Harry Potter geek that I am, I had to throw a Harry Potter themed party for Christmas/my birthday last year (yes this is quite an over-due post). I ended up prepping this all by myself (the boyfriend was sick and slept the whole day) so didn't take as many pictures as I should have but it ended up going fantastically and I was really pleased with everything. Of course I have Pinterest to thank (link to my board with my inspirations) for most of the ideas but all in all, it was a lot of fun and now all my friends have a Pottermore account, wand, Hogwarts House, and a Patronus!

If you're into Halloween and have lots of props packed up, you'll have an easy time prepping the house. I borrowed a giant spider from my boyfriend's parents and shoved it right on the floor (was going to hang it but it was massive..like 6 ft long body not including the legs) so that was a nice touch. We also had candles lit all around the house (yes fire hazard but they were all safely placed and no kids running around) and I had used red lipstick to write on my bathroom mirror with the signature "The Chamber of Secrets has been opened again..Enemies of the Heir Beware" which was great and spooked some of my friends haha. I also had a corner of the wall decorated for photos

I made a few wands for photos and just for fun and it was actually so much fun to make and decorate them. I used wooden chopsticks as my base and a hot glue gun to create the designs. Definitely be careful - I burned myself a few times. I watched a few Youtube videos (just search DIY Harry Potter wands) and looked up some pictures of main character's wands for inspiration and help but really it's not hard at all and have fun with it! The hardest part was probably painting over the hot glue because sometimes it would rub off? I used acrylic paint so not sure if that made a difference or not (I think that's what most people do). It took multiple coatings (with drying in between) to get the wands to satisfactory state but overall my friends were really impressed and I was really happy with them!
Can you guess which wands were inspired by which character's wands?!
I had a little stand set up to be a photo booth (hence the polaroid camera included) with the wands and the books!
Onto food! I set up a table with drinks and candy all Harry Potter themed. Because my party took place in the late afternoon, our real dinner food was normal pasta and salad but I did set up the dining table pretty nicely as well (unfortunately didn't take a picture of it) with candles and other sorts to make it look like a Harry Potter feast. If you're looking for real Harry Potter food rather than candy and what not, I'd suggest some sort of pie or pot roast in addition to possibly a soup and salad. Real food ideas were harder to come by on Pinterest and online but when in doubt, just go with anything British!


A lot of the containers I got from Michael's Crafts Store so I'd suggest checking them out if you're looking for some ways to add magic to your party. I got the test tubes ($1 each), light bulb jars ($1.99 each if I recall correctly), mason jars with handles ($2.99 each), and the milk jars (not sure how much these cost, have had them for a while). The Ferris wheel in the back is actually a cupcake holder I bought online from Ebay for less than $20 a while ago. I didn't have time to make cupcakes to actually fill it with but it does spin which is pretty cute haha. The chalk board signs are supposed to be to label cheese I think but their pretty multi-purpose. I got them from Crate and Barrel but I'm sure you can find them online for cheaper as well.
The powdered dung beetles were just jello mix (actually the yellow one was lemon flavored Gatorade powder) that people were to mix/create drinks with. I looked it up and you can use jello mix for this purpose so you can use it as an option if you have jello mix lying around (like I did). If not, you can also just get powdered Kool-Aid or some other powdered drinks and let people have fun! I also made pumpkin juice (see image below; there's only one filled since I had the others in the fridge) using this recipe. It's not bad but you do have stir it frequently or else the pumpkin mix sinks to the bottom. If you're too lazy to click the link (you do have to scroll down through all their photos to get to the recipe), here's the ingredients (just mix it all together)
  • 4 liters apple cider or apple juice (what I used)
  • 1 small (15 oz) can pumpkin puree
  • 1/2 c. sugar (you can add less depending on your preference)
  • 2 tsp. pumpkin pie spice (I just mixed cinnamon, nutmeg, ginger, and clove)
  • 2 tsp. vanilla extract
Not pictured, but the mason jars with the handles in the back were filled with Butterbeer (what's a Harry Potter party without butterbeer?!) which I made by mixing Root Beer soda (1 L bottle) with a hearty squirt of salted caramel extract (don't shake it to mix it...seems obvious but it went over my head). Then I added a scoop of vanilla ice cream into the jars and poured the soda+caramel mixture in. I can't drink soda but all my friends said it tasted really good so I think it went well? Haha.

A lot of people use Ferrero Rocher as snitches but I didn't have time to make wings and stick them on so I thought, hey golden eggs are a thing and shoved them into a parfait glass I got from a thrift store haha. I didn't take up close pictures of the two jars next to the golden eggs but you can see them on the sides of the photo. The one of the left was filled with gummy worms (Target brand cause I'm cheap) labeled as "dragon worms" and the one on the right had Bean Boozled Jelly Beans (their pretty expensive) on the top layer and then regular knock-off Jelly beans (again Target brand) on the bottom to fill the jar up. Take note that the jar STUNK like smelled SO bad when we opened it and those bean boozled jelly beans do NOT mess around when it comes to the nasty flavors! Had I had more time, I would have created the actual Bertie Bott's Every Flavor Beans box (here's a template ad another one) and put them in there because I think that's so much cuter. Next time though...!
Of course I had to make macarons with the Harry Potter theme! I used an edible black marker (this is the set I have) to draw the designs and used my basic macaron recipe (blog post here) with some dyed a certain color. I'm pretty proud of my HP font too :) By the way, I got inspiration for these designs from a Pinterest photo I saw so not taking credits!
I also made some chocolate frogs (got a cheap mold for less than $5 on Amazon) and was going to fill one with some ghost pepper shavings..but my mom saw the ghost pepper and freaked out and said it was going to burn a whole in someone's esophagus and threw it out the day before my party. So buying another one wasn't an option so I used some normal hot peppers and hid them in 2 of the chocolate frogs and gave them to my friends. Boy were they surprised haha!

So that about wraps up my Harry Potter party and everything it entailed. I apologize for not having more photos but hopefully this gave you some ideas on how to throw your own Harry Potter party! Have fun with it and embrace your inner wizard/witch! <3

Does Castor Oil Work to Grow Your Eyelashes?? [REAL TEST!]

Being your typical Asian girl, long thick full luscious eyelashes are something I don't have. It's never been extremely bothersome though and I've never felt self-conscious or ashamed of my lashes. Heck, I'm pretty lucky because my lashes are actually a decent length for most Asians and I'm fortunate enough to not have short lashes that grow downward and into my eyeballs (yes that's a thing; it happened to my cousin and also a friend who actually had to get surgery to correct it because they were scratching/damaging her eyes!).

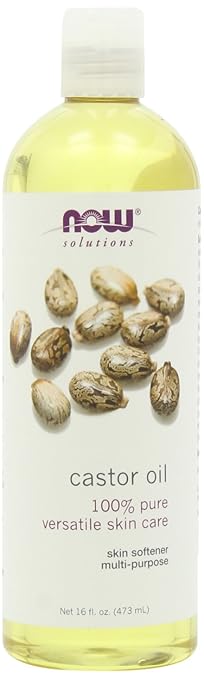
But that's besides the point. After watching numerous beauty gurus talking about RevitaLash or some other lash elongating or thickening product (many of which cost $60 and upward for a small mascara size bottle), I decided to give some DIY products a go. I started with just using my organic lipbalm to "coat" my lashes every night but then I did some research and found that Vaseline can be helpful (some controversy on it though) as well as castor oil. Castor oil seemed to be really highly recommended so I decided to get a bottle of castor oil from Now (pretty reputable brand, highly rated) on Amazon ($9.15 only for 16 oz!). The bottle is HUGE. I'm not sure how I'm going to finish it although I have been able to use up more by mixing a squirt of castor oil with some cheap body lotion and using it on my body.

NOW Castor Oil, 16-Ounce

I've used the castor oil every night (for about 2 months now) and apply just a little (pea size amount) on the tip/edge of my index finger. I put any excess oil onto the back of my other hand and apply the oil to upper lashline (the root of the lashes!) of one eye. I usually swipe the side of my index finger back into the excess I've wiped onto my hand to get some more product and then move onto the other eye. Then I'll use what's left on my finger to coat the bottom lashes. People say you really just need to get the base/root of your eyelashes rather than the whole entire eyelash but I find the oil on my finger tends to hit/coat the whole lash while I'm focusing on putting product on the lash line so basically, I end up coating my lashes as well as the root. Don't think it hurts to nourish the lash tips although if it gets in your eye, it kind of itches but it's not a huge deal (I actually wear night time contacts and haven't had too much problem with the product getting in my eye or irritating my eyes but just a word of note I suppose). Probably the better method to apply the castor oil would be to use a Q-tip/cotton swab but I'm too lazy to buy them/my finger works just fine for me but to each their own.

Now I'm not an ophthalmologist or optometrist so I can't say if this is safe or bad for your eyes/lashes but I haven't noticed any negative side effects in the last 2 months that I've been doing this (ie redness, allergic reaction, etc). The only possibly one downside is that maybe the castor oil clogs my pores because about twice, I've gotten a pimple on my upper cheekbone/under my eye which is pretty rare for me but I'm not sure if that's due to the castor oil. I've also gotten about 2 pimples within my eyebrows which seem to be associated with when I put any leftover castor oil through my brows (thought I'd try to thicken up those too) so I've stopped doing that. I read on a website (here is one site and another site that talks about the comedogenic properties of castor and other oils) that castor oil can clog pores on some people so I'd definitely suggest trying it out for a day or two first before really going for it. Despite possibly getting pimples around my eyes because of the oil, I haven't gotten any pimples on my eyelids or lashline (no styes) and I actually had what I think might have been a milia (keratin filled bump) which you can see in the initial pictures below and it's now gone away possibly because of the castor oil (it gets on my eyelids when I'm applying it, sometimes I rub the leftover/excess around my eyes like eye cream). So as a final warning, just be aware of any skin changes and stop if you think the castor oil is causing negative effects.

Okay so here's some picture results from my last 2 months of using castor oil (what you've all been waiting for).
I apologize for the lighting difference and meh quality but these were taken off my phone with no product on. The top 2 photos were at the start (February 2017) and the bottom 2 photos are now (April 2017). I'm going to continue using the castor oil since 2 months isn't a whole lot of time, and update this as it goes but so far I haven't seen that much of a difference..can you guys? It's definitely a bit disappointing that there's not much change and I actually did some MORE research on castor oil and found that only some people have actually seen eyelash growth with it so maybe it's not as effective as I initially though.

There is an actual medical product that boosts eyelash growth but requires a prescription and is incredibly expensive. It's called bimatoprost (generic) or Latisse (brand name) and has been shown to be extremely effective in lengthening your lashes. I don't plan on getting that though because (1) price and (2) a friend tried it and said after stopping, her lashes seemed stunted in growth (this has been mentioned by others who've used it as well).

So hopefully this was somewhat helpful or interesting to read. I'm sorry castor oil isn't the miracle product (for me at least) but give it a shot if you want - maybe you'll be different? Anyways, what other DIY or actual real products have you guys tried to make your eyelashes grow?

Wednesday, March 16, 2016

[Nail Look of the Day] Lace, florals, and polka dots; who wants a tea party?

I was inspired by a photo I found on Pinterest (if you want to see the original, you can sift through my nail inspo board here) and decided to recreate the look. I think the flowers turned out really well (I used a different blend than usual to make my petals) and I was really pleased with my pinky-peach base color.
Unfortunately, I can't really share what nail polish I used to get the base pink-peach color because I actually used two sheer nail polishes to create it. I started with a coat of a peach nail polish that had too much orange undertones for my liking (it's an Asian brand - The Face Shop - if you're interested but I doubt it's still in production). It's relatively sheer so I let it dry and then did one super thin coat of Revlon Pink Cafe nail polish (I've used this a couple of times in previous nail looks). This nail polish starts off being pretty sheer and "jelly" like (if that makes sense) which allowed me to layer the two colors without having one totally block out the other. I'm definitely pleased with the end color.
Once I let my base color dry, I created half moon shapes with my a pale pinky white nail polish. In retrospect, I would have done this layer first THEN painted on the pink-peach color because it was pretty hard to make the rounded curves this way around especially because my pale pink-white nail polish brush (a Julep polish) was super fat and not made for tight corners. I think a white would have made this layer stand out more (I actually did use a white polish for my pink nail which you can see in the photo above and it made that layer look like BAM so much more obvious. It depends on the look you're going for I suppose. While this layer was drying, I used a dotting tool dipped in that same pink-white lace color to draw half circles to create that "lace" look adn then used aother dotting tool dipped in white nail polish to create polka dots around the half circles or on the pink-peach base area. This part was tricky because I tried making some dots INSIDE the half sphere space but it wasnt very large so not sure if it made the look better or worse.
After that, I just drew on the flowers by having a small puddle of a hot pink (Sally Hansen Hot Magenta) and light pink (Sinful Colors Easy Going) and using a dotting tool to mix the too a little before placing the tip on my nail and creating a circle of swirled color that looks like a rose. Using a toothpick or a thin dotting tool, I used a green color that I created by blending Essie Mojito and Sally Hansen Emerald Express. I wouldn't suggest this and would advise just getting an actual dark green color because Emerald Express is a glitter polish but it was the only dark sort of green color I had and I wanted to tone down Essie Mojitio.

Anyways, I'm not sure if this post was terribly helpful but hopefully the pictures were inspiring or fun to look at if anything. Please excuse the dryness and wrinkliness of my cuticles and palms by the way! :) Feel free to leave a comment below with any questions, suggestions, or requests!

Saturday, December 12, 2015

The Best (and cheapest!) Way to Clean Your Makeup Brushes

I'm not going to babble too much and get straight into the post. It's pretty common knowledge that makeup brushes need to be washed - especially face makeup brushes. You don't want bacteria building up and if you're doing makeup on other people, you don't want their face oils and germs on the brush when you use it next right? Same goes with eye brushes although the concern is more that when you use different colors, you'll have residual from the old shade you used and well, that's no good if you've got black shadow mixing with your highlight. So yes it's clear that makeup brushes need to be washed. But using what?!

Store bought cleansing solutions are expensive aren't they? So most people have come to realize that well... olive oil is great at removing makeup from the face and doesn't clog pores. And dish washer soap is supposed to kill 99.999% of bacteria. SO.. if you take the two and mix them together, you should get the perfect makeup cleansing mixture right? CORRECT! I think that's also pretty common knowledge (I think all the Youtube makeup gurus I watch use this solution). It's cheap (well olive oil can be pricey but it's def worth it) and effective. I've used it since I started getting into makeup and have never had any issues. However..the only one problem is really getting out ALL the makeup from some of my denser brushes (ie. the Sigma F80 kabuki brush). Sometimes the foundation really gets stuck in and even after multiple scrubs on my hand, I find there is still residual foundation spots left on the brush. I know other people have had this problem because Sigma designed a tool to help with this: a brush cleaning glove! It has ridges and bumps that are supposed to help you "deep clean" all your brushes quickly and efficiently.

I think it's a cool idea especially if you have a ton of brushes.. However, for someone like me who only needs to wash a few (5-7) brushes every so often, $39 is a pretty steep price. So I discovered my own tool to help me deep clean and it's something I think most people will have! A ginger grater! Now I know what you're thinking (okay well I don't) but does it seem weird? Well a ginger grater also has little small raised bumps to help you grate a ginger into tiny shreds of pieces. It's not too sharp like a knife or a cheese grater, and it's on a flat surface (like the one shown below).

It's definitely improved the cleanliness of my brushes and speed of the whole process so I thought I'd share it with all of you. All you have to do is move your brush up and down or in circular motions and you'll see all the pigment and gunk from your makeup foaming up off your brush. I do this as many times until the soap bubbles are clear or when I rinse the brush under water and wring it out, the liquid drainage is clear.


To dry my brushes, I use a dry and clean dish towel or hair towel and lay it vertically. I roll up one edge so that it creates a raised roll that I can prop my brushes against so that they lay at a downward slant to promote the drainage of water as they dry. This is important to prevent the bristles in your brushes from falling out. In the below photo they're propped upward because I had just dipped them in my oil+detergent mixture. They're currently propped the opposite way since I just finished cleaning them. I like to use a hair towel because they're long enough to roll up and still have extra towel room to cover my brushes when they're drying to prevent dust or random stuff falling on them and dirtying them (if that makes sense)
I hope this post was somewhat useful for you and please give it a go! It might seem weird at first but it's quite effective! If you have any questions, feel free to leave them down below!

Wednesday, July 1, 2015

Disney Princess Series Nail Art: Sleeping Beauty (Aurora)


In the next installation of my Disney Princess themed nail trend, I decided to do Sleeping Beauty, also known as Aurora. It's weird, the last time I watched it (which was a while ago but I still remember quite clearly), I remember thinking it was a little creepy the way Aurora gets possessed. I mean like it just looked super scary, but as a little kid, I don't remember being scared at all when she was walking to the spindle and pricked herself.. so who knows haha. Maybe I'm just a bigger scaredy cat now ^__^;
Unfortunately the photos I took of these nails aren't the best quality (I blame my phone's poor camera quality) but hopefully you get the gist of the nail look and feel inspired to do a better recreation. I got inspiration from a photo I saw on Pinterest but later added something that makes this look more my own and really adds to the overall look.

I  added strips of gold nail striping tape between the two colors but that was after I had taken photos and I realized it was missing something. The bit of gold definitely tied the entire look together so much better so if you do plan on recreating the look, I highly suggest you use the gold tape (it's super easy to use!) or, if you don't have that, use a gold polish and line the borders. You can see in the below photo the gold a little bit (sorry it's not clear, it's from another photo a friend took where the focus wasn't the nails). Doesn't the extra gold really tie this whole "princess" look together?!

I used the following nail polishes to make this look but remember you can use whatever you have! This looks is great because it only uses two colors. The hardest part is just getting that sort of triangle tip and even if you're not great at doing it, having the gold striping tape really helps to cover up any mistakes and make it LOOK like you had perfect straight lines (:
-Sally Hansen Xtreme Hard as Nails in Fuchsia Power
-Essie in Ballet Slippers
-Seche Vite top coat (the usual)
-Gold striping tape on ebay (as listed above)
Anyways I hope you guys are all enjoying the summer weather (it's so hot where I am!) and these nails are the perfect summer color so if you do recreate this look, please link me or send it over! :)

Friday, February 27, 2015

Get the [Nail] Look: Vintage Roses


Once again, based on a Pinterest inspiration photo, I have tried out this vintage looking floral nail look. Wow that was a mouthful. 
Pretty Nails with Gold Details nails ideas nails design Manicure Ideas featured
I loved how class it looked from the polka dots to the black and white stripes to the addition of that one plain red nail. Everything about this look is PERFECT to the t (is that even the right saying?) Anyways, moving on, here's my rendition of the look :)

Obviously not as good but hey I liked it. I'm working on filing my nails to get that square shape but in the photo,this person's nails were actually somewhat rounded (FINALLY!) so i think that made my nails match the photo even more. I used my dotting tools I got from Ebay to make the polka dots and the flowers but definitely using the back of a toothpick or a bobby pin will work fine (trust me I've done that!).
I used the following nail polishes
-Orly White French Tips Nail Polish
-LA Colors Art Deco in Black
-Forever 21 Nail Polish in Tomato
-Revlon Colorstay Nail Enamel in Cafe Pink
-Essie in Mojito Madness

Hope you enjoy and let me know if you want to see like actual step by step instructions. I've been thinking about it but usually when I'm painting my nails, I get so into it and having to take pictures each step seems kind of a hassle =3= Plus I don't have a tripod or anything with me so having to take the photos by myself would definitely be a struggle haha. But I'm sure it'd be more helpful so next time I might do picture step by step tutorials!

Saturday, January 24, 2015

Get the [Nail] Look: Flower Tips

So lately I've taken to Pintrest for nail look ideas and I came across this one that I was absolutely in love with this one nail look (shown below) that I kept seeing on literally everyone's board!
I loved this look so much that I decided to try and recreate it. I couldn't find the right pink, and I still can't! So if you know what polish looks similar to the pink in that picture, PLEASE let me know down in the comments below because I literally spent an hour searching up very pastel pink nail polish and swatch trying to find the perfect color. I ended up giving up because I couldn't find any color close enough and just stuck to a very light pastel pink that I had. It's a bit too light for my liking but I'm pretty happy with the end result!

I used the following nail polishes (shown in order from left to right):
-Sinful Colors Nail Polish in Easy Going
-Essie Nail Color in Mojito Madness
-Revlon Colorstay Nail Enamel in Cafe Pink
-Orly White French Tips Nail Polish
-Essie Nail Color in Camera (discontinued)

Although the bright red nail polish by Essie is discontinued, you can use any sort of red-pink nail polish that would blend well with the pink. Or you can totally make this look your own and choose a different flower color like yellow roses or even blue roses if you're feeling creative ;D
Steps:
1. Paint base coat with Easy Going by Sinful Colors. This polish can be pretty streaky so you need at least two if not three coats. Wait for it to completely dry. Be patient!
2. On a scratch piece of paper, put a drop of the white (Orly French Tips), pink (Revlon Cafe Pink), and red-pink nail polish (Essie Camera) so that they're all touching. Using a rounded tip (ie. a dotting tool or the knob of a bobby pin), swirl right in the middle where all the colors meet so that your rounded tip has a bit of all colors.
3. In a C or circular shaped motion, start drawing the first petal of your rose. Continue on going towards the center. Paint about three roses per nail. (Try not to crowd them as much as I did so leave some extra space in between). Let dry.
4. Add the leaves! Using a green polish (Essie Mojito Madness) and a tooth pick, create leaf like structures.
5. Let it all sit a bit before adding a top coat. I used Seche Vite as usual which works for not completely dried polish but it depends on what top coat you are using. Be careful that your design isn't so wet that it smears when you add the top coat.
6. Finished~! Make sure to take a picture for instagram and tag me (@creamydinner) ^__^

Tuesday, January 13, 2015

Simple 3 Color Winter Nails


Because my exams are finally over, I've been able to paint my nails and oh my, how I've missed this simple luxury. Please don't mind the dryness of my nails (yes I know extremely unflattering but the winter cold air has left in moisture) and focus on the design instead ;D I took my inspiration from a design I saw on Pinterest but switched the colors around . I like the mix of the emerald green and silver. It's a bit festive and actually would have been more perfect before Christmas but nevertheless, I think this is still perfect for the winter weather. My nail painting skills are a bit rusty, having not painted them for so long now, but this look was so simple and easy to do that it was pretty foolproof.
 

The three nail polishes I used were:
-Revlon Matte Suede in Emerald City
-Sally Hansen Hard as Nails Xtreme Wear in Showtime (I think this is discontinued which is a shame because it's so pretty and I've used it for so long)
-Orly French Tip (I really need another white nail polish because this one is getting goopy!)

The overall nail look was really quick and easy to do. I hope to be doing more nail designs in my free time so please look forward to those and send me any styles or designs you want me to attempt (easy ones please haha!)

Monday, December 22, 2014

Manicure Monday: Alice in Wonderland Inspired Nail Art

Happy almost Christmas~! As much as I love the holiday season and painting my nails in the Christmas spirit, I decided to do something different with my sister's nails the other day and wanted to share it with you all for Manicure Monday. Because my sister loves Alice in Wonderland so much, we decided to go with that theme for her nails which constituted pretty bows, gold accented designs, and just basically an overall girly theme. We went blue as the main color because it's my sister's favorite color and also because Alice wears a blue and white dress throughout the movie so we thought it best appropriate. Part of our inspiration also came from another Alice in Wonderland nail design which you can easily find if you just Google "Alice in Wonderland nail art" so you can see where we got the color and some pattern designs from there.
I did all the nail art with either a toothpick or my white nail art deco nail polish which has a special thin tip made for drawing lines/for nail art (as the name so appropriately states) but overall the designs are all pretty simple and easy enough to do. I actually used the toothpick to trace out lines before filling them in with a normal nail polish (like in the case of the white diamond or the white clock on my sister's ring finger and thumb respectively) and for the lace design. Toothpicks are probably one of the best "at-home" nail tools you can use because they're so useful! I used them to pick up the nail gems in addition to using them to create the designs.
I purchased the gold chain from my local Daiso which is sort of like a Japanese dollar store except everything is usually $1.50 unless otherwise stated. It comes in a long chain which you can cut to your liking with scissors. I'm pretty sure you can find it on Ebay for less than a dollar which is also about the same price as the nail gems I used which came in a wheel with multiple colors similar to this. I also added on some cute stickers I got from China which you can also purchase on Ebay for super cheap :)
For the nail polishes, I used..
-Sky Blue: Revlon Core Nail Blue Lagoon
-Pastel Baby Blue: Barry M Gelly Nail Paint Huckleberry 19
-White: Orly Nail Polish White Tips #42001
-Black: Sally Hansen Hard as Nails Xtreme Wear Nail Color 370 Black Out
-White Nail Art: L.A. Colors Art Deco Nail Art 901 White
And as usual, I topped with Seche Vite top coat to seal everything in. I think it was especially important this time because I needed to make sure none of the 3-D things would fall off like the rose or the gold chain. 
Let me know what you think and if you have any nail design requests, just leave them in the comments below~! Hope you all have a wonderful holiday break and spend lots of time with your family! ^__^