Showing posts with label look. Show all posts

Friday, February 5, 2016

Get the [Nail] Look: Floral Friday

Sorry I haven't been posting for a while and apparently all my photos got removed because I think I accidentally deleted the album of photos connected to my blog. So if you notice any posts with broken photos, please bare with me as I am trying to fix them all! It is taking me quite a while to find all the photos again -sigh-.

Without further ado, here is my rendition of my most recent Pinterest find.
 I started off by painting all my nails with Revlon Minted. I let that dry completely before putting 2 coats of the slightly transparent white-pink polish from Julep. I have 3 Julep polishes I got from a free trial for their Maven Box and have to say, they're really quite good! The brushes are a bit fat but the polishes themselves have a really nice gel-like quality. After getting a good semi-opaque coat of the light pink, I let it dry and started drawing on the roses and leaves. I made the roses by mixing two shades of pink and swirling them in a circular motion to make them look like roses. I then used a somewhat smaller dotting tool to make the leaves. I actually used 2 green nail polishes to create extra depth but only listed one below. I let everything dry enough so that I could apply the gold striping tape without lifting up all my hard work if I needed to reposition it.
The nail polishes I used are as follows (from left to right):
-Revlon in Minted
-Sally Hansen Xtreme Wear in Punk Pink
-Sinful Colors in Easy Going
-Essie in Mojito Madness
-Julep in Ava Bombshell
Overall, this nail look is one of my favorites. It definitely looks detailed and complex but it's really not that bad! All the techniques are quite simple and it just takes some time to let each layer dry. I would suggest watching your favorite TV show or movie while doing this to help the drying phase pass by. I took me less than 2 hours to do this and I finished it off with my favorite Seche Vite top coat. I hope you guys all try this out and let me know how it goes in the comment!


Thursday, November 19, 2015

Disney Princess Series Nail Art: The Little Mermaid (Ariel)

I've been wanting to do the Little Mermaid for a while now but could never decide on the right design (or find one that I could feasibly do). There are a ton of wonderful mermaid inspirational nail pictures on Pinterest (which you should follow my Pinterest nail board for photo inspirations!) but some of them are too difficult to use (like how am I supposed to draw fish scales without a nail stamper?! I know you can use like.. fish net fabric and stipple nail polish over it but I didn't have that/couldn't be bothered haha). I did go onto Ebay and found some seashell jewels for super cheap and once they came, I was able to create my Little Mermaid design! It's definitely not a requirement but I think to have some sort of sea jewel like a starfish, seashell, nautical anything really... well it just helps add to the look.

Summer always seemed like the right time to do mermaid nails but I never got around to it so now in the fall it does seem my nails do look a bit little misplaced or out of season. Nevertheless, they are definitely super bright and will catch anyone's eye ;) I highly recommend you have a good strong top coat or nail adhesive so that your jewels don't fall of though. I used my standard Seche Vite topcoat without any problems.
The nail polishes I used are as follows (from left to right):
-Forever 21 Nail Polish in Red
-Barry M Nail Paint Gelly in Greenberry
-Covergirl Boundless Color in Gold Rush (discontinued)
-butter LONDON 3 Free Nail Lacquer - Marbs
I blotted on the gold nail polishes by wiping off any excess nail polish and also painting some of the gold polish on a makeup sponge and dabbing it onto my nail. If I were to redo this look I would get a thicker larger and chunkier gold glitter nail polish though as the gold glitter I have was way too fine for the look I was going for.
Well that's my nail art rant/post of the day (week? month?). I hope you guys enjoy and try to recreate it! If you do, please tag me on instagram or twitter (@creamydinner) or leave a comment below!

Friday, June 26, 2015

Disney Princess Series Nail Art: Beauty and the Beast


If I didn't put the princess/movie in the title would you be able to guess which Disney princess this nail look was inspired by? I went around asking a couple of my friends and almost no one would know right away like my Cinderella nails unless i told them it was Disney princess inspired and then they would get it then haha. Anyways I think I liked these ones a bit less out of all of the "princess-themed" nails I've done because my flower didn't turn out that nice and I ended up using a lot of stickers so this nail look isn't as recreatable as I would like. Also the yellow that I used has a weird quality to it that just makes it look kind of blotchy no matter how I apply it? I'm not sure but leave me a comment of what you think! By the way sorry my nails were really dry the week I did this so you can totally tell in the pictures :(

I used the following nail polishes if you want to try and at least recreate the same color scheme. If you don't have stickers like I did, you can definitely still just use a gold glitter and apply it at the tips or in a half moon at the bottom or draw more red flowers (and better than mine). I really hate how blotchy my red rose was sigh but I think my right hand flower also had ugly leaves so that didn't help.

-Zoya in Piaf
-Sally Hansen Hard as Nails Extreme Wear in 180 Monarch-y
-Essie Mojito Madness
-Forever 21 Ruby Red
Anyways I hope you at least found some inspiration in this nail look. If not, the following picture offers the main color palette of Beauty and the Beast and you should try creating your own nail look based on Belle! If you do, please link me or send me your look :)

Friday, February 27, 2015

Get the [Nail] Look: Vintage Roses


Once again, based on a Pinterest inspiration photo, I have tried out this vintage looking floral nail look. Wow that was a mouthful. 
Pretty Nails with Gold Details nails ideas nails design Manicure Ideas featured
I loved how class it looked from the polka dots to the black and white stripes to the addition of that one plain red nail. Everything about this look is PERFECT to the t (is that even the right saying?) Anyways, moving on, here's my rendition of the look :)

Obviously not as good but hey I liked it. I'm working on filing my nails to get that square shape but in the photo,this person's nails were actually somewhat rounded (FINALLY!) so i think that made my nails match the photo even more. I used my dotting tools I got from Ebay to make the polka dots and the flowers but definitely using the back of a toothpick or a bobby pin will work fine (trust me I've done that!).
I used the following nail polishes
-Orly White French Tips Nail Polish
-LA Colors Art Deco in Black
-Forever 21 Nail Polish in Tomato
-Revlon Colorstay Nail Enamel in Cafe Pink
-Essie in Mojito Madness

Hope you enjoy and let me know if you want to see like actual step by step instructions. I've been thinking about it but usually when I'm painting my nails, I get so into it and having to take pictures each step seems kind of a hassle =3= Plus I don't have a tripod or anything with me so having to take the photos by myself would definitely be a struggle haha. But I'm sure it'd be more helpful so next time I might do picture step by step tutorials!

Monday, February 23, 2015

Manicure Monday x Get the [Nail] Look: It's Gold, Baby!

Hey everyone! I decided to do another "Get the [Nail] Look" because Pinterest just has so many amazing inspiration nail looks so I might as well show all of you wondering how to get similar nail looks! This week's is pretty simple because I was feeling a little lazy but I love how elegant it still looks. I didn't have the right shade of coral with me (ugh there are just too many shades of pink and coral and red that I don't have!) but what I used seemed to work fine enough.

The taupe I ended up using was a lot more cool toned and next time I think I'll use another one of my taupe polishes that comes off more brown and warmer like in the photo. However, since I didn't have a coral and used a pink color, I think the cool toned taupe looked just as nice.
Nail Polishes used:
-Revlon Colorstay Nail Enamel in Cafe Pink
-Milani Jewel FX Nail Lacquer in Gold 531
-L'Oreal Paris Colour Riche Nail Color Nude Privee Collection in It's Now or Never
-OPI Spotlight on Glitter Nail Lacquer in I Reached My Gold

I actually used another gold glitter polish which is much finer than the Milani nail polish (which you can tell in the photos) and layered the OPI glitter top coat over it to create a more dimensional effect. However, the finer gold glitter polish I used is by Covergirl and it's super old because it was before they game out with the square shaped nail polishes that they have now and I can't seem to find it online so yea :( But most brands carry a gold glitter polish so it shouldn't be too hard to find a replacement if you don't want to use the Milani one (which is a much larger glitter particle size but definitely still awesome).
I am seriously in need of a coral nail polish so if you guys have any suggestions on an amazing coral color (like the one in that picture), please let me know! :) Or send me pictures of looks you want me to recreate!

Tuesday, January 13, 2015

Simple 3 Color Winter Nails


Because my exams are finally over, I've been able to paint my nails and oh my, how I've missed this simple luxury. Please don't mind the dryness of my nails (yes I know extremely unflattering but the winter cold air has left in moisture) and focus on the design instead ;D I took my inspiration from a design I saw on Pinterest but switched the colors around . I like the mix of the emerald green and silver. It's a bit festive and actually would have been more perfect before Christmas but nevertheless, I think this is still perfect for the winter weather. My nail painting skills are a bit rusty, having not painted them for so long now, but this look was so simple and easy to do that it was pretty foolproof.
 

The three nail polishes I used were:
-Revlon Matte Suede in Emerald City
-Sally Hansen Hard as Nails Xtreme Wear in Showtime (I think this is discontinued which is a shame because it's so pretty and I've used it for so long)
-Orly French Tip (I really need another white nail polish because this one is getting goopy!)

The overall nail look was really quick and easy to do. I hope to be doing more nail designs in my free time so please look forward to those and send me any styles or designs you want me to attempt (easy ones please haha!)

Sunday, November 2, 2014

Autumnal Inspired Nails

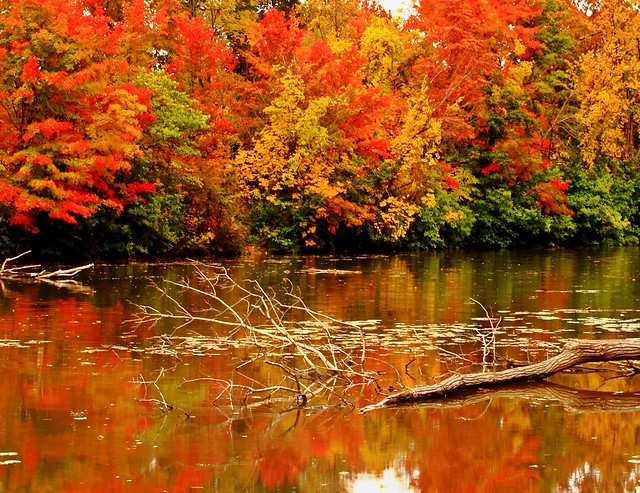
Ah finally the leaves are beginning to turn that beautiful red-orange-brown and the weather is cooling down into the perfect leggings+boots+scarves weather. YES it is the signs of Autumn and I couldn't be more excited :)
Some random picture of Fall scenery that I found online. Doesn't it make you just so happy? :)
Today I wanted to share a simple nail look created with a mix of those more earthy-toned cream shades. I chose all cream colors and it actually looked fine without the gold accented sticker designs (actually better in my opinion but I can't really take off the stickers now sigh..). I was inspired by a nail look I saw online featuring simple colors so I chose out whatever autumn shades I had in my collection and came up with this!


 I kind of hate how you can see the fine details with such an enlarged photo haha especially since you can see all the beauty of my dry cuticles and the lines of the stickers and the bumps in the nail polish (sigh) BUT BESIDES THAT, I love the look! I was a bit impatient on putting the stickers on so I definitely messed up my nails but the overall effect is just so fall-esque and I totally loving it. 


I used the following nail polishes to get this look:
-White: Orly Nail Polish White Tips #42001
-Orange: Korean brand that I can't seem to find the name for so I'll show a picture of a similar shade
-Maroon: Zoya Natural Nail Polish Coco
-Dark Grey (that looks blue tinted but really isn't): Maybelline Color Show Nail Polish Lacquer Impeccable Greys 410
-Nude: 3 Concept Eyes (3CE) Nail Lacquer #BE02

I realized I really need more warm-toned/fall nail shades like an olive green or a dark brown so let me know in the comments if you know any nice nail polishes that you think I'd like and I might pick them up and use them in another nail look!

Friday, June 6, 2014

Frozen's Princess Elsa Inspired Makeup Look


One of the most popular Disney princess movies ever was Frozen, recently released in November of 2013. Princess Elsa is definitely beautiful and her purple eye look really stands out. Right after I watched the movie, I was inspired to do a makeup look based off of Princess Elsa's look.
I used the above photo for reference when I was creating this look in case any of you were wondering. I'm in no way saying I look like her or that I could ever look as gorgeous as she does, but I had a lot of fun recreating her look!

I know this is super late and probably way out of season (much more appropriate for fall or winter when I had originally done this) but I just wanted to share it with any of you guys interested. I used a mix of purple shadows and can do a makeup tutorial if any of you are interested~!

I love how soft the look is but still really elegant and pretty. It's a beautiful smokey eye without being too much and you only really fully see the color when you blink/look down. It suits brown eyed girls (anyone get that reference to the Korean girl band? ;D ) or blue eyes like Elsa or really any eye color in my opinion. Anyways I have to go study for my exams but hope you are all enjoying your summer (if you're already finished with school) and good luck to everyone else who still is in school and has finals or end of the year projects coming up! xoxo.

Saturday, October 5, 2013

My Everyday Natural Makeup Look (Step by Step Instructions w/ Pictures)

 
Note: This is my first time doing something like this - aka a picture tutorial rather than a video. If you like this type of tutorial, please let me know in the comments down below! I'd really appreciate it :)

Also I'm going to list the products I used below with links to where you can get each one in case you guys are interested, though they're all pretty popular products and can be easily found at drugstores or Sephora, but hey, if it helps one person, it's worth the effort ^__^ Please know that you don't need to use the exact products I used to recreate this look, that's the beauty of makeup! You have so much freedom to make a look yours~!

Product list (click on the product name for the link):
-ELF Essential Tone Correcting Concealer in Rosy Beige
-Urban Decay Primer Potion in Eden
-Urban Decay Naked Palette (used the shades Naked and Buck)
-Maybelline Stylish Smokes Quad in Natural Smokes 02 (used the lightest shimmery brown and darkest matte brown)
-Sephora Flashy Liner in Flashy Brown
-Dollywink Liquid Eyeliner in Brown
-3 Concept Eyes Highlighter by Stylenada in Gold Pink
-(forgot to add this in my picture tutorial! woops!) Revlon Lipbutter in Juicy Papaya 027