Baking has been something that I'm not particularly amazing at because half the time I don't have all the ingredients and I always end up substituting something in, but hey it always turns out edible albeit not exactly the most presentable piece. NEVERTHELESS, that doesn't stop me from scouting out the simplest recipes to use up leftover items in the pantry as I did recently with old leftover chocolate from who knows when. I decided to make chocolate lava cake because (1) my mother absolutely loves this and it's one of the few sweet things she'll eat and (2) the recipes online seemed easy enough. So with a few of my infamous adjustments, here's what I came with and I hope you try it out and enjoy ;)
Ingredients:
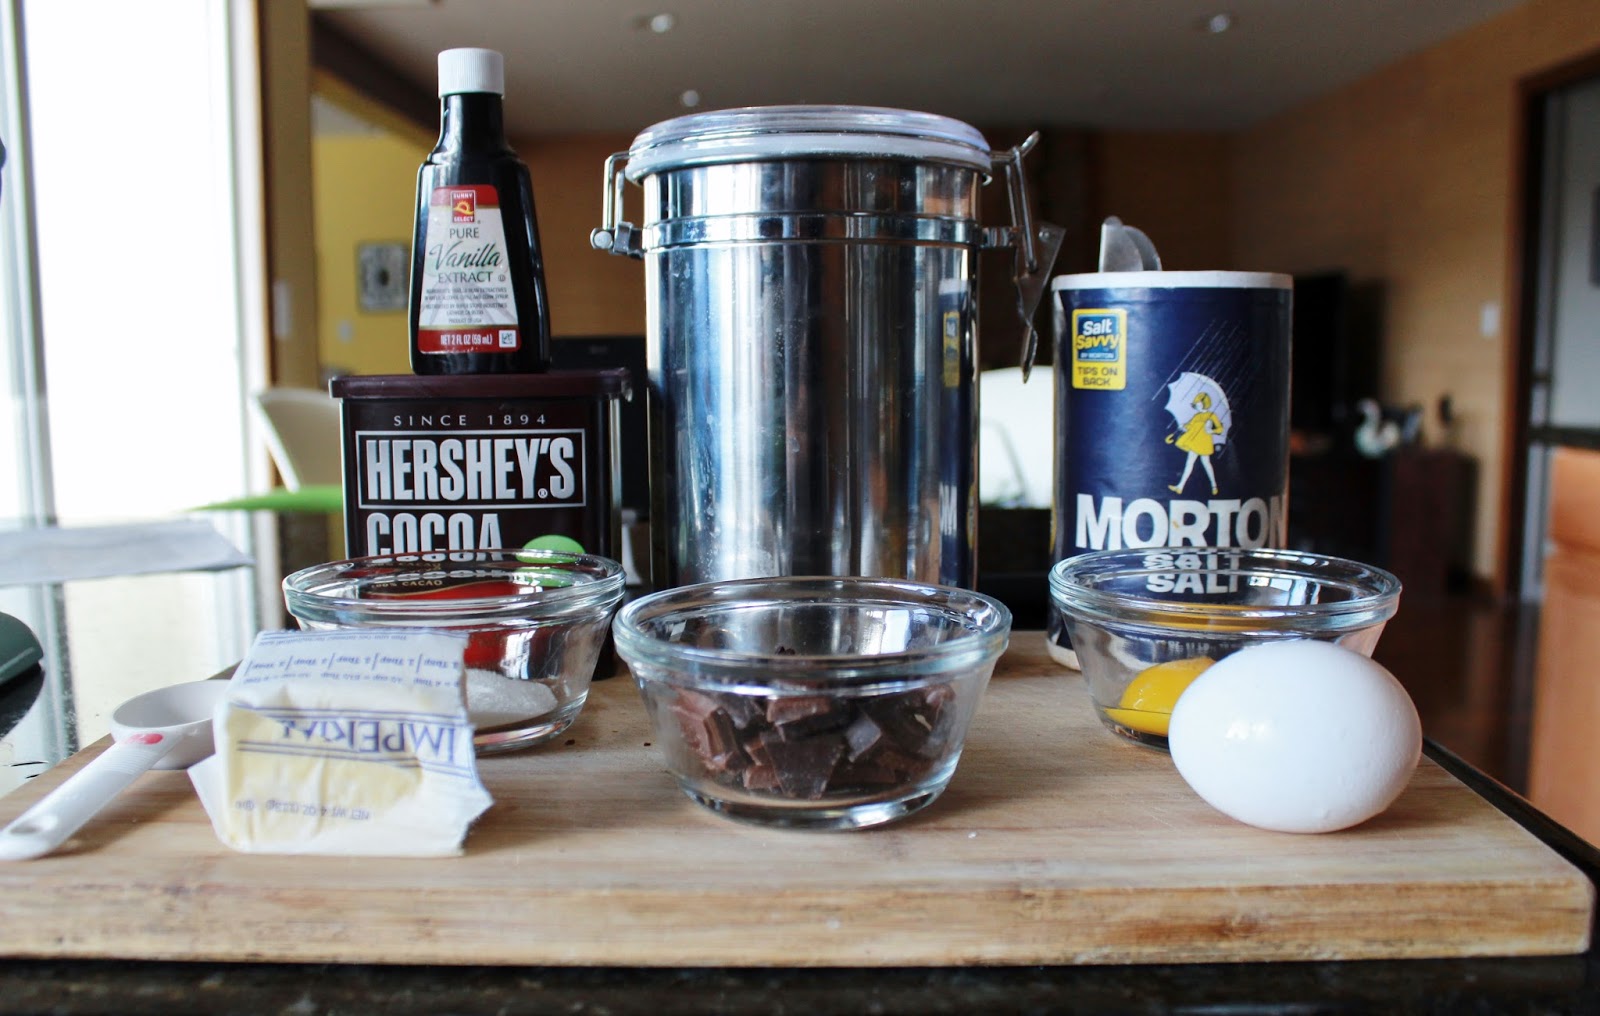
- 1 egg yolk
- 1 egg
- 1.5 tablespoons white sugar
- 1.75 ounces of chopped dark chocolate
- 2.5 tablespoons butter + extra to butter the ramekins
- 2 teaspoons unsweetened cocoa powder
- 1.5 tablespoons flour
- a sprinkle of salt
- a dash of vanilla extract (to your liking!)
I've never known what to do when a recipe calls for just egg whites or egg yolks but I've discovered leftover egg white is perfect for egg white omelets or macarons and leftover egg yolk works perfectly for either this lava cake recipe or creme brulee! Never let any bit of your egg go to waste! Also, I actually ended up not even having enough dark chocolate so I mixed in some Hershey's milk chocolate and I think it turned out just fine. Use any type of chocolate you like depending on your preference (or if you want to be "healthy", go with 70% or higher dark chocolate for those antioxidants~!). As a side note, the original recipe calls for twice as much of each ingredient because I halved the recipe to only make 2 ramekins.
I first mixed the egg yolk, egg, and sugar in a bowl until the mixture looked frothy and well, "well-mixed".
Then I melted the chocolate and butter and since I was too lazy to set up a double boiler, I just microwaved my chocolate at 30 second intervals (I only needed to do it 3 times before my chocolate was completely melted). Feel free to use whatever method you prefer though! After each microwaving session, I would take the bowl out and give it a quick stir to make sure none of the chocolate was getting too much heat and burning. I wouldn't exactly recommend microwaving if you're not going to be careful because you might end up overheating the chocolate and that just gets annoying to clean off (trust me, I've learned the hard way).
Once the chocolate was all the way melted, I threw it into the bowl and gave it a quick mix!
Once the chocolate was well mixed in, I added the cocoa powder, mixed, flour, mixed, and then salt and mixed. I had to use a spatula to make sure all the ingredients got mixed in (oh the struggles of a stand mixer).
After my dark chocolately goodness was all mixed together, I poured it (somewhat) evenly into the two ramekins I had buttered earlier, covered them in saran wrap, and left them in the refrigerator for about 5-6 hours. You definitely don't need to leave it in that long but it doesn't hurt. I only waited because I prepared the mixture in the afternoon and wanted to bake it fresh for my parents for dinner. The shortest amount of time to refrigerate the batter is 30 minutes though so even if you're in a time crunch, you should have enough time to let these sit before baking!

When it came time to bake, I removed the saran wrap and added hot water that went about halfway up my ramekins. I ended up baking them for about 17 minutes but I think a little less time would have been better because while one of them was perfect, the other one was a bit over done and didn't have a lot of the "lava" (aka oozing chocolate when you cut into it). It's hard to gauge when these are done though because you can't do the standard toothpick check. In my opinion though, under-baked is better than over (for lava cake at least) so go for less time at first if you're not sure.
I topped my cakes with strawberries and mint leaves from my backyard and sprinkled a bit of powder sugar and wahla~! Technically you should be able to take the cakes out but I suppose I didn't butter them well enough because they were pretty solidly stuck in the ramekins and I didn't want to ruin them so I just left them in the bowls.
Step-by-Step Instructions
- Butter (and I mean BUTTER!) 2 ramekins and set aside.
- Mix together egg yolk, egg, and sugar in a bowl until "light, foamy, and lemon colored."
- Melt chocolate and butter at 30-second intervals in the microwave or use a double boiler. If using the microwave, stir after each heating until completely smooth and melted. Do not overheat the chocolate!
- Incorporate melted chocolate into egg+sugar mixture.
- Add cocoa powder, flour, salt, and vanilla extract, mixing in between each addition.
- Pour batter into buttered ramekins (lightly tap on cutting board/smooth surface to remove any air bubbles)
- Refrigerate for a minimum of 30 minutes (any longer doesn't seem to negatively affect the batter though).
- A few minutes before you want to bake your lava cakes, preheat oven to 425 degrees F.
- Take the ramekins out of the refrigerator and place into an oven-safe dish. It must be deep enough to allow you to pour hot water to halfway up the ramekins.
- Bake for 15-18 minutes.
- Let cool for 5-10 minutes before attempting to take them out of the ramekins. They may still be hot so be careful and wear oven mitts. Use a knife to cut around the ramekins and invert them to release the cakes.
- Top with any toppings of your choice like fruit, powdered sugar, or more chocolate!
Recipe adapted from Chef John's Chocolate Lava Cake