 |
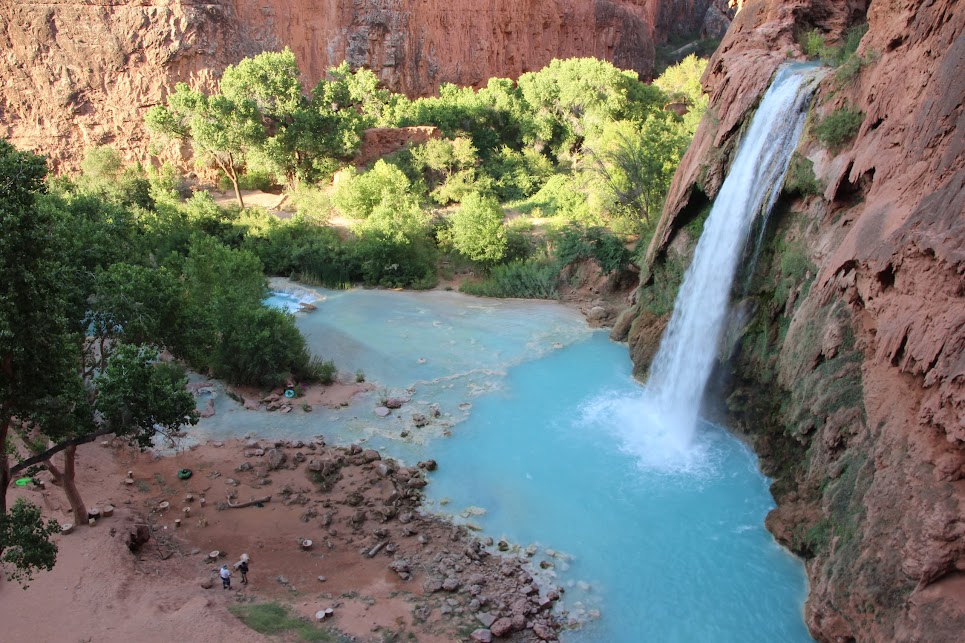
| Havasu Falls (no editing! None of the pictures you see are edited) |
Preparation
First, you must obtain a camping permit or a reservation at the hotel lodge before your trip (most people stay at least 1 night there but you can go for a day trip in some non-summer months, this also requires a permit). On their official website, they say they take requests either through email or on the phone (numbers and emails can be found on the website) but from what I read online (and what we did) it's best to call them. If you've done any research on Havasupai, you will know that you will probably have to call multiple times to (1) have someone pick up and (2) have a date available that you can make. They don't give you a time period to call between so we called multiple times a day during regularish business hours 9 AM - 4 PM (we found morning is the most likely to have someone pick up) and would ask if there was any hotel lodge cancellations in the next month until there was an opening available that we could make. We chose to stay at the lodge for the A/C + shower but also because we don't have the compact lightweight camping tents or sleeping bags but if your group is down for camping, I assume you just call and ask for any available camping permits. For the lodge booking, we had to give our credit card information over the phone to put down a $40 deposit (but this is not charged right away) and then received an email confirming the booking. You're supposed to print out the confirmation email and bring it but my sister actually forgot it but it ended up being okay when we got to the lodge and talked to the receptionist (but you should still bring it!!). It costs $145/night to stay at the lodge which has only rooms with 2 queen beds which was perfect for us 4 people.
Once you've got your dates and permit to stay there, you need to start preparing what to bring. You will be hiking a LOT. It will be hot and sunny. You will need water and food. Here's our checklist (bear in the mind that we did NOT camp so we did not include camping gear!):
-Hiking backpacks
-Clothes: Shorts, Sports Bra, Hiking Socks (3 at least), T-shirts (dri-fit), Tank Top, Sleeping Wear - T Shirt / Shorts, Swimsuit, Hats
-Water shoes (4)
-Hiking shoes (4)
-Towels (microfiber ones = light)
-Sunglasses
-Food / Beverages: Protein Bars (at least 5 per person), 3L Camelbak (3), Extra Bottles of Gatorade (2), Gatorade powder
-Camera Related: Waterproof camera (1), DSLR (1), Tripod (1), Drone (1), GOPRO (1), Camera Charger (1), Extra Battery (1)
-Toiletries : Lip balm with SPF, Tissue Packs, Mosquito repellent, Hand sanitizer, Small First Aid Kit (Band-aids, Alcohol Swabs), Wound dressing/wrap in case injury, Medicine - Tylenol, Advil, Claritin), Toothpaste (1) / Toothbrushes (4), Face wash (sample packs), Lotion - face and body, Sunblock SPF 50 (2)
-Flashlights (1 per person) + head lamp?
-Spray bottle to fill with water to spray while we hike
-Whistle for emergencies
-Poncho/water jacket for possible rain
-Map of Havasu (need to print)
-Confirmation Receipt for Lodge (1)
-Phone Chargers (4)
-GPS? (If the car we rent does not have one built in - Use Phone?)
-Cash? You can pay with credit
-Small Umbrella
-TO BUY IN VEGAS: Disposable Water Bottles, Ice (for initial hike in), Gatorade
As you should be able to see, we had camera equipment which you may or may not be brining. Drones are actually banned in Havasupai so bring at your own risk(?). The important stuff for the hike though is appropriate hiking backpacks, clothes, and shoes, water (at least 3 L), sunscreen, and food/snacks (at least enough for the hike in, you can buy more at the store in the village if you need but keep in mind that prices might be a little more than usual). It is IMPERATIVE that you have the right gear or else you will end up with blisters and a sore back if not more. We didn't own hiking backpacks before this trip but they are MADE for carrying heavy weight for extended periods of time so we asked around and borrowed 2 (though we actually had 6 to choose from) and bought 2. Hiking backpacks have sizes and you should go into your local store to get fitted. REI actually has a very good return policy (hint hint) if you don't already own a hiking backpack. A hiking backpack will distribute the weight on your hips and shoulders and allow you to fit all your goodies. We also bought 3 L waterbladders which I thought weren't necessary at first (why not just bring multiple water bottles right?) but I was actually so grateful that we had them. You need to be constantly hydrating and having the little sippy sippy easily accessible makes this super easy. You should also bring a bottle of Gatorade or some sort of electrolyte/salt replenish-er drink since you will be sweating. Also, if you plan to hike to Beaver Falls or walk around the waterfalls, you should bring water shoes or shoes that you are comfortable wearing in the water as you have to walk through multiple streams.
Getting There
Havasupai is located in the Grand Canyon. We flew into Las Vegas and then drove about 4 hours to get to the parking lot and trail entrance to Havasupai. The Las Vegas airport is actually closer than the Phoenix Arizona airport to Havasupai. The last place to fill up gas is about 2 hours from the parking lot at Peach Springs so plan accordingly. You will also likely lose signal as you get closer so have a print out map of directions or have an offline map saved on Google Maps (I would try setting it to/close to the Havasupai trailhead). I would advise looking up the directions on multiple sites to make sure you don't end up in the wrong place.
From the parking lot (known as the Hilltop Parking Lot), you must either hike down, ride a mule/horse, or take a helicopter in ($85 one way, they take cash or credit card but there is a $10 credit card fee, you need to contact them beforehand if you wish to helicopter in). The same goes coming back out; hike, horse ride, or helicopter. You can ride the horses/mules or have them just carry your things in; this needs to be arranged ahead of time and costs around $85 I think.
The Initial Hike In
The total hike from the parking lot to the Havasupai village (which is where the villager live, the hotel lodge, the visitor center, and the convenience store and cafeteria) is approximately 8 miles (this is what it says online and this is also about what we got on our phone pedometers) but if you are camping, the campground is another 2 miles from the village. Going to Havasupai is going down into the canyon but it is only a steep decline for the first 1.5ish miles and then it becomes pretty much flat the rest of the 6.5 miles. For most people, the 8 mile hike takes 3.5-5.5 hours. We took just under 4 hours at a pretty normal pace (we already had too many stops in my opinion). For the spring and summer months, it is imperative to leave early to avoid the heat. When we went in late June, temperatures were already 95-100 F by 9-10 AM and peaking at 112 F at around 4 PM, so we got to the hilltop around 5:15 AM and started our hike at 6 AM (had to eat some food, get our bags ready, go to the last real bathroom you'll see for a few hours, etc). Most people were already starting the hike at 5:30-5:45 though so we were definitely the late stragglers. Luckily, when you leave around that time, you should be hiking in the shade of the canyon and there are only a few places where you'll have the sun directly beating down on you. I'll say that it really wasn't too hot (like when it's so hot the air is hard to breathe) because of the shade and there was also a steady cool breeze throughout (I assume this is due to the rivers + waterfalls located nearby?). The paths are wide and well-defined though it sometimes forks but the forked roads will converge soon after so I don't think you can get lost. The hardest thing about the hike, in my opinion, was that the path is made mostly of little pebbles and rocks. Imagine walking on sandy or rocky beach, not as easy as a treadmill or packed dirt paths! However, the hike down is totally doable and my 50+ year old mom was able to do it so don't be scared! Just be prepared and walk around a bit with your pack stuffed with weights beforehand so you're not completely caught off guard. Hiking back up is another thing though as the, now last, 1.5 steep part will be much harder as you go uphill but it's not impossible (we chose not to hike back out and took the helicopter instead which is another challenge in itself actually, more on this later).
The Village
The people of the Havasupai tribe live in the village area where, like I said earlier, there is a visitor center, hotel lodge, supermarket/convenience store (limited fruits/vegetables/meats), and a cafeteria/restaurant with a good selection of hearty foods. We ate at the cafeteria for dinner on our last day but it closes around 7:15 PM so we actually missed it on our first day but we had brought packets of tuna and some sandwich thins (more portable than normal bread) so were able to eat that instead. Again, the campground is 2 miles from the village so you can rest up/refuel at the village before going to the campground if you are camping. You can refill your water using the water from the hotel lodge sinks or from a natural spring pipe in the campground.
The Waterfalls
You will reach the village after approximately 8 miles. However, the actual waterfalls are located 1.5 to 5ish miles away. We went to 4 of the main waterfalls but there is at least one other one that we missed. There are 2 waterfalls, Little Navajo and Havasu Falls, located in between the village and the campgrounds (2 mile distance between the two sites). The path from the village to the campground is a bit sandy/dusty but otherwise it's not too bad of a hike and is downhill (going the other way around is definitely a little tiring). Both waterfalls are pretty visible and you just have to go a little off the main path to get to them.
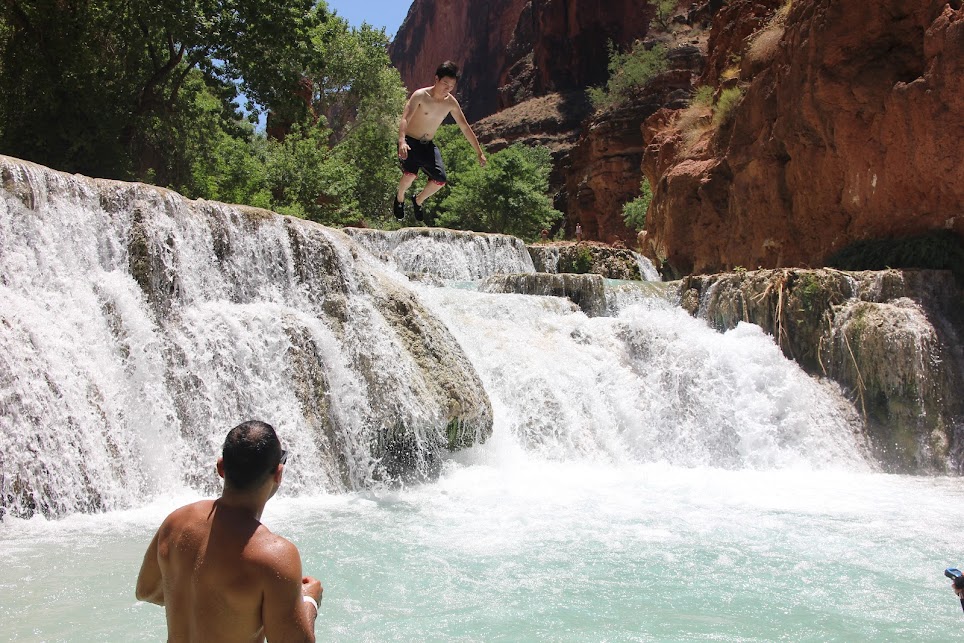
Little Navajo was actually my favorite waterfall of them all because you can jump off of it (yes I'm very into cliff jumping now haha *__*). It's about 30 ft at the highest point at the main fall but if you walk a bit from it (not on the main path), you'll reach another part of Little Navajo (this is the waterfall we missed) and apparently that part is 50 ft. The rocks aren't very slippery and I just wore lightweight shoes instead of water shoes (my sister and her boyfriend had water shoes though) and didn't have any issues. I would definitely recommend wearing some sort of shoe (and not flip flops) when going on the waterfalls since you'll be stepping on and over rocks. You can choose from multiple places to jump from the waterfall but please please be careful because there are a few rocks so jump wisely. Lots of the local kids and other hikers will be jumping around there so watch and ask where to jump from if you aren't sure.
Havasu Falls is located less than 0.5 miles from the campground and is the most famous waterfall. I don't think it's safe to jump from it because it is quite high and the water pool below it is not very deep but I did see someone on Instagram post a video jumping off (not from the very top though). It's a beautiful waterfall and worth the swim around or some time spent there as there are a few picnic benches. Some people even bring tube floaties to play around with.
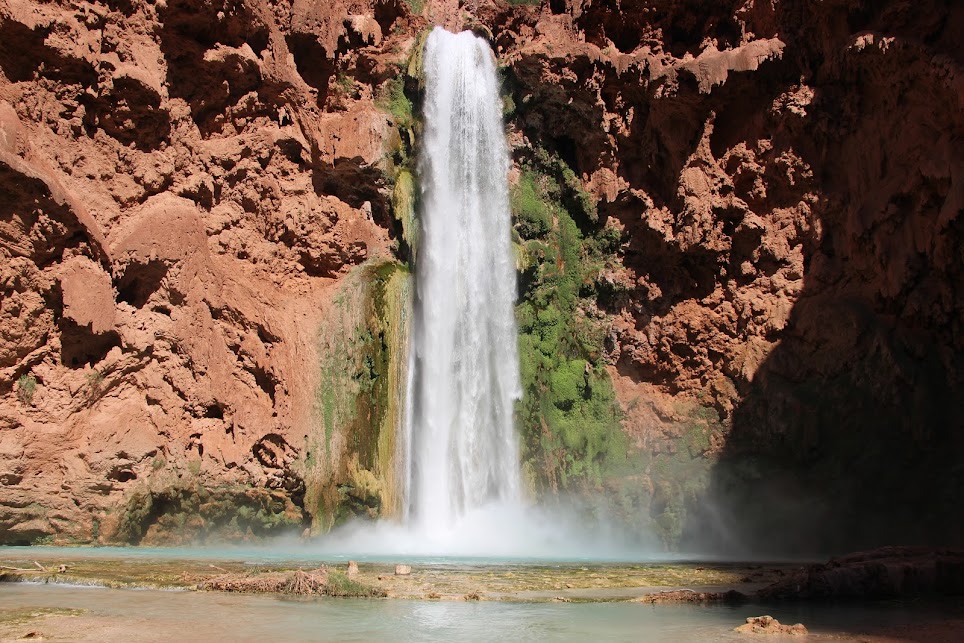
There are 2 other main waterfalls that are further out from there, Mooney and Beaver Falls. Mooney Falls is just past the campground edge (the entire campground is a bit less than 0.5 miles in length?) but you have to go through 2 short caves and down a steep set of stairs made partly from the cliffs and partly from wooden ladders and metal chains. Know your limits!
Some people only go to Little Navajo and Havasu which is totally fine
but since we stayed for 3 days and 2 nights, we were able to go to
Mooney and Beaver. The round trip from the hotel lodge (in the village) to Mooney and Beaver and back was about 11 miles total and since we spent time at Beaver eating lunch, we got back around 5 and spent some time at Little Navajo since it was so hot and then returned to the village around 6. I would advise carrying 2-3L of water/person as well because we only brought 3 water bladders that day (3 L each) and actually drank up 1 of them and came down to about 0.5 L in the other 2 bladders when we reached the campground where we were able to refill our water. We also had 4 bottles of Gatorade (made from powdered mix), 1 for each person.
Mooney Falls was maybe my least favorite because it's SUPER tall (not jumpable for sure..) and water sprays out so as you're climbing down the cliffs, you're getting sprayed by the mist. Beware the the water is very high in lime (which is what makes it so beautifully blue) and if you don't wipe it right away from your camera lens, you'll get water spots/stains that are little difficult to get off. Nevertheless, it's still a nice waterfall and there's a large water pool surrounding it including a swing off a smaller water drop!
Beaver Falls is supposed to be about 3 miles from Mooney but the path to Beaver is not very clear in the beginning so it could take your longer. If you want to go to Beaver Falls (which is a collection of multiple somewhat smaller waterfalls), you have to go past Mooney Falls (away from it). You want to leave early if you're going to Beaver to avoid hiking in the heat of day; we planned for 6 but ended up actually leaving at 7 and we were definitely still hiking around when it got pretty hot. You will need to bring your water shoes or wear them instead of hiking shoes (up to you) as you will be crossing multiple streams of water (not super strong current ones that might knock you over). You'll also be walking on paths that are overgrown with plants so if you're antsy about being touched by plants, well either wear long pants and bear the heat or suck it up I guess? You don't have to worry about ticks or anything and the plants aren't sharp/won't cut your legs up. Soon after Mooney, you'll see a fork in the path. If you take a right, the path will end at a stream which we thought meant it was a dead end but on our way back, we somehow ended up crossing a stream and having to follow it while wading in it and ended up back at this supposed "dead end" we had seen earlier. I think I'd advise going this way on your way to Beaver Falls as we took the fork left and went on a path that is pretty narrow and covered in green bushes and vines.
It gets kind of confusing from there as there are multiple forks and paths, some of them less defined than others, and we sort of just trampled our way through and ended up at a stream (which I suspect is connected to Mooney's water runoff?). We saw some other people walking around who were coming BACK (and this was only at 8 AM!) from Beaver and they told us to cross this stream so we put on our water shoes and did so. You have to be smart and choose and area that isn't too deep because there are areas of the streams that get relatively deep but you should be able to find a place to cross that won't go past your thighs/get your shorts wet. We had walking/hiking sticks which were super useful in judging the depth of the streams. After that, the path to Beaver is pretty well-defined and doesn't branch off like crazy. We had to cross about 4-5 more streams (2 more big ones and then a few more other smaller ones). You will pass by/see lots of streams with little falls and can stop there to rest/play in the water if you want..
When you're close to Beaver (maybe 0.75 miles?), you'll reach a huge palm tree (not tall but just wide) and you can either go left or right. If you go left, you'll have to cross a stream of water and then continue onward to the falls. If you go right, you'll have to climb a ladder and continue to the falls basically walking on a cliff. Some people who had gone to Beaver already told us that that way was more "sketch" and advised we go left (which they took coming back). If you go left though, you will have to cross a few more smaller pools of water (all shallow) when you can see the falls/you're right next to them, you'll actually want to go through them to find a place to put your things. To do so, you have to go down a cliff which has a rope for you to hold onto for dear life, but that last part, you definitely want to be a bit cautious.
Crossing the pool of water connected to Beaver was difficult because it is initially deep (up to my waist but I'm short so maybe up to the average person's thighs/definitely will get your pants wet) and we had to carry our backpacks over our heads to avoid getting them wet (camera gear remember!). It's only deep for a short bit and then gets shallow and you can cross easily to get to the other side where you can put down your stuff.
It felt like a long hike initially though especially when you're not sure when you'll reach the falls but hiking back it really wasn't too bad. You can jump from a few of the waterfalls but you need to be careful because the water isn't super deep so you may touch your feet if you go straight down so I'd advise canon balling or flattening out when you hit the water. Be SAFE!
Leaving Havasupai on the Helicopter?
The helicopter only runs on certain days (Saturday and Sunday for sure, I forget the rest so you should look this up) and costs $85 per person. Cash or credit card is taken (credit card preferred apparently but there is a $10 credit card fee). If you choose to take a helicopter out (which we did since we were sore and tired from hiking 10+ miles for 2 days in a row), you will have to wait at the fence surrounding the helicopter pad (next to the cafeteria) early in the morning the day of, around 4-5 AM. You can only "book" the helicopter flying into Havasupai but no reservations are taken for helicoptering out. Other people will start lining up early as well so it's best to get there early and be first in line even if you can't write down your name until 9 AM (supposedly. We actually didn't have the paper sheet passed out to put your name down until maybe 9:30?) and the helicopter does not start flying until 10 AM. The Havasupai tribe members have priority and do not need to wait in line to take the helicopter out so do not be surprised if you are not the first to leave even if you are first in line. The helicopter ride itself is maybe 5-7 minutes? But it takes 15-20 minutes for one full helicopter trip (loading on, flying out, loading off, flying back) which can hold 4-6 people each time. We got in line around 5:15 AM but unfortunately for us, there was a group of 14 people who had just a few people get up early and get in line around 4 AM or something so this really pushed us back in line (and was quite irritating to be honest). Not including the 14 people in front of us, there were only 2 other people before us so total 16 people before us and we ended up flying out at 1 PM. So yes it would have been faster to hike out but my sister's boyfriend's knee was swollen and hurting so it wasn't an option really.

Last Precautions
It is recommended that you do not hike during peak heat hours which are 10 AM - 4 PM (we did end up hiking during this time on our second day to Mooney and Beaver and it definitely got hot between 12-3)
It is possible there could be flash floods so review safety guidelines on what to do for a flash flood (get to higher ground!)
There are sightings of snakes (we didn't see any) so review what to do in case of a snake bite.
ALWAYS carry more than enough sunscreen, water, and food.
Do not hike alone. Havasupai is an amazing experience to share, go with your friends and you won't regret it.
Lastly, we created a Google doc which you may or may not find helpful. It contains more information on how to get to each fall and other info (courtesy of my sister and online research). I hope this post (which has taken me quite some time to write!) is helpful in preparing for your trip to Havasupai. It really is one of the most beautiful places you will see and the hike makes it worth that. Treasure the land and keep it in as pristine shape as when you came.
-Whistle for emergencies
-Poncho/water jacket for possible rain
-Map of Havasu (need to print)
-Confirmation Receipt for Lodge (1)
-Phone Chargers (4)
-GPS? (If the car we rent does not have one built in - Use Phone?)
-Cash? You can pay with credit
-Small Umbrella
-TO BUY IN VEGAS: Disposable Water Bottles, Ice (for initial hike in), Gatorade
Getting There
Havasupai is located in the Grand Canyon. We flew into Las Vegas and then drove about 4 hours to get to the parking lot and trail entrance to Havasupai. The Las Vegas airport is actually closer than the Phoenix Arizona airport to Havasupai. The last place to fill up gas is about 2 hours from the parking lot at Peach Springs so plan accordingly. You will also likely lose signal as you get closer so have a print out map of directions or have an offline map saved on Google Maps (I would try setting it to/close to the Havasupai trailhead). I would advise looking up the directions on multiple sites to make sure you don't end up in the wrong place.
From the parking lot (known as the Hilltop Parking Lot), you must either hike down, ride a mule/horse, or take a helicopter in ($85 one way, they take cash or credit card but there is a $10 credit card fee, you need to contact them beforehand if you wish to helicopter in). The same goes coming back out; hike, horse ride, or helicopter. You can ride the horses/mules or have them just carry your things in; this needs to be arranged ahead of time and costs around $85 I think.
 |
| Get an early start on the hike! |
The total hike from the parking lot to the Havasupai village (which is where the villager live, the hotel lodge, the visitor center, and the convenience store and cafeteria) is approximately 8 miles (this is what it says online and this is also about what we got on our phone pedometers) but if you are camping, the campground is another 2 miles from the village. Going to Havasupai is going down into the canyon but it is only a steep decline for the first 1.5ish miles and then it becomes pretty much flat the rest of the 6.5 miles. For most people, the 8 mile hike takes 3.5-5.5 hours. We took just under 4 hours at a pretty normal pace (we already had too many stops in my opinion). For the spring and summer months, it is imperative to leave early to avoid the heat. When we went in late June, temperatures were already 95-100 F by 9-10 AM and peaking at 112 F at around 4 PM, so we got to the hilltop around 5:15 AM and started our hike at 6 AM (had to eat some food, get our bags ready, go to the last real bathroom you'll see for a few hours, etc). Most people were already starting the hike at 5:30-5:45 though so we were definitely the late stragglers. Luckily, when you leave around that time, you should be hiking in the shade of the canyon and there are only a few places where you'll have the sun directly beating down on you. I'll say that it really wasn't too hot (like when it's so hot the air is hard to breathe) because of the shade and there was also a steady cool breeze throughout (I assume this is due to the rivers + waterfalls located nearby?). The paths are wide and well-defined though it sometimes forks but the forked roads will converge soon after so I don't think you can get lost. The hardest thing about the hike, in my opinion, was that the path is made mostly of little pebbles and rocks. Imagine walking on sandy or rocky beach, not as easy as a treadmill or packed dirt paths! However, the hike down is totally doable and my 50+ year old mom was able to do it so don't be scared! Just be prepared and walk around a bit with your pack stuffed with weights beforehand so you're not completely caught off guard. Hiking back up is another thing though as the, now last, 1.5 steep part will be much harder as you go uphill but it's not impossible (we chose not to hike back out and took the helicopter instead which is another challenge in itself actually, more on this later).
 |
| Be aware of the pack mules and step out of their way when they come by! |
The people of the Havasupai tribe live in the village area where, like I said earlier, there is a visitor center, hotel lodge, supermarket/convenience store (limited fruits/vegetables/meats), and a cafeteria/restaurant with a good selection of hearty foods. We ate at the cafeteria for dinner on our last day but it closes around 7:15 PM so we actually missed it on our first day but we had brought packets of tuna and some sandwich thins (more portable than normal bread) so were able to eat that instead. Again, the campground is 2 miles from the village so you can rest up/refuel at the village before going to the campground if you are camping. You can refill your water using the water from the hotel lodge sinks or from a natural spring pipe in the campground.
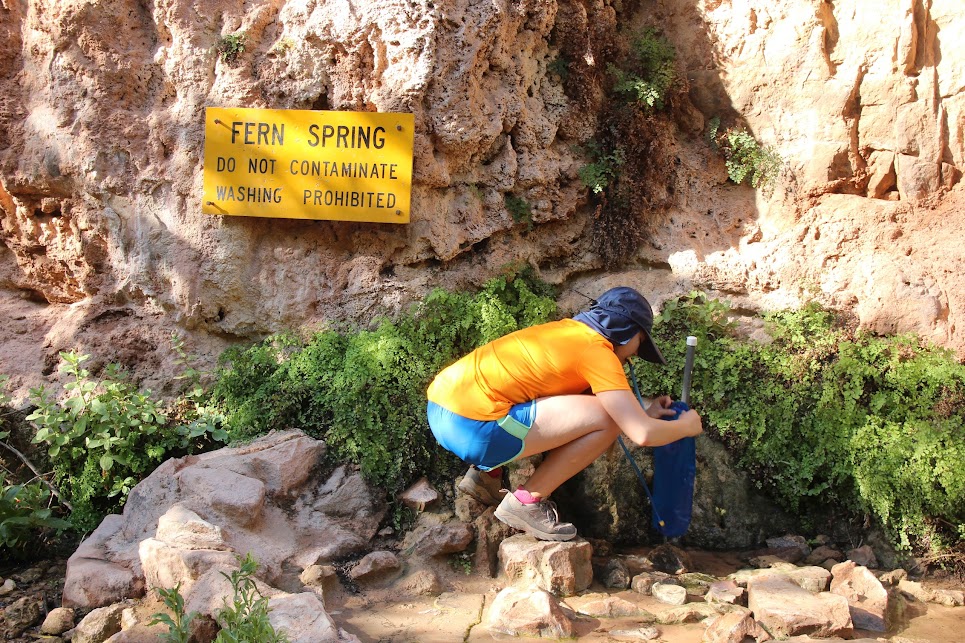 |
| Filling up our water bladders at the campground natural spring for the long hike! |
You will reach the village after approximately 8 miles. However, the actual waterfalls are located 1.5 to 5ish miles away. We went to 4 of the main waterfalls but there is at least one other one that we missed. There are 2 waterfalls, Little Navajo and Havasu Falls, located in between the village and the campgrounds (2 mile distance between the two sites). The path from the village to the campground is a bit sandy/dusty but otherwise it's not too bad of a hike and is downhill (going the other way around is definitely a little tiring). Both waterfalls are pretty visible and you just have to go a little off the main path to get to them.
 |
| Walking to Havasu! |
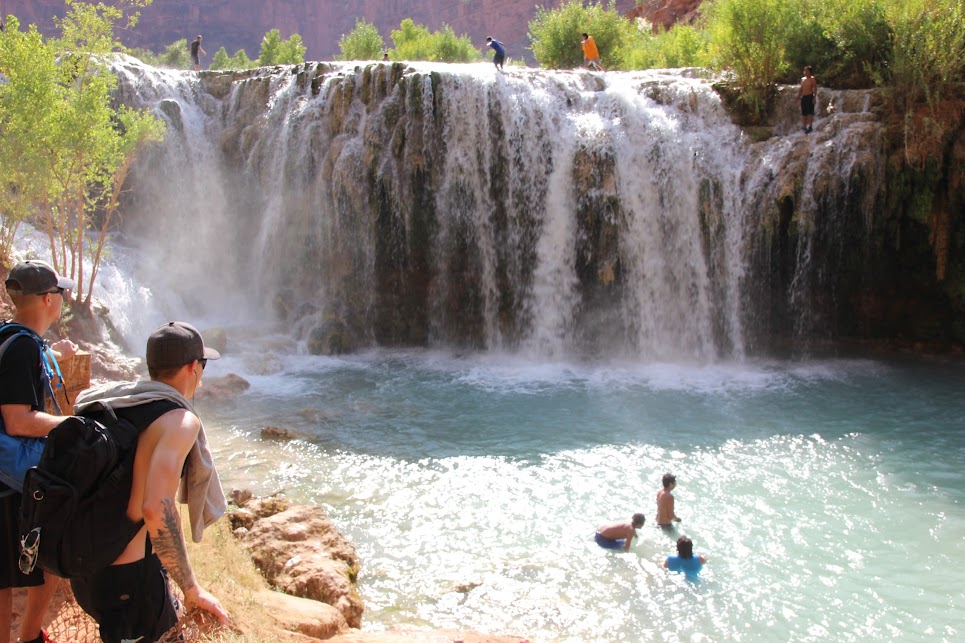 |
| Lots of people jumping at Little Navajo! |
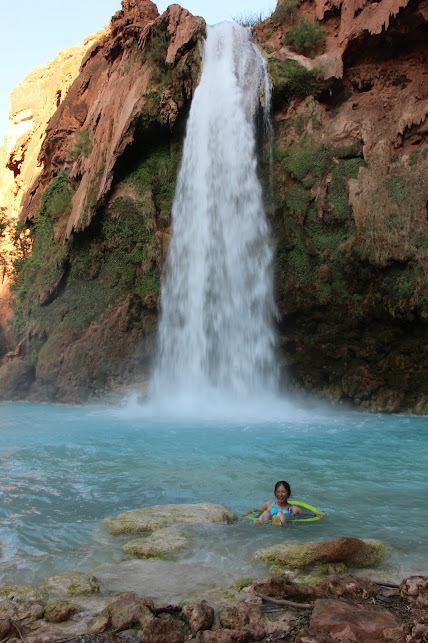 |
| Casually floating around |
 |
| Steep climb down! |
Mooney Falls was maybe my least favorite because it's SUPER tall (not jumpable for sure..) and water sprays out so as you're climbing down the cliffs, you're getting sprayed by the mist. Beware the the water is very high in lime (which is what makes it so beautifully blue) and if you don't wipe it right away from your camera lens, you'll get water spots/stains that are little difficult to get off. Nevertheless, it's still a nice waterfall and there's a large water pool surrounding it including a swing off a smaller water drop!
Beaver Falls is supposed to be about 3 miles from Mooney but the path to Beaver is not very clear in the beginning so it could take your longer. If you want to go to Beaver Falls (which is a collection of multiple somewhat smaller waterfalls), you have to go past Mooney Falls (away from it). You want to leave early if you're going to Beaver to avoid hiking in the heat of day; we planned for 6 but ended up actually leaving at 7 and we were definitely still hiking around when it got pretty hot. You will need to bring your water shoes or wear them instead of hiking shoes (up to you) as you will be crossing multiple streams of water (not super strong current ones that might knock you over). You'll also be walking on paths that are overgrown with plants so if you're antsy about being touched by plants, well either wear long pants and bear the heat or suck it up I guess? You don't have to worry about ticks or anything and the plants aren't sharp/won't cut your legs up. Soon after Mooney, you'll see a fork in the path. If you take a right, the path will end at a stream which we thought meant it was a dead end but on our way back, we somehow ended up crossing a stream and having to follow it while wading in it and ended up back at this supposed "dead end" we had seen earlier. I think I'd advise going this way on your way to Beaver Falls as we took the fork left and went on a path that is pretty narrow and covered in green bushes and vines.
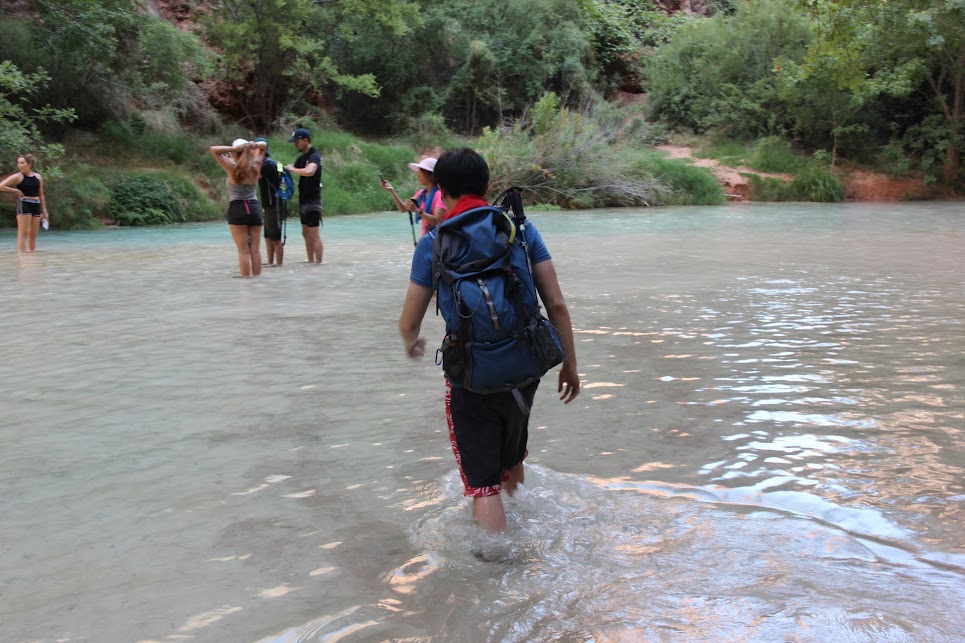 |
| Crossing the river! |
 |
| Crossing streams! |
When you're close to Beaver (maybe 0.75 miles?), you'll reach a huge palm tree (not tall but just wide) and you can either go left or right. If you go left, you'll have to cross a stream of water and then continue onward to the falls. If you go right, you'll have to climb a ladder and continue to the falls basically walking on a cliff. Some people who had gone to Beaver already told us that that way was more "sketch" and advised we go left (which they took coming back). If you go left though, you will have to cross a few more smaller pools of water (all shallow) when you can see the falls/you're right next to them, you'll actually want to go through them to find a place to put your things. To do so, you have to go down a cliff which has a rope for you to hold onto for dear life, but that last part, you definitely want to be a bit cautious.
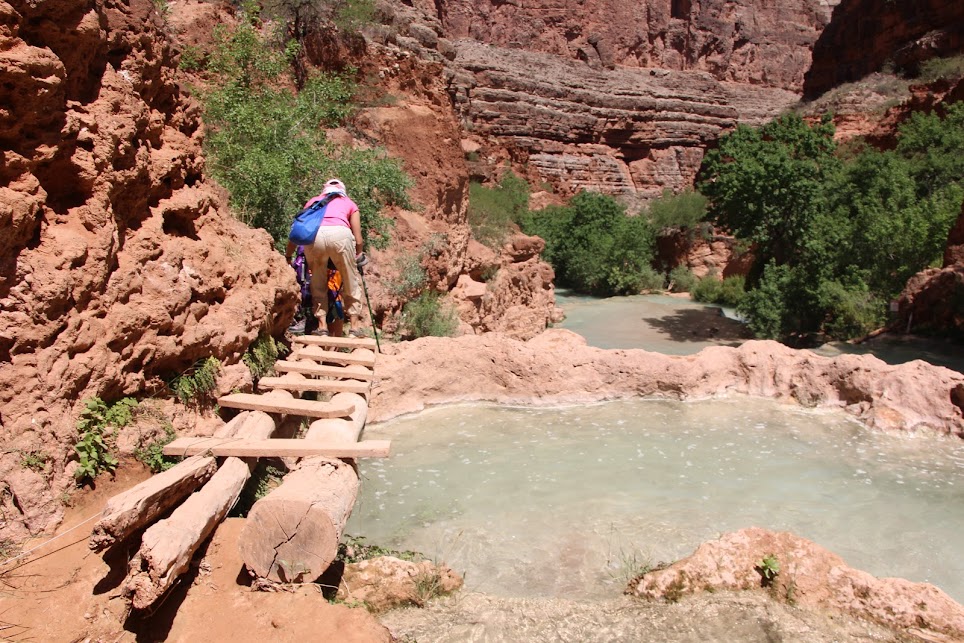 |
| This is the bit right BEFORE the sketchy cliff shuffle (remember this is the path if you go LEFT at the palm tree) |
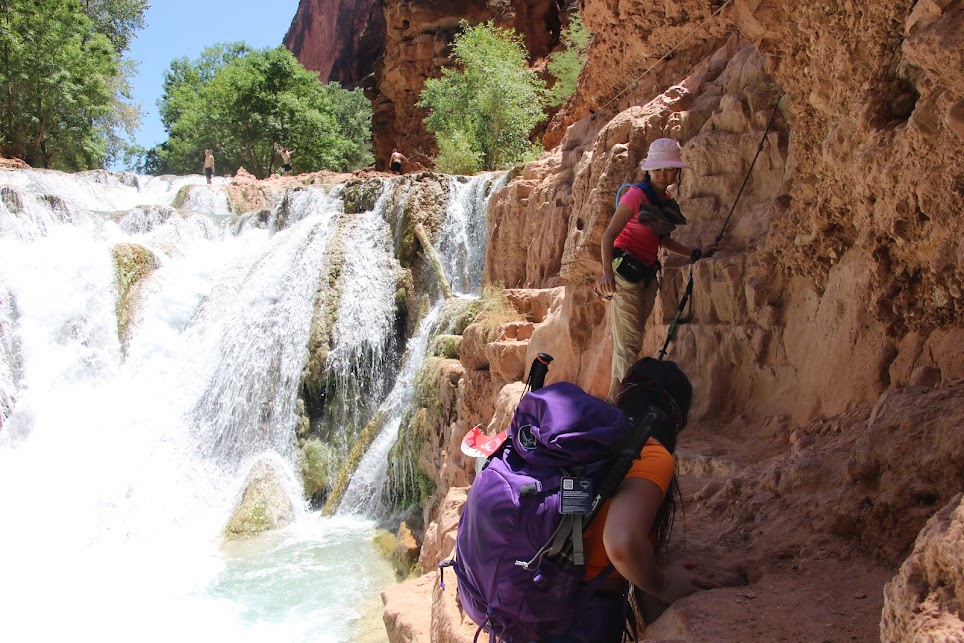 |
| Clinging on! |
Crossing the pool of water connected to Beaver was difficult because it is initially deep (up to my waist but I'm short so maybe up to the average person's thighs/definitely will get your pants wet) and we had to carry our backpacks over our heads to avoid getting them wet (camera gear remember!). It's only deep for a short bit and then gets shallow and you can cross easily to get to the other side where you can put down your stuff.
 |
| This area was shallow! |
Leaving Havasupai on the Helicopter?
The helicopter only runs on certain days (Saturday and Sunday for sure, I forget the rest so you should look this up) and costs $85 per person. Cash or credit card is taken (credit card preferred apparently but there is a $10 credit card fee). If you choose to take a helicopter out (which we did since we were sore and tired from hiking 10+ miles for 2 days in a row), you will have to wait at the fence surrounding the helicopter pad (next to the cafeteria) early in the morning the day of, around 4-5 AM. You can only "book" the helicopter flying into Havasupai but no reservations are taken for helicoptering out. Other people will start lining up early as well so it's best to get there early and be first in line even if you can't write down your name until 9 AM (supposedly. We actually didn't have the paper sheet passed out to put your name down until maybe 9:30?) and the helicopter does not start flying until 10 AM. The Havasupai tribe members have priority and do not need to wait in line to take the helicopter out so do not be surprised if you are not the first to leave even if you are first in line. The helicopter ride itself is maybe 5-7 minutes? But it takes 15-20 minutes for one full helicopter trip (loading on, flying out, loading off, flying back) which can hold 4-6 people each time. We got in line around 5:15 AM but unfortunately for us, there was a group of 14 people who had just a few people get up early and get in line around 4 AM or something so this really pushed us back in line (and was quite irritating to be honest). Not including the 14 people in front of us, there were only 2 other people before us so total 16 people before us and we ended up flying out at 1 PM. So yes it would have been faster to hike out but my sister's boyfriend's knee was swollen and hurting so it wasn't an option really.
Last Precautions
It is recommended that you do not hike during peak heat hours which are 10 AM - 4 PM (we did end up hiking during this time on our second day to Mooney and Beaver and it definitely got hot between 12-3)
It is possible there could be flash floods so review safety guidelines on what to do for a flash flood (get to higher ground!)
There are sightings of snakes (we didn't see any) so review what to do in case of a snake bite.
ALWAYS carry more than enough sunscreen, water, and food.
Do not hike alone. Havasupai is an amazing experience to share, go with your friends and you won't regret it.
Lastly, we created a Google doc which you may or may not find helpful. It contains more information on how to get to each fall and other info (courtesy of my sister and online research). I hope this post (which has taken me quite some time to write!) is helpful in preparing for your trip to Havasupai. It really is one of the most beautiful places you will see and the hike makes it worth that. Treasure the land and keep it in as pristine shape as when you came.
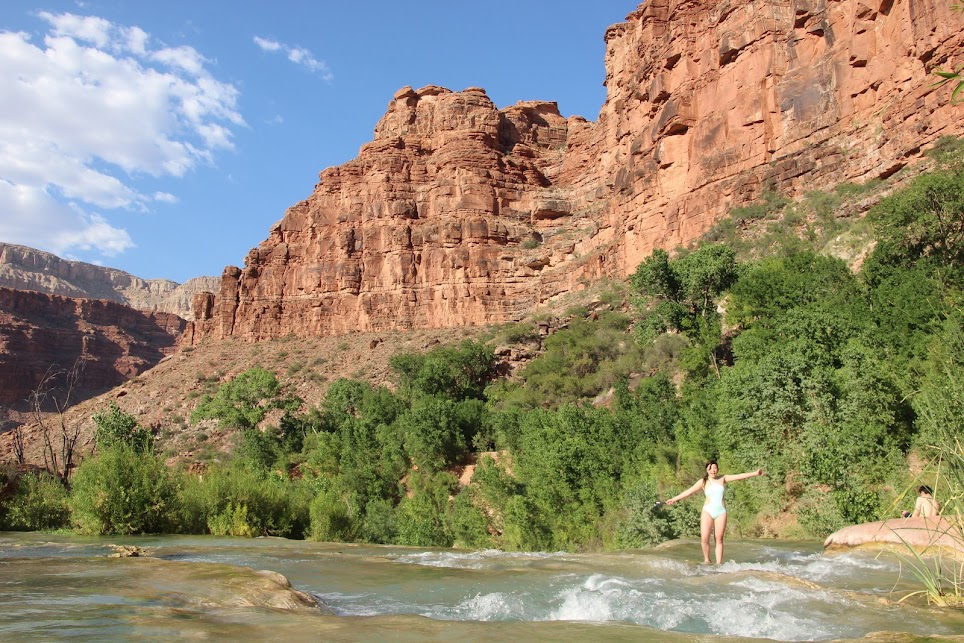 |
| Havasupai you were AMAZING! (taken on top of Little Navejo) |


